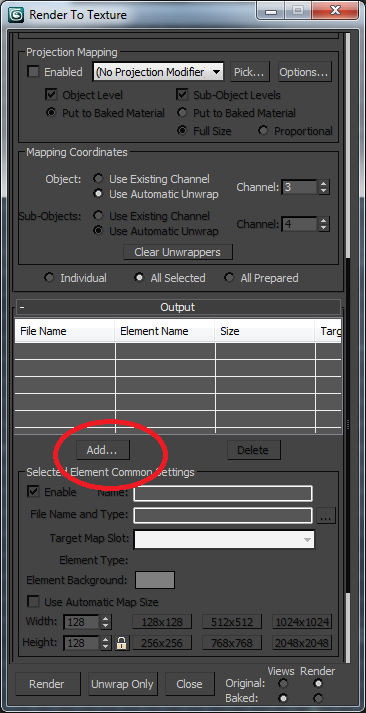
Here are how to setup the parameters for baking light in your scenes. There are many many parameters that can be tweaked, but here are some values that seem to generally work
First setup your lighting
Choose “Render to Texture” in the “Rendering” menu. You will get the dialogue box below. First change the output path to the directory you want the files to end up.
Select all of the items in the scene.They should show up in the dialogue box.
Up the padding. I am not sure the best value here, but 12 seems to work well.
Click the add button
Choose completemap for the name, choose diffuse color for the target map slot and automatic map size. If the target map slot doesn’t have diffuse color option, continue through this tutorial and comeback to set this parameter before pushing the render button
Choose save source and create new baked to Standard:Blinn
The scale option in the automatic map size creates a mapping between the model size and the size of the texture. The higher the number the larger textures will be. 0.1 seems to work for indoor models
after baking the texture choose export as an osg. Be sure to write “.osg” at the end of the filename
Use the original texture files
put things in meters


