How to Setup Parameters for Light Baking in 3DSMax

Here are how to setup the parameters for baking light in your scenes.  There are many many parameters that can be tweaked, but here are some values that seem to generally work

First setup your lighting

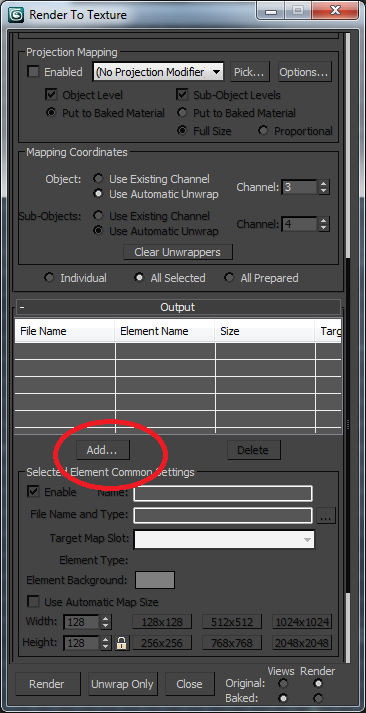
Choose “Render to Texture” in the “Rendering” menu.  You will get the dialogue box below.  First change the output path to the directory you want the files to end up.

Select all of the items in the scene.They should show up in the dialogue box.

Up the padding.  I am not sure the best value here, but 12 seems to work well.

Click the add button

Choose completemap for the name, choose diffuse color for the target map slot and automatic map size.  If the target map slot doesn’t have diffuse color option, continue through this tutorial and comeback to set this parameter before pushing the render button

Choose save source and create new baked to Standard:Blinn

The scale option in the automatic map size creates a mapping between the model size and the size of the texture.  The higher the number the larger textures will be.  0.1 seems to work for indoor models

after baking the texture choose export as an osg.  Be sure to write “.osg” at the end of the filename


Use these parameters:

Don’t save the images


Use the original texture files


put things in meters

Attach things to user’s head

Imagine if you have to show some kind of game status on screen for the tracked user… You can just have that object always in front of the user in the CAVE. There are two ways:

1) Use OnUpdate() to always update that object’s position to User0’s position. OR

2) When initializing, use self.movable().setParent(‘User0Head’) to attach it to the User0Head entity. You can then set the position of the object, and it’ll be in relation to the parent. You won’t need to use OnUpdate() to position it anymore!

Understanding the physics collision type in Virtual Lab

There are three different types of CollisionType properties for the physics.  Let me give a little bit more information than is provided in the documentation.

Static: This means that the program assumes that the object will not be moved, but other objects can interact with it.  A good example of something that should be static is a building, as we wouldn’t expect to move the building, but we would like to walk up stairs.

Dynamic: This means that the physics system is the one in charge of moving the object.  This means that the objects will fall due to gravity and be pushed around when other objects collide with it.

Kinematic: This means that you move the objects around and the physics systems acts accordingly.  In this way, the objects will not fall as there is no gravity putting a force on them.  This is the state of objects in the kitchen scenario when they are attached to the wand.

You can also dynamically change between these modes, for instance changing from kinematic when the user has an object selected and dynamic when they don’t, causing the object to appear to fall.

Update: How to connect to the network drives

At WID (in case this doesn’t automount)

  1. Go to my computer
  2. Choose map a network drive
  3. Choose a letter and choose the folder \\lel-fs.morgridge.net\CAVE-Shared

For Windows

  1. VPN into WID (see here for details)
  2. Go to my computer
  3. Choose map a network drive
  4. Choose a letter and choose the folder \\lel-fs.morgridge.net\CAVE-Shared
  5. Enter your user name and password.
    For your user name, add  morgridge\ before your user name, e.g. morgridge\kponto

For OS X

  1. VPN into WID (see here for details)
  2. Connect to the samba mount: smb://lel-fs.morgridge.net.
    press command-k to connect.
  3. Enter your user name and password
  4. Mount CAVE-Shared

How to get/use OpenSceneGraph Viewer

There are several ways to get OpenSceneGraph Viewer.

Install VirtualLab

1. Install Virtual Lab.  Directions here.

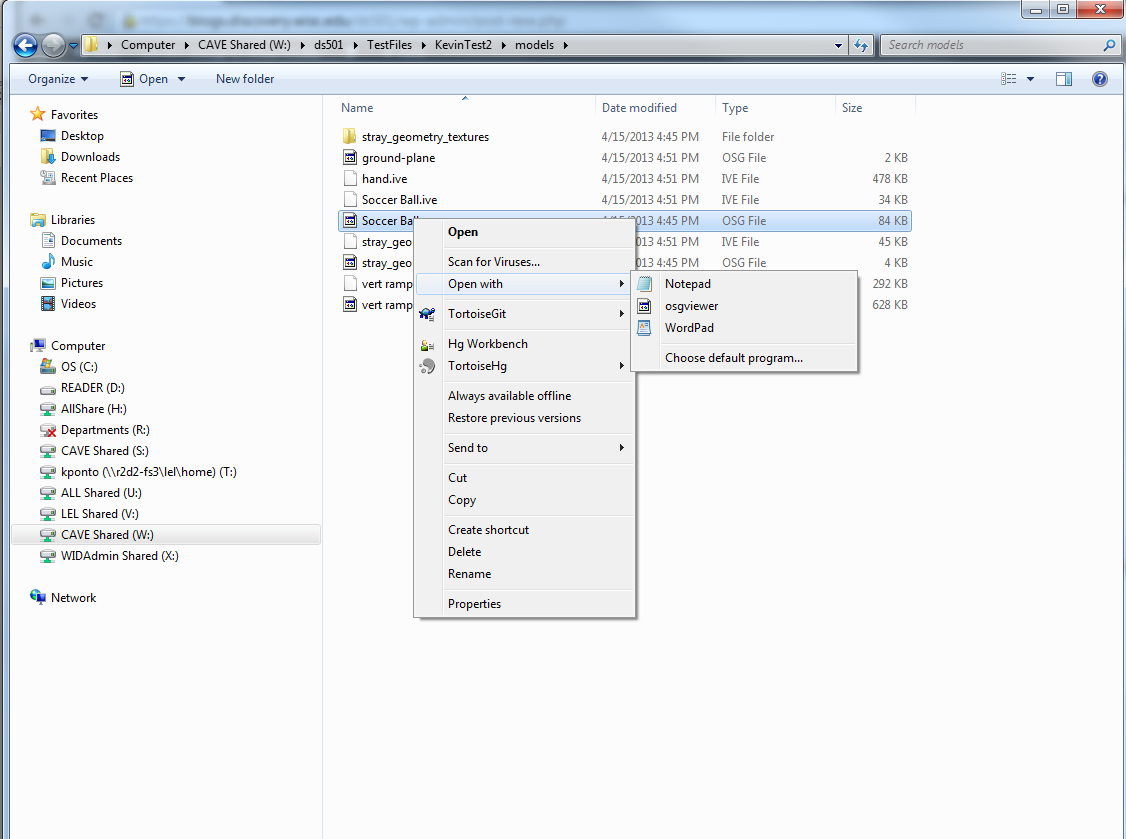
2. Right click on your osg or ive file and choose open with.


3. Click the browse button

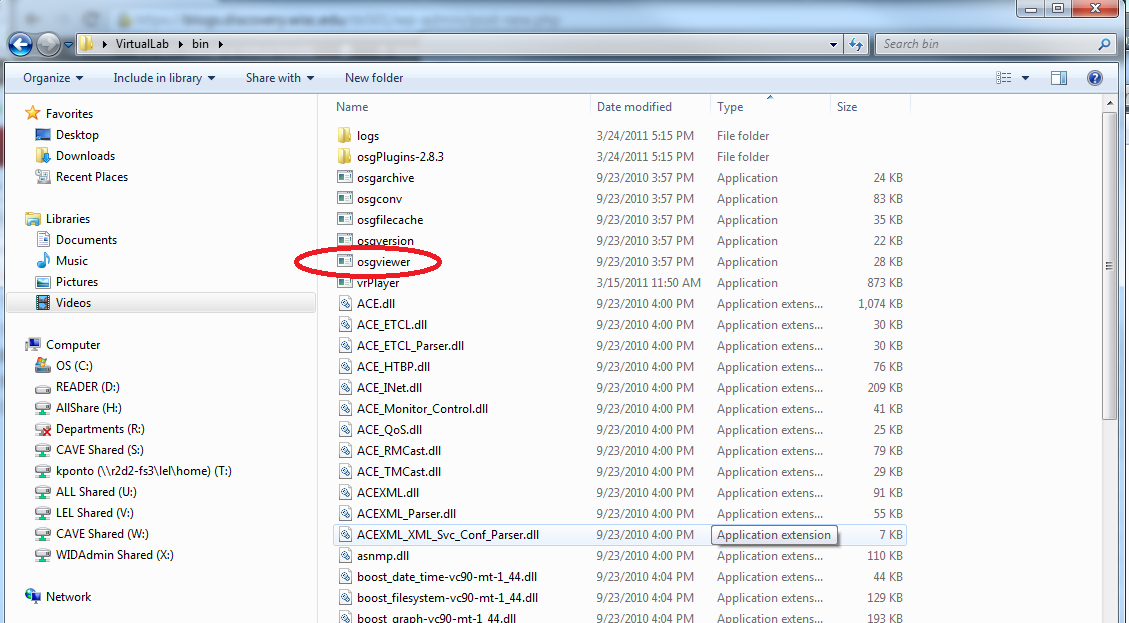
4. Navigate to Virtual Lab folder (e.g. ProgamFiles (x86)\Mechdyne\VirtualLab).  Go into the bin folder inside of the virtual lab folder.  There you should find a program called osgviewer.  Choose that.

From now on, you can simply double click on osg files and they will open in osg viewer.

Install OpenSceneGraph Windows

coming soon (the site to download OSG is currently down)

Install OpenSceneGraph OS X

coming soon (the site to download OSG is currently down)

How do I get the entity for the Wand, User, and the View?

user = VRScript.Core.Entity(‘User0’)
head = VRScript.Core.Entity(‘User0Head’)
wand = VRScript.Core.Entity(‘User0Hand’)

The user is entity for the capsule in the center of the CAVE meaning the physical position of the user is not accounted for.  The head is the entity where the head tracker is, so it does account the the physical position of the user and the viewing orientation.  The wand refers to entity for the wand device and can be swapped out if you don’t want the red beam.

How to Overwrite Your Old Sketchup Export

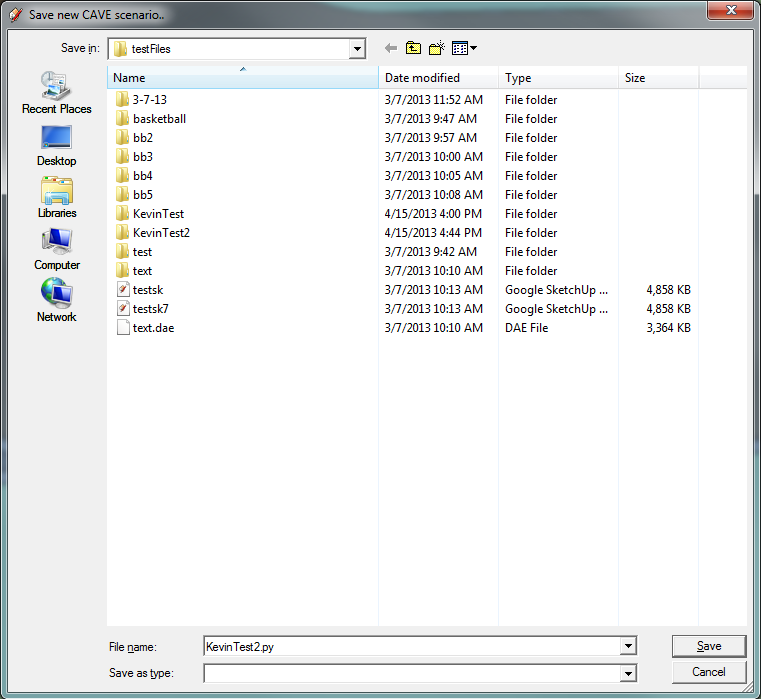
You may have noticed that when you try to save over top of your previous sketchup export that it opens the folder as opposed to saving.  There is a pretty simple work around, add “.py” to the name of your export.  For example

if I want to overwrite the KevinTest2 export, I simply type “KevinTest2.py” into the dialogue box.  This helps from needing to make lots of export folders and constantly changing launch locations.

How to Install the New Sketchup Plugin

Step 1
First install GIT on your machine.  You can find the appropriate version here if you don’t have it on your computer

http://pages.cs.wisc.edu/~kponto/ds501/Git-1.7.11-preview20120710.exe

When you install GIT, be sure to choose

when the this option appears.

Step 2
Install the sketchup plugin
http://pages.cs.wisc.edu/~kponto/ds501/UWLEL_SketchupPlugin.exe 

Step 3
Enable the sketchup plugin

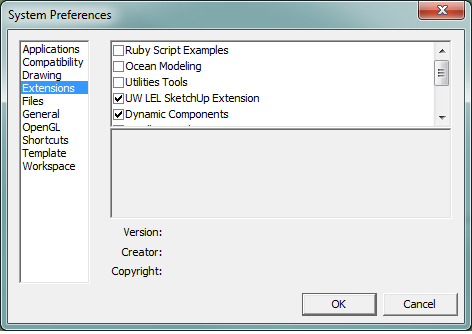
  1. Choose Windows >> Preferences
  2. Enable the plugin

 Step 4

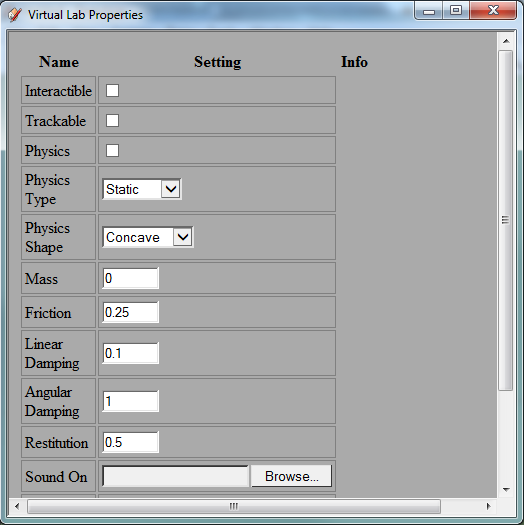
When you right click on an object, choose “LEL Properties”.  You should see a dialogue that looks like this