
Progress is continuing on all of the looks. Unfortunately it’s still mostly back-end technical work, so there’s not much actual product to show yet.
1) Speaker coat:
I finally sourced and purchased the fabric for both the coat and the jumpsuit that will be worn underneath. I patterned and fit the coat this weekend and things are looking good.
I did some additional research in ways to make the speakers louder and more efficient to produce. While the embroidery technique on the test speaker was successful, it was time consuming to produce and I’m not in love with the visual outcome. While researching alternatives, I stumbled upon this article about electroplating directly onto fabric. I happen to have a friend in the Metals department who does a lot of work with copper electroplating, so I contacted her. After negotiating with the head of the Metals department, I got permission to try it out.
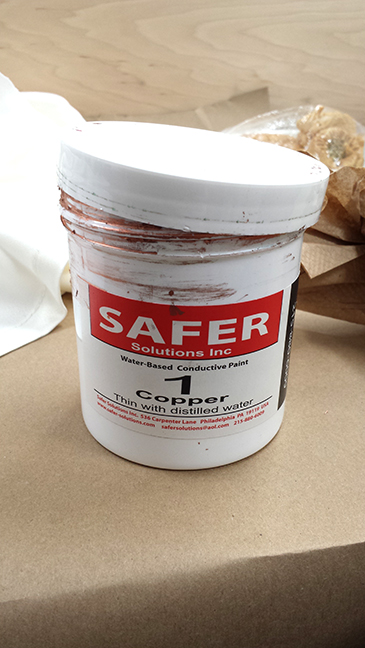
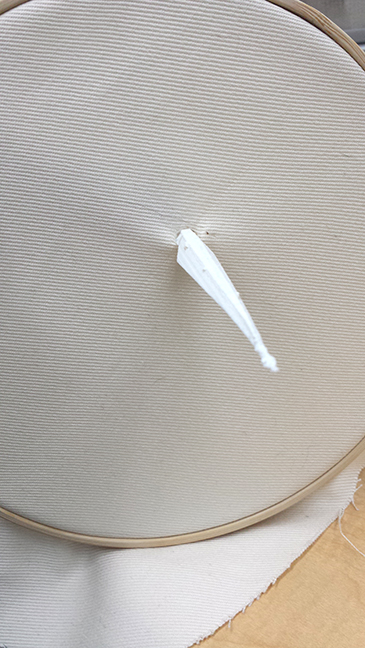
I designed a spiral in Illustrator that I used to make a thermofax screen. I then screenprinted the spiral onto polyester fabric, using a conductive copper paint.
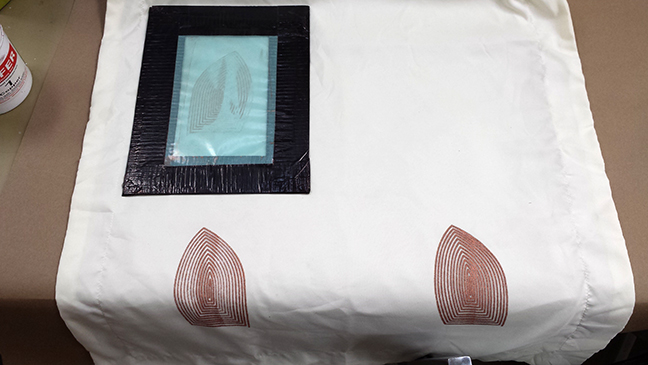
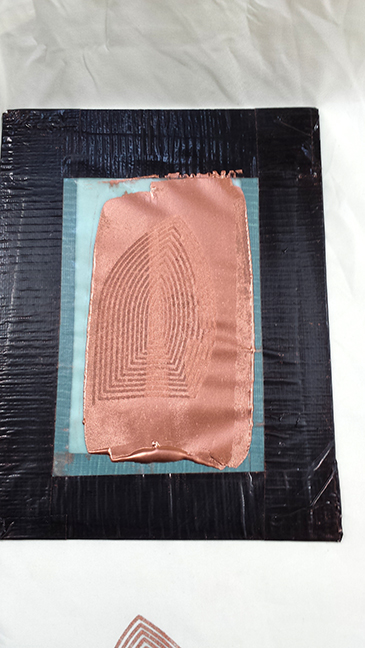
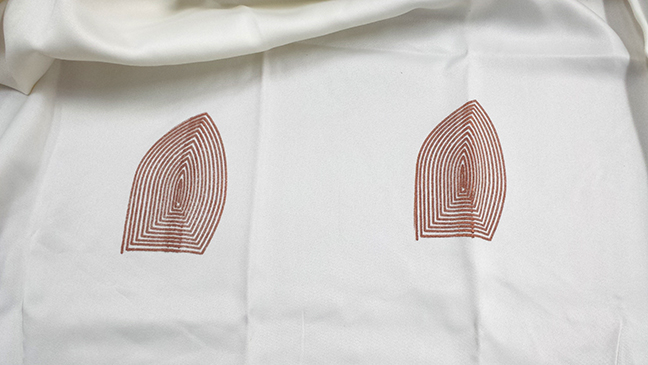 One dry, the prints were wired to copper “trees”. These will help keep the fabric stable in the electroforming bath, as well as conducting electricity directly to the print.
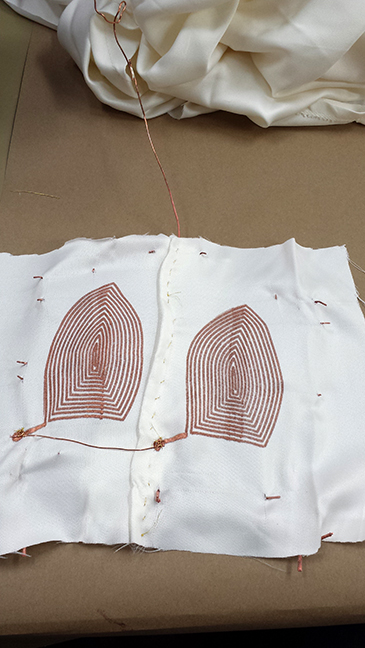
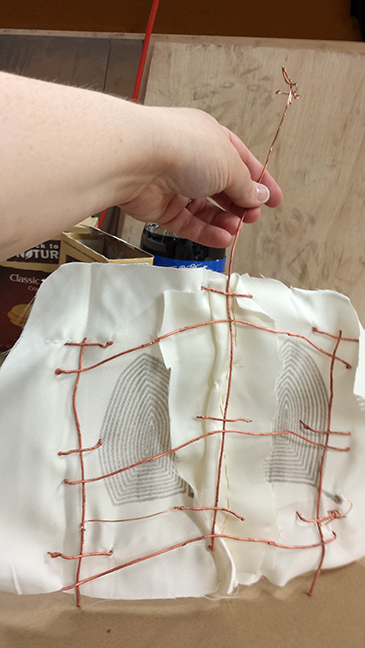 The fabric is in the bath as we speak and I’ll be picking them up in the morning. I’m hopeful that this method will give me a better outcome overall.
2) Inflatable dress
Not much progress here, as I’m still waiting for my solenoid valve to arrive. According to my tracking number, it should be here by the end of the week. Once it arrives I anticipate this look going together fairly quickly.
3) LightPrint top
I’ve been struggling with the components on this one. I wired up a test circuit, using the FadeCandy interface and the WS2811 chips to power my LEDs. Despite following the datasheet wiring instructions and triple-checking my wiring, I can only get the first LED in the series to light up. I verified that the testing script should light the entire series by using it on an addressable LED strip and checked that the chips were all good by swapping them in the series. I’m going to run the setup by a couple of people this week to see if we can suss out the problem. As a backup, I ordered an addressable LED strip from Adafruit that has 144 LEDs per meter. While the SMD5050 LEDs on the strip aren’t as bright as I would like, the sheer volume should get the point across. Plus, I know the strip will work right off the bat.
After an epic battle with Rhino, I finally completed the design for the neckpiece.
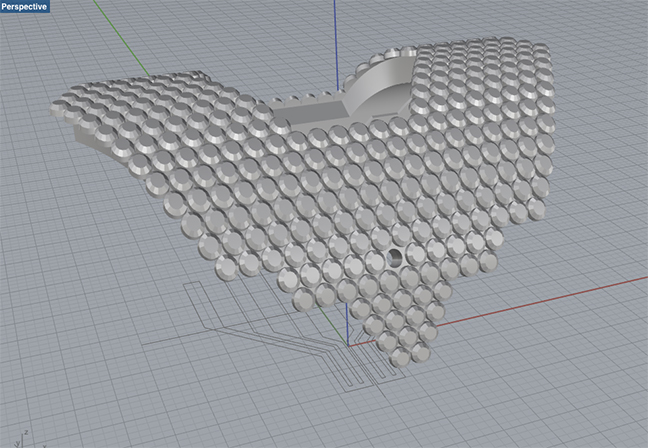 The design was developed from the shape of the PIR sensor. The hole at the center front allows the sensor to drop seamlessly into the design. The neckpiece is designed to contain all of the electronics, as well as helping direct the lighting between the outer fabric and the reflective under fabric. The challenge now is finding a place to print this. Obviously, it’s huge. Shapeways quoted $400 for the front half. I’m looking into printing options on campus to see what’s possible. If none of those pan out, I’ll look into either finding a way of reducing the Shapeways cost or dividing it up into pieces small enough for my printer. More to come on this…
4) Hoodie sweater:
I commandeered one of the newly-donated knitting machines and set it up in my studio for my personal use. While in generally great condition, I quickly found that a part needed to be replaced. That replacement came today and I sat down to do my swatch knitting…only to discover that a wheel in the carriage is sticking. I’m researching the problem tonight and will hopefully be up and running tomorrow.
5) Spine top:
Last week I finally printed my sample spine, attached it to fabric and tested it with some muscle wire. It was a complete flop. The muscle wire barely made the spine twitch and the heat running through it scorched the fabric. I started researching other options, such as micro stepper motors or linear actuators. I hit the jackpot when I found MigaMotors. They make a muscle-wire-powered linear actuator that is silent, approximately the size and thickness of a credit card and can generate 4.5 pounds of pulling force. Plus it’s designed for use with Arduino! I have 10(!!!) of these little guys in the mail to me as we speak.
With the new power source, I also redesigned the spines. The new version inserts directly through the fabric and clips into a base that allows it to swivel. The bases will glue to a thin plastic strip, which will connect to the linear actuator. When the actuators pull the strips, all of the spines will pop up. I also tweaked the design so that they would layer better and to fit the angular aesthetic of the rest of the collection.

Since I’m going to need a couple hundred of these, the plan is to get a good, clean set 3D printed, then make a mold and cast them in batches. The connectors are super quick, so I’ll just print those.
Miscellaneous:
It hit me the other day that there are a bunch of small details I still need to coordinate…
1) Invites/announcement cards (already ordered and should be done in a day or two)
2) Exhibition signage. (The wall doesn’t lend itself to the usual vinyl, so I’m considering lasercutting the letters out of black acrylic)
3) Shoes and accessories (need to work on this)
4) Painting my mannequins (I have access to a paint sprayer, I just need to choose a color and buy the paint)