End of Semester Wrap Up

1) Describe your final project/studies. What have you accomplished over the course of the semester?

2015-05-09 14.22.34
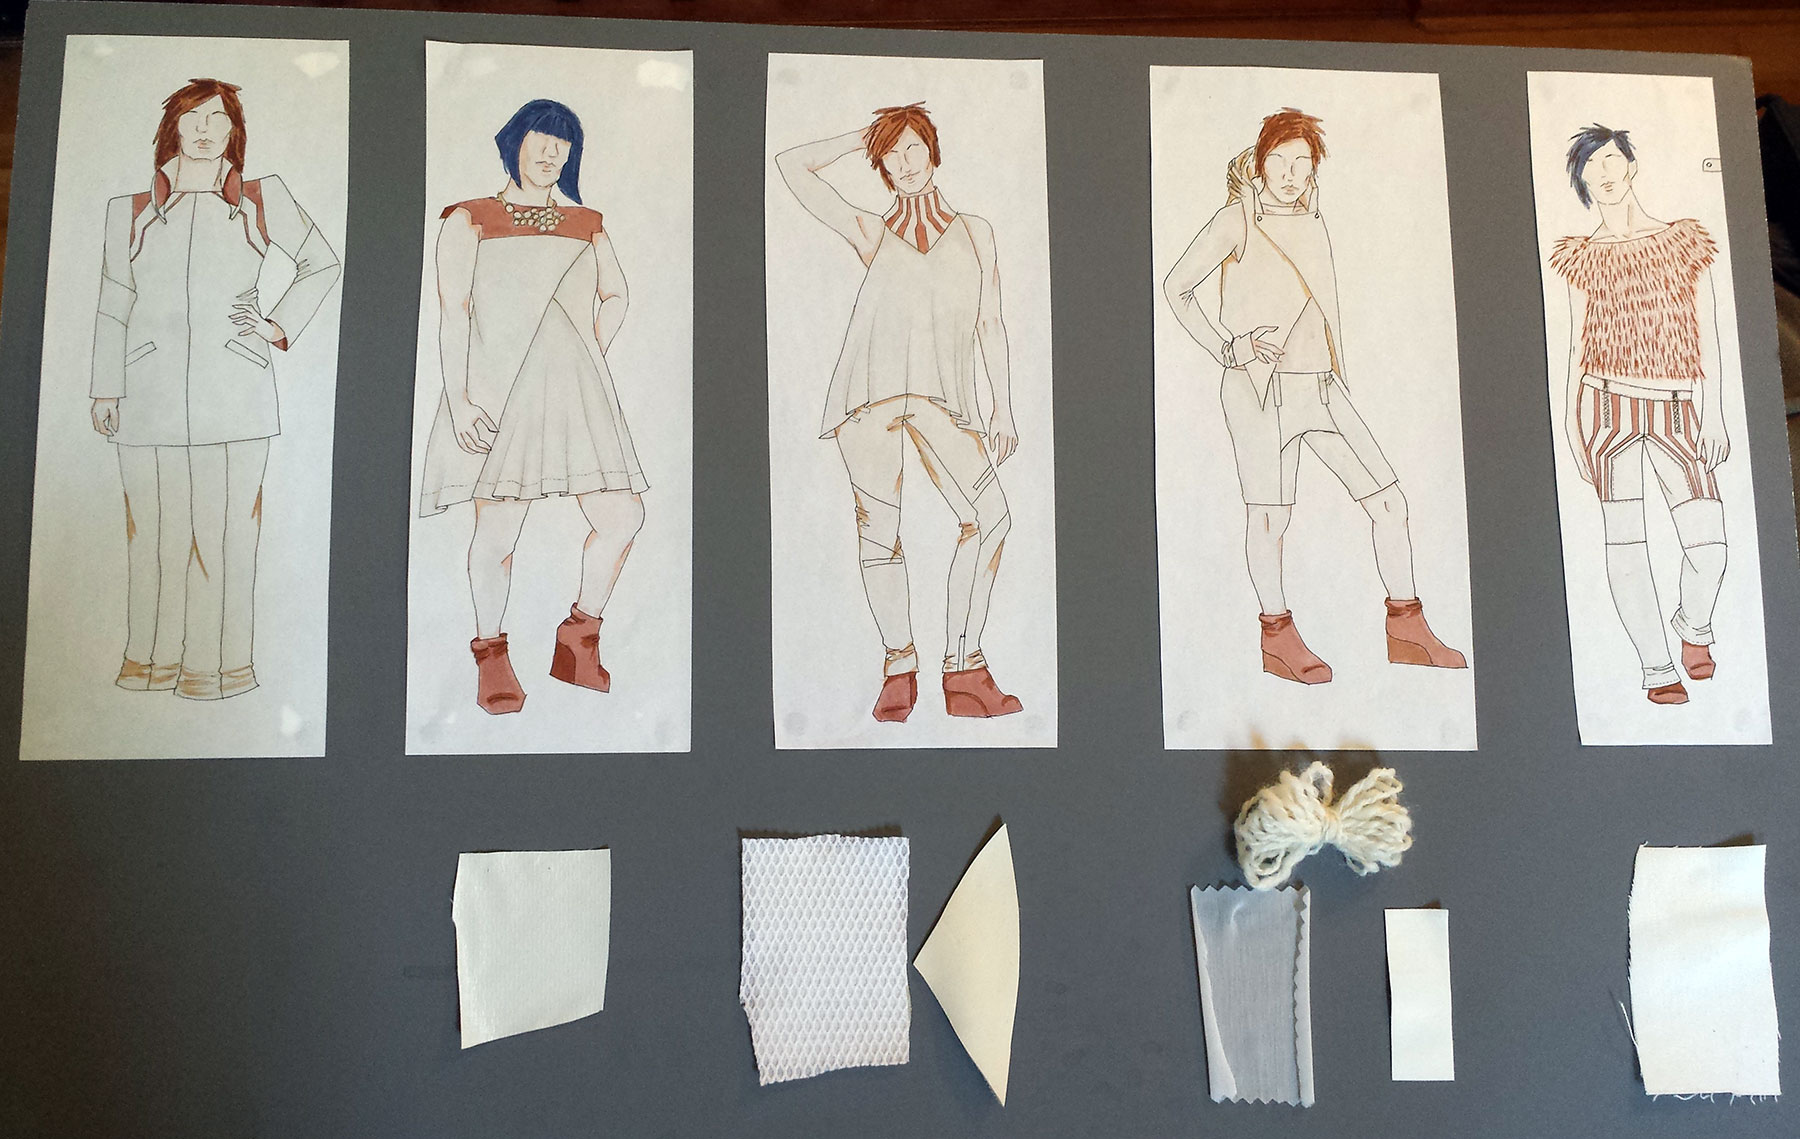
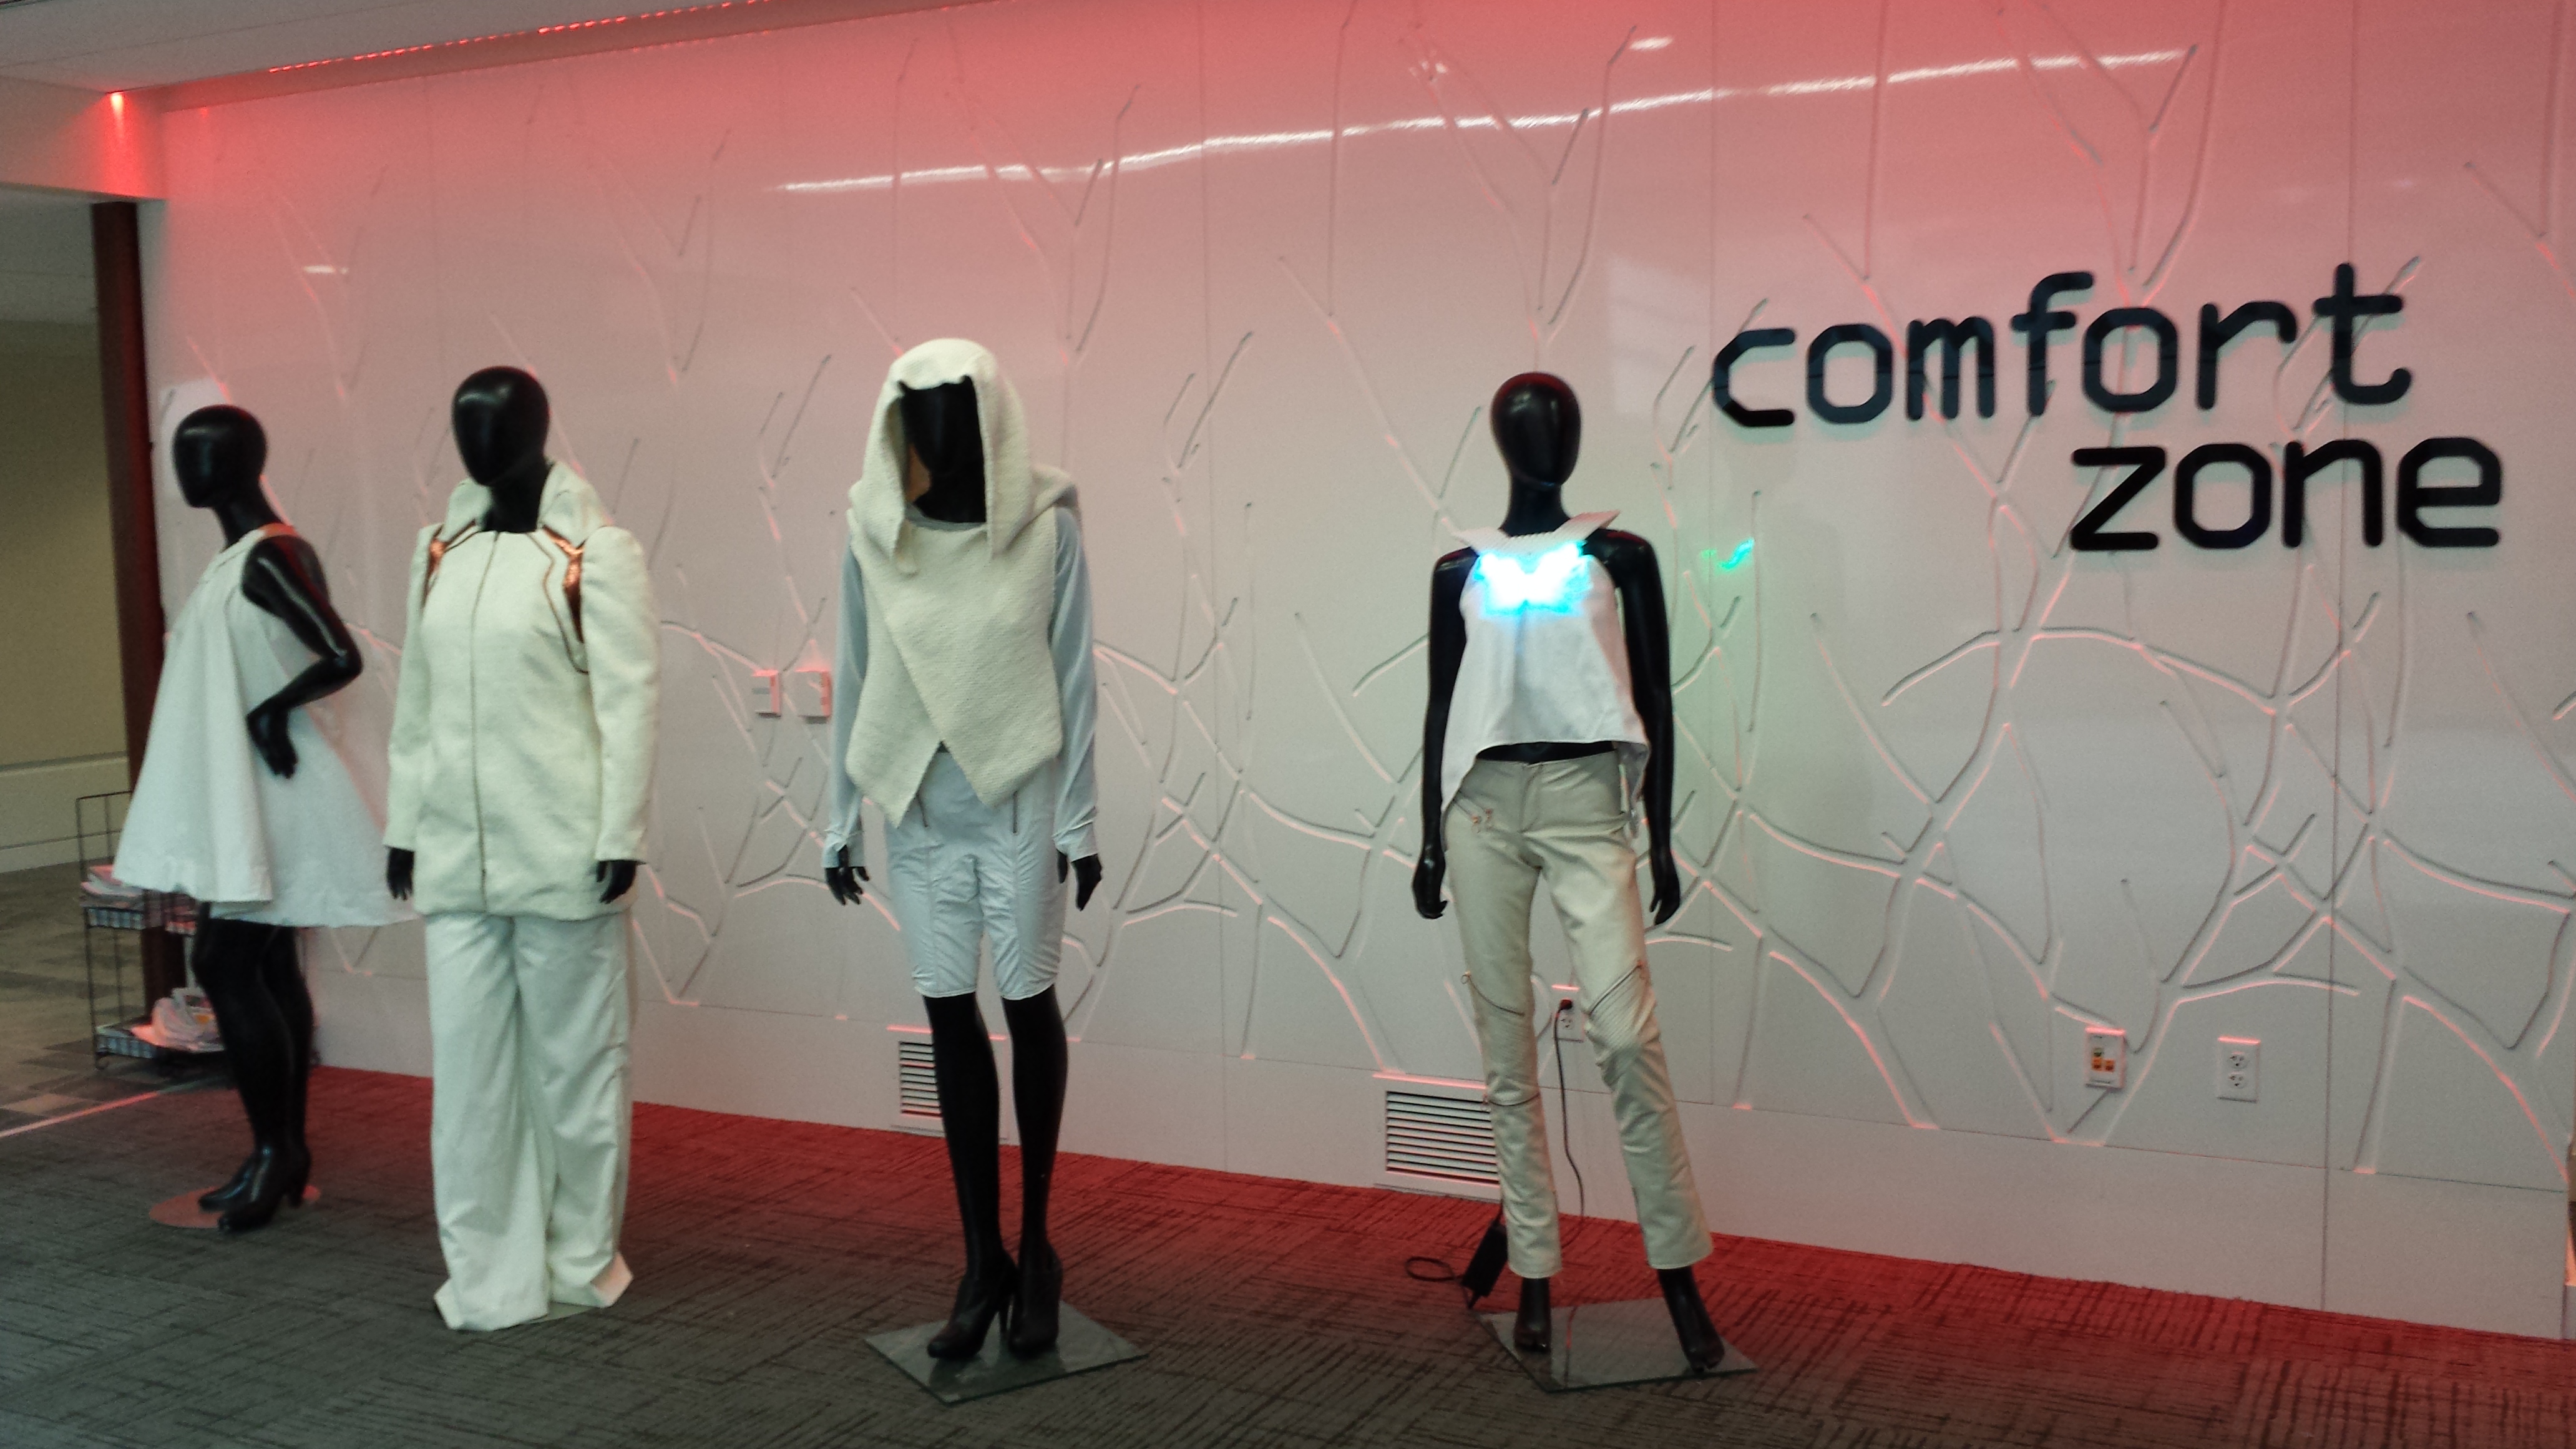
I had a show!  While none of the pieces fully functioned the way I planned, I’m happy to say that I did pull together enough to put on an exhibition that I felt was pretty well received.  There was a lot of enthusiasm about both the garments themselves and the technologies integrated into them. I’ll review the final outcome of each garment below..

Inflatable dress:

I was very happy with the overall silhouette of this piece.  The fundamentals of the CO2 inflation system worked perfectly and the effect was awesome.  Unfortunately, the electronics of the piece ceased functioning in the 11th hour, so the piece as shown in the exhibition was triggered manually.
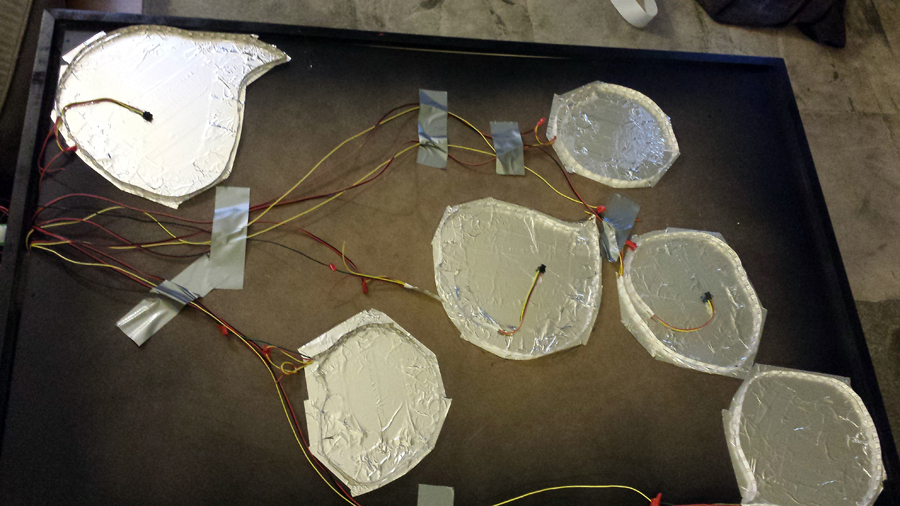
Speaker coat:

In the end, I had to abandon the textile speakers.  I was simply unable to get them to be loud enough for this application.  I was able to harvest some small, rechargeable speakers that fit great in the collar and had great volume.  The Lillypad MP3 didn;t end up working for me, as I was suddenly no longer able to upload code to the board, so the finished product simply played music, rather than being triggered.

Hoodie sweater:

This piece was one of my biggest disappointments.  The sweater panels that Dennis knit for me are unbelievably gorgeous and the sweater itself came out perfect.  But, it turns out that at some point during the process one of my servo motors stripped a gear and was no longer able to fully rotate.  Since the electronics of this piece had already been tested months previous, I made the mistake of leaving the final assembly and testing of this one until the end, at which point I didn’t have any resources to replace the motor.  The exaggerated silhouette created by the hood frame no longer made sense without the mechanics, so I decided to remove the framework and show the sweater on its own.
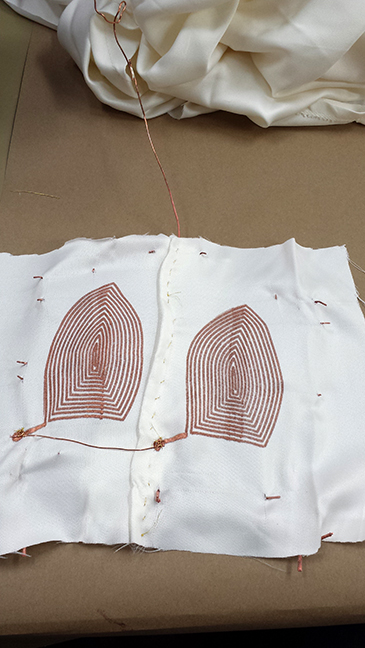
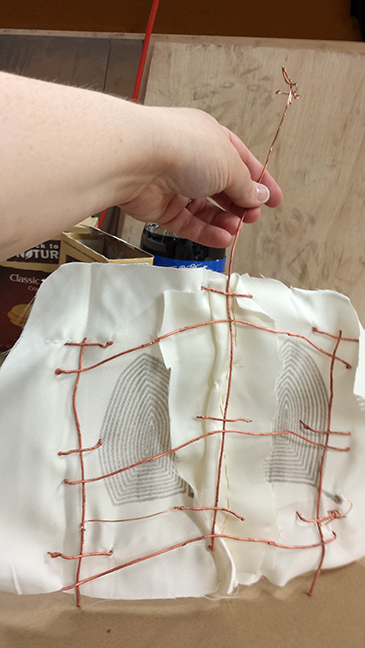
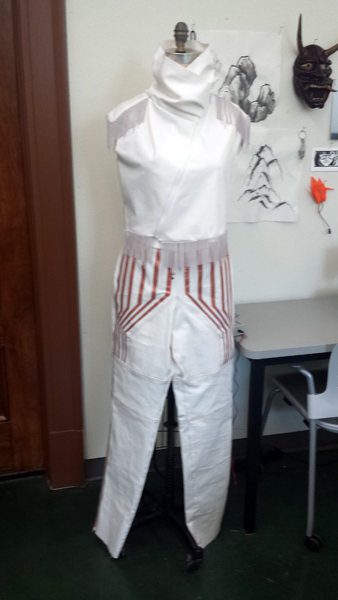
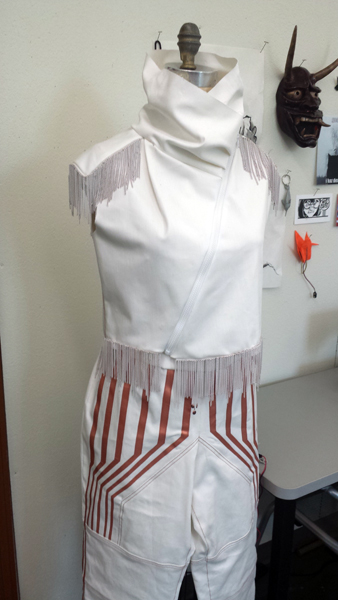
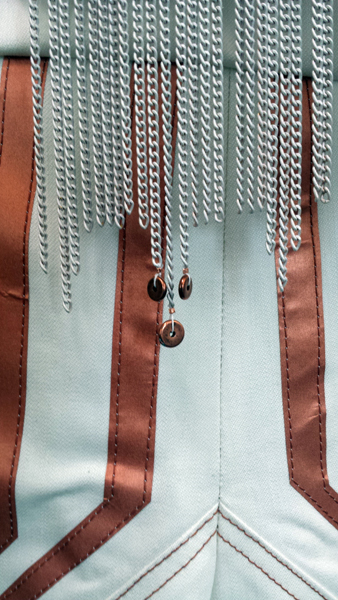
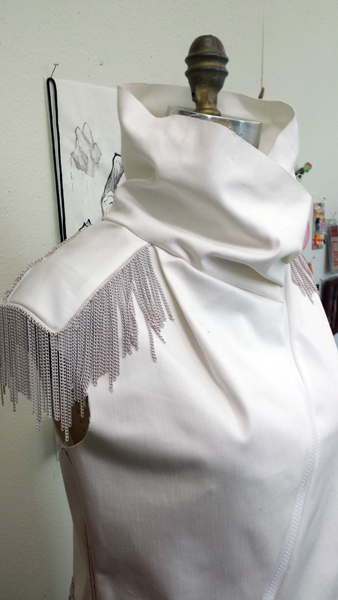
LightPrint top:

This piece actually got closest to where I intended.  The 3D printing via Shapeways didn’t work out, so I ended up printing the neck piece in flat sections using a flexible PLA filament and I was very pleased with the outcome.  As I suspected, the LED strip lights weren’t as bright as I wanted, keeping the lighting effect concentrated around the neck rather than diffusing through the entire garment.  The elimination of the PIR sensors from the other pieces combined with the challenges of coding an analog interrupt led me to pull the sensor from this piece as well.  Instead, I coded a continuous, soft rainbow fade.
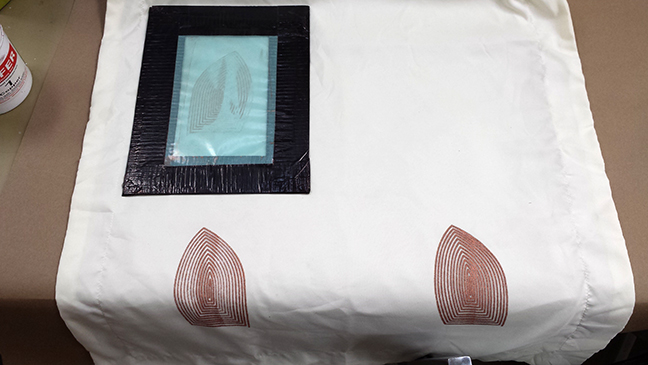
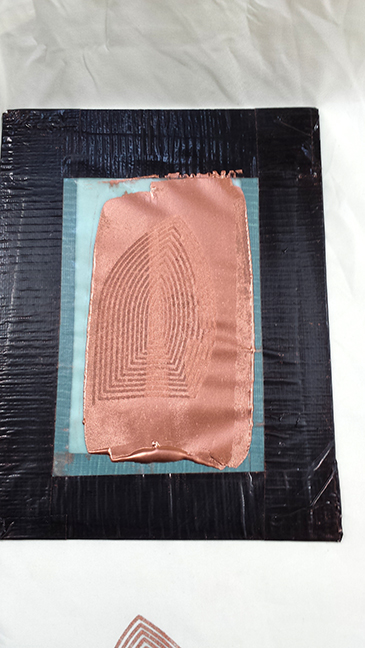
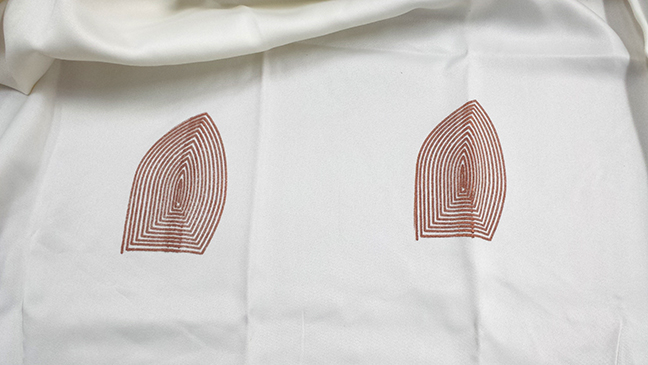
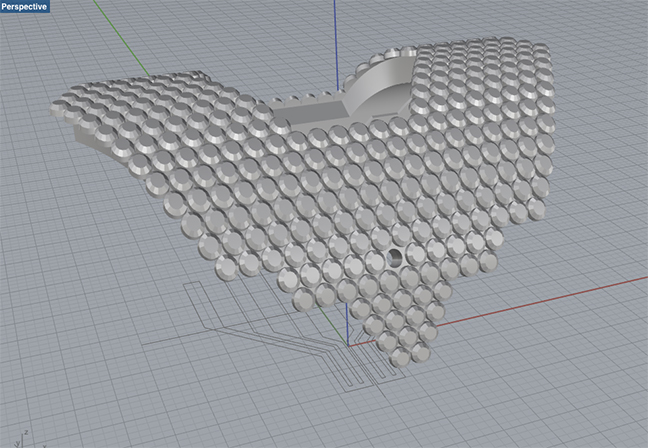
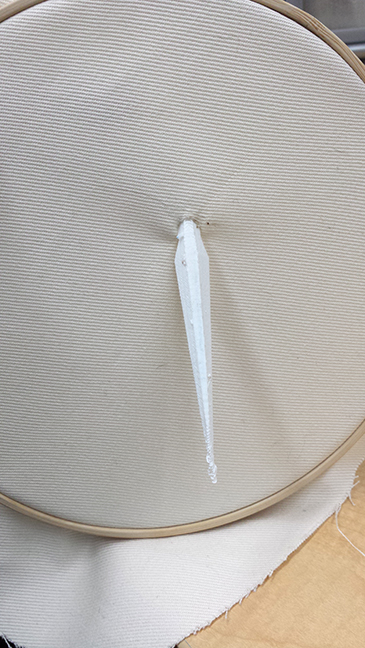
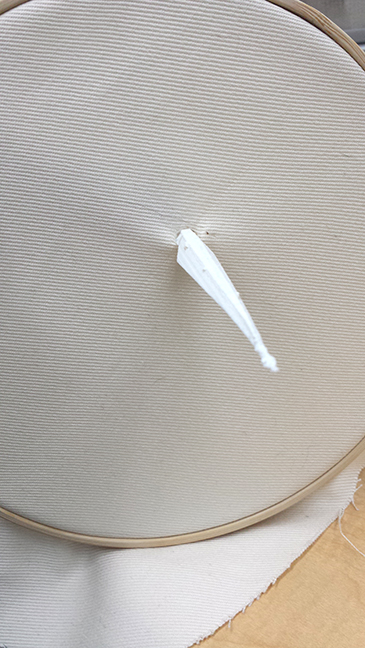
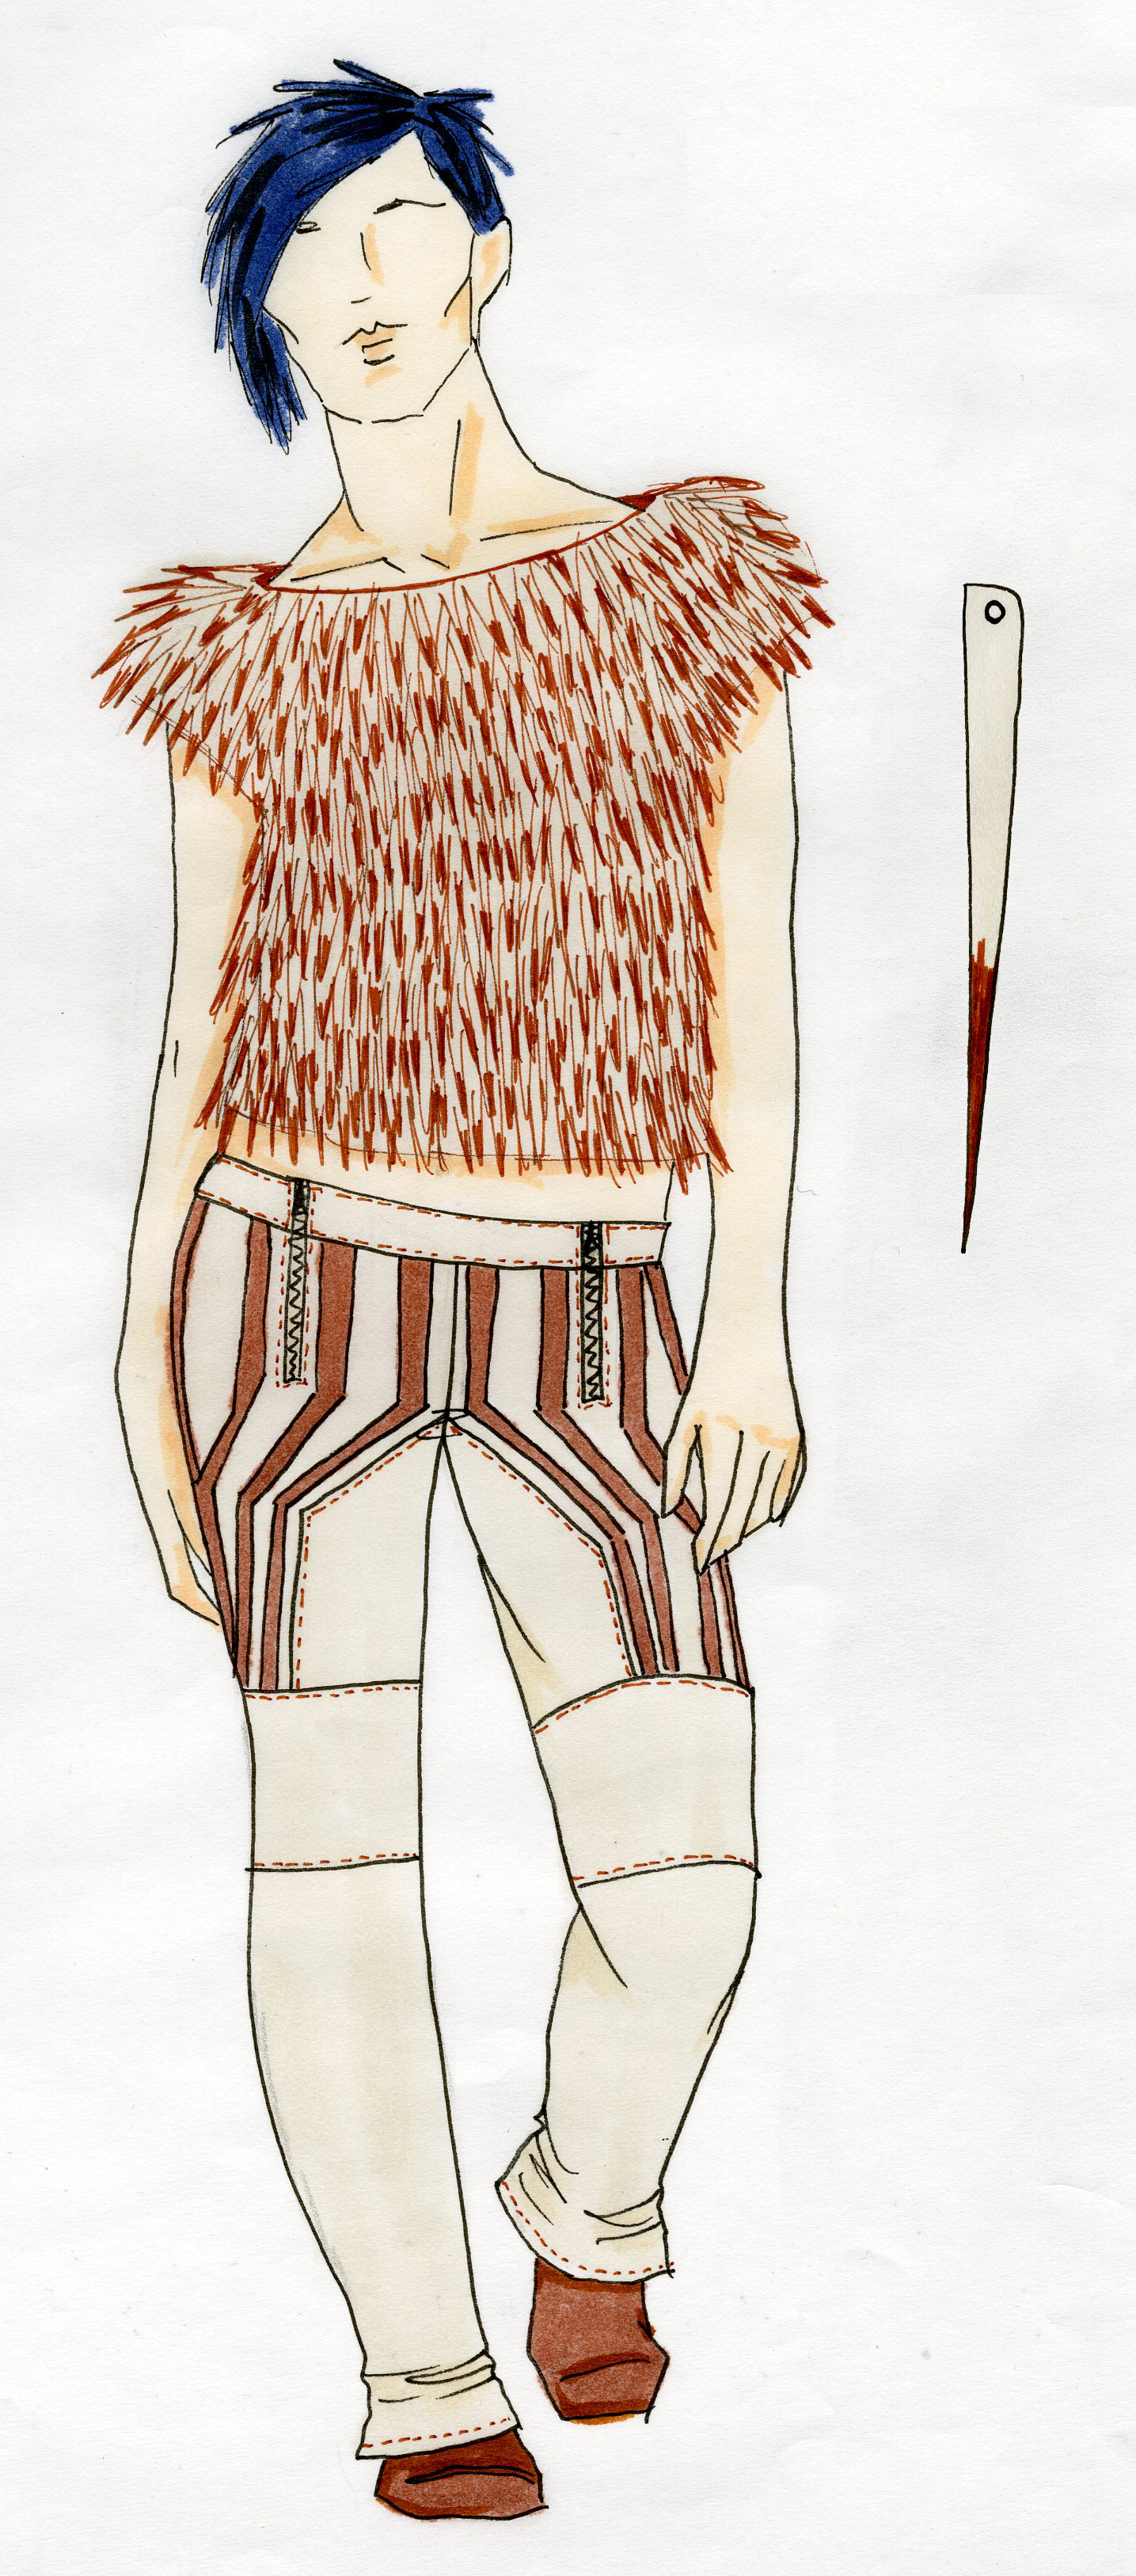
Spines top:

This piece ended up eating a lot of my time and was ultimately the one I was unable to show.  Once I started casting the spines, I quickly realized that I didn’t have the time to make the 400+ I would need for the top.  I changed track and developed a version of the top that utilized plastic zip ties as the spines.  This showed a great deal of promise in testing and I started working on the first spine panel for the top.  Unfortunately, after 4 hours of assembly I only had about an inch & a half of finished work.  At that point I set the project aside in favor of the other pieces.  I’ve already mentally reworked this piece to make it a little more achievable, so I’m looking forward to completing it in the near future.

2) Describe your overall feelings about the project/studies. Are you happy, content, frustrated, etc with the results?

I think it’s clear that I had some significant frustrations with this project.  I’m incredibly disappointed that I was unable to achieve the final outcome I intended.  However, I am proud that I rallied to an extent and was able to put forward a complete collection.

3) What were some of the largest hurdles you encountered over the semester and how did you approach these challenges.

Obviously, time was the enemy this semester.  The biggest challenge was the time I lost to my husband’s recovery, both the weeks where I was home with him and the ongoing challenges of his changed day-to-day needs.  This put me in a situation where I was simply unable to dedicate 100% of my time to this project and that bit me in the end.

My other hurdle was my own enthusiasm as compared to my level of knowledge.  I was trying a lot of different techniques and pursuing a large variety of new skills/technologies simultaneously and I think I got a little overwhelmed, especially once it was crunch time.  One of my ongoing challenges is that I know enough about the tech to get started and explore, but not enough to effectively troubleshoot once issues arise. I’m looking into pursuing some collaborations in the future that would allow me to take my work further.

4) If you had more time, what would you do next on your project/studies?

Fortunately, this isn’t a matter of “if.”  My plan is to complete these pieces to their intended outcome this summer and then hire a videographer to document the work on actual human bodies.  I think this will help get across the intention of the pieces more effectively.

Update – 4/20

Progress is continuing on all of the looks.  Unfortunately it’s still mostly back-end technical work, so there’s not much actual product to show yet.

1) Speaker coat:

I finally sourced and purchased the fabric for both the coat and the jumpsuit that will be worn underneath.  I patterned and fit the coat this weekend and things are looking good.

I did some additional research in ways to make the speakers louder and more efficient to produce.  While the embroidery technique on the test speaker was successful, it was time consuming to produce and I’m not in love with the visual outcome.  While researching alternatives, I stumbled upon this article about electroplating directly onto fabric.  I happen to have a friend in the Metals department who does a lot of work with copper electroplating, so I contacted her.  After negotiating with the head of the Metals department, I got permission to try it out.

I designed a spiral in Illustrator that I used to make a thermofax screen.  I then screenprinted the spiral onto polyester fabric, using a conductive copper paint.

speaker2 speaker3screenpaintspeaker1One dry, the prints were wired to copper “trees”.  These will help keep the fabric stable in the electroforming bath, as well as conducting electricity directly to the print.

speaker5 speaker6The fabric is in the bath as we speak and I’ll be picking them up in the morning.  I’m hopeful that this method will give me a better outcome overall.

2) Inflatable dress

Not much progress here, as I’m still waiting for my solenoid valve to arrive.  According to my tracking number, it should be here by the end of the week.  Once it arrives I anticipate this look going together fairly quickly.

3) LightPrint top

I’ve been struggling with the components on this one.  I wired up a test circuit, using the FadeCandy interface and the WS2811 chips to power my LEDs.  Despite following the datasheet wiring instructions and triple-checking my wiring, I can only get the first LED in the series to light up.  I verified that the testing script should light the entire series by using it on an addressable LED strip and checked that the chips were all good by swapping them in the series.  I’m going to run the setup by a couple of people this week to see if we can suss out the problem.  As a backup, I ordered an addressable LED strip from Adafruit that has 144 LEDs per meter.  While the SMD5050 LEDs on the strip aren’t as bright as I would like, the sheer volume should get the point across.  Plus, I know the strip will work right off the bat.

After an epic battle with Rhino, I finally completed the design for the neckpiece.

LPneckThe design was developed from the shape of the PIR sensor.  The hole at the center front allows the sensor to drop seamlessly into the design.  The neckpiece is designed to contain all of the electronics, as well as helping direct the lighting between the outer fabric and the reflective under fabric.  The challenge now is finding a place to print this.  Obviously, it’s huge.  Shapeways quoted $400 for the front half.  I’m looking into printing options on campus to see what’s possible.  If none of those pan out, I’ll look into either finding a way of reducing the Shapeways cost or dividing it up into pieces small enough for my printer.  More to come on this…

4) Hoodie sweater:

I commandeered one of the newly-donated knitting machines and set it up in my studio for my personal use.  While in generally great condition, I quickly found that a part needed to be replaced.  That replacement came today and I sat down to do my swatch knitting…only to discover that a wheel in the carriage is sticking.  I’m researching the problem tonight and will hopefully be up and running tomorrow.

5)  Spine top:

Last week I finally printed my sample spine, attached it to fabric and tested it with some muscle wire.  It was a complete flop.  The muscle wire barely made the spine twitch and the heat running through it scorched the fabric.  I started researching other options, such as micro stepper motors or linear actuators.  I hit the jackpot when I found MigaMotors.  They make a muscle-wire-powered linear actuator that is silent, approximately the size and thickness of a credit card and can generate 4.5 pounds of pulling force.  Plus it’s designed for use with Arduino!  I have 10(!!!) of these little guys in the mail to me as we speak.

With the new power source, I also redesigned the spines.  The new version inserts directly through the fabric and clips into a base that allows it to swivel.  The bases will glue to a thin plastic strip, which will connect to the linear actuator.  When the actuators pull the strips, all of the spines will pop up.  I also tweaked the design so that they would layer better and to fit the angular aesthetic of the rest of the collection.

spine1 spine2 spine3

Since I’m going to need a couple hundred of these, the plan is to get a good, clean set 3D printed, then make a mold and cast them in batches.  The connectors are super quick, so I’ll just print those.

Miscellaneous:

It hit me the other day that there are a bunch of small details I still need to coordinate…

1) Invites/announcement cards (already ordered and should be done in a day or two)

2) Exhibition signage.  (The wall doesn’t lend itself to the usual vinyl, so I’m considering lasercutting the letters out of black acrylic)

3) Shoes and accessories (need to work on this)

4) Painting my mannequins (I have access to a paint sprayer, I just need to choose a color and buy the paint)

Comfort Zone Update: Spring Break edition

After a couple of weeks off due to a family medical crisis, I have a good bit of progress to report!  First, I finalized garment sketches and put all of my fabrics together to make sure I like how everything is working as a collection.  Here’s my current design board:

boardI thin it will be easiest to review where I’m at on each garment individually. Continue reading

Week 5

Last week got eaten by an unexpected job application opportunity, so there wasn’t as much progress on the show front as I planned.

I finished the collar assembly for the hooded sweater.  The retraction works great!  Unfortunately, my servos aren’t strong enough for the apparatus.  I’ve ordered some new servos that will be here tomorrow that have far greater holding torque.  They should fit into my existing framework pretty easily.  I also got my range sensors and am planning on testing them either today or tomorrow.

I draped/patterned the body of the sweater and knit up some swatches to figure out what would work best.  I found a great tuck pattern that will add a nice texture to the sweater and should be able to start knitting tomorrow.  I also finished patterning the shorts.  The plan right now is to have the outfit complete this week.

Week 5

Progress is being made on outfit #1.  I’ve ordered the leather for the pants and gotten yarn for the hoodie sweater.  I worked through how to assemble the support structure for the extendable hood.  I spent the weekend 3D printing a support base for the collar and motors to help everything stay stable.  The servo motors I purchased worked perfectly with the Adafruit motor shield.  They’re very tiny and quite strong, so I think they’ll work just fine.  Tomorrow I’m going to finish assembly and testing of the collar/hood support and drape the fabric portions of the sweater.  I’m also hoping to start machine knitting the fabric.

I’m beginning to get a little concerned about the viability of the capacitive sensing apparatus.  I’ve tried a variety of techniques (adding more resistance, adding a non-conductive layer to shield, applying smoothing to the sensor readings) and things still seem to be all over the board.  Also, I haven’t been able to get the range I want.  I’m going to run the mock-up past a couple of people this week, but if I can’t get a solid outcome I’m going to pursue plan B, namely a different sensor technology.  I’m considering this product from Sparkfun:

12785-02https://www.sparkfun.com/products/12785

It seems fairly straightforward to use with a decent range and very small package.  I want to make sure that I’m not wasting my time getting hung up on unproductive technology exploration instead of making progress.

I’ve been doing a good amount of research on the next outfit, which will be a dress that has a hem that inflates when triggered.  I’m researching materials and potential inflation methods now.

Week 4

This week:

My meeting with Natalie Rudolph went well and I think we will be able to collaborate in the future.  However, the work we were talking about would be for next year, due to timeline restrictions.  I’ll be continuing to meet with her through the rest of the semester and I’m hopeful that we’ll be able to produce some work for my 3rd year MFA show.

I was extremely fortunate to receive a significant grant that will almost completely fund this semester’s show.  While this is incredibly exciting and humbling, I now need to work a couple of items I had written into the grant but had assumed I wouldn’t get funding for back into the project.  Most significantly, I now have the budget to create a video to support the gallery display of my work.  This will allow me to show the garments on moving bodies, in addition to the more static, interactive display.  I’m in the process of finding a videographer in order to determine a reasonable time frame fro video production.  Then I can readjust my calendar in order to make sure I have the garments completed in time.

On the production front, I wired up a sample of the conductive sensing technology using the copper taffeta.  I was able to get usable readings, but not quite the range I’m looking for.  I think adding more resistors to the system should resolve this easily.  I ordered some material swatches and have finalized my list of garments for the most part.  I’m currently working on sketches as I move into patterning.

Next week:

After picking up some supplies my plan for the upcoming week is to finalize the capacitive sensing technology, mock up the extendable hood mechanics for one of my garments (a hooded sweater) and, once that is complete, drape the fabric to accommodate that framework.  This will allow me to purchase the yarn by the end of the week and start knitting early the following week.

Week 3

This week got devoured by meetings, so I don’t have a huge project update.  I had a good meeting with Meg Mitchell in which we discussed my direction and plans for my upcoming qualifier show.  She responded particularly well to this piece:

jcf003The intention of this piece is to use the copper taffeta applique on the pants as a capacitive sensor with enough range to make a textile proximity sensor.  When the sensor is activated, the 3D printed spines would lift via muscle wires.

We discussed some additional applications for this sensing technique and I’ve been sketching ideas.  The plan for this week, now that my supplies have arrived, is to test the capacitive sensing (since the pants are already sewn).  If I can get that working, I might change up my final show garment plans to all use a similar sensing technology.  This would allow me to focus on design completion and responses, rather losing too much time this semester to testing technology.

I have a meeting scheduled on Wednesday with Natalie Rudolph, a professor in the Mechanical Engineering department who works on the 3D printing team.  We’re going to discuss their work and what some possible avenues of collaboration may be.  More to come!

Kent State Fashion/Tech Hackathon

This past weekend I drove to Kent State in order to attend the TechStyle Symposium and the Fashion/Tech Hackathon. 

The symposium, held on Friday, was a gathering of apparel professors and graduate students from schools around the world, including Kent State, Iowa State, Loughborough University and others.  The talks in general revolved around various applications of technology in the apparel field.  They touched on topics such as 3D garment simulation, laser cutting, digital fabric printing and building technology into garments in order to assist disabled children.  In addition to the talks, there was a brief poster session featuring presentations from Iowa State graduate students.  Overall, the symposium was interesting and an excellent networking opportunity.

The Hackathon was a much different event, although equally interesting.  Over 150 students (undergrads and grads) from across the country were brought together and tasked with creating some sort of wearable technology prototype in 36 hours.  Assorted supplies were provided by the organizers (Arduinos, LEDs, Intel Edisons, Myo armbands, Oculus Rifts, etc.) for the hackers to use.  We also had access to the Kent State TextileLab facilities, included a 3D body scanner, 3D printers, a laser cut and digital fabric printers.  Teams could either be formed beforehand or at the event.

Although I had been told in advance that graduate students were welcome, there seemed to be very few actually attending the event.  That made trying to find a team a little awkward.  In the end, I decided to just work by myself.  That did mean that without any additional tech help I scaled back some of my experimentation and chose a project I knew I could complete within the alloted time.

The final outcome is what I called the LightPrint Dress (a terrible name, I know; in my defense I had only had 3 hours of sleep).

I rendered the neckpiece which I printed on a Makerbot Replicator 2, then embedded it with UV LEDs harvested from several small UV flashlights.  I designed the fabric and had it printed at the Kent State facilities.  I then hand-stencilled UV reactive liquid (aka Tide) onto sections of the pattern before draping the dress.  The intended outcome was that the UV lights would activate the reactive portions of the pattern, thereby changing the appearance of the textile in an interactive way.  Unfortunately, due to time and material limitations the final effect was not what I had hoped.

The project as a whole, however, was well-received by the judges.  I was awarded the prize for “Most Technically Challenging Hack” by one of the event sponsors.  The judges seemed most impressed by the fact that I had completed all aspects of the project by myself, thus showing a broad range of skills.  The prize was a Moto360 Smartwatch, which I am still trying to figure out how to use, lol.

While the project was not hugely challenging by my personal criteria, it is a good proof of concept that I would like to pursue further.  A future iteration I would like to explore is one where all of the electronics are fully integrated/encased in the neckpiece with a recharging port and wireless connection to some sort of app to enable user programming.  Rather than using UV LEDs, I would like to install high-powered RGB LEDs and use white fabric for the actual garment.  Theoretically, this would allow me to create user-controlled, color change garments.

Overall, the entire event was an excellent experience.  I would definitely participate in another fashion hack in the future.

Wrap Up

1) Describe your final project.

My final project is a white & copper vest and jeans outfit titled “Switch”. (Bonus points if you get the movie reference!)  At this point it is incomplete, but in the final outcome the piece will have a series of integrated tilt sensors, created by copper beads on the vest’s fringe trim that contact copper taffeta strips appliqued to the pants.  The activation of these sensors will trigger LED lights in the vest, creating an organically-generated pattern of their own.

At this moment, the vest and pants are about 85% complete from a base sewing perspective, I’ve completed a successful wiring test and have some basic code written that will be modified once all of the wiring is in place.

Switch1 Switch2 Switch3 Switch4 Switch5Tilt Switch Test
2) Describe your overall feelings about the project. Are you happy, content, frustrated, etc with the results?

While I’m disappointed to not be further along on my final piece, I am very excited about it’s potential.  I think it will be a great conversation starter piece, as well as a foundational jumping off point for my work going forward.

3) What were some of the largest hurdles you encountered over the semester and how did you approach these challenges.

It seems like everything I attempted this semester ended up being a hurdle, often one that I didn’t clear.  The amount of “failure” I experienced in my experimentation was frustrating, but I feel like I’ve learned a huge amount this semester. I gained some great learnings on the usefulness and limitations of new materials (copper taffeta & addressable LED strips = awesome!  muscle wires = disappointing) that I will be able to apply to my work as I go forward.

The single most important thing I learned this semester is that I need to rethink my entire approach to projects, from a timeline and process perspective.  I’m a very fast and capable seamstress, and I plan my project timelines accordingly.  Normally, I’m able to produce a large quantity of work in a semester, without a lot of trial and error.  Adding electronics has changed everything.  I now need to plan in time for experimentation and, especially, failure.  Accepting that thing will not always (if ever) work as anticipated the first time through has been a huge mental hurdle for me.  Having learned this lesson, I can now plan my work more realistically in order to ensure a more favorable outcome.
4) If you had more time, what would you do next on your project?

Obviously, with more time I would finish my current project.  That completion is currently my plan for summer.  Overall, with more time I feel that I could have successfully completed that projects I attempted to their full potential, rather than being stymied at the last minute by unexpected roadblocks.

Failure, part 2…hundred…

I’ve decided this project is cursed.

Things were looking up at the beginning of the week.  My print finally worked out well and all of my electronics arrived on time. I assembled a nice mounting frame to house the lights and wiring.  Last night I ran some tests via breadboard and worked out some bloated but totally functional code for the addressable RGB LED strips that gave me exactly the pulse effect I was looking for.  I even had the PIR sensor up and running exactly as hoped.  I wired up all of the electronics on the mounting frame, backing each sector of LEDs with aluminum tape to help diffuse the lights through the fabric.

FrameElectronicsI also used an Ardunio Mega shield kit to wrangle all of the wiring and make it easier to swap the Mega in and out of the project.

ArduinoShieldOnce all of the components were mounted, I re-uploaded my code and plugged everything in to verify it all worked before I mounted the felt…at which point I noticed smoke and the distinct scent of fire that accompanied my Mega burning out.

BurnedOutMegaI suspect that the burn out was the result of sloppy 3am soldering, as everything worked fine in the breadboard stage.

Obviously I am deeply disappointed in the outcome of this project.  I have put a major number of hours into every aspect of it, and have almost nothing to show in return. The completed fabric was installed at the site this morning and will be on display until September.

PanelFront PanelSide

Moving onward and upward, here are my initial thoughts on my final project.

FinalProject

I plan to use the etched copper taffeta with metallic beaded fringe to create an integrated tilt sensor.  The triggering of different sensor areas will activate random light patterns in the jacket, so that the patterns are essentially generated by the movement of the wearer.

I am using the below circuit board as my pattern inspiration.  This will be present in the copper etching and a tonal print on the jacket fabric.

Circuit-structuringThe nice thing about using clean lines is that I can tape off the appropriate areas directly on the copper fabric pieces and apply the Vaseline more thickly that screenprinting will allow.  This will create a better result with the etching.

I am planning on re-purposing the addressable RGB LED strips from the felt project into the jacket of the final project, using them to mirror the structured lines of the print.  My plans for this weekend are to construct a few sample tilt sensors from copper taffeta scrap and, once I’ve settled on a specific method, I’d like to get a good jump on creating the beaded fringe.