Wrap Up

1) Describe your final project.

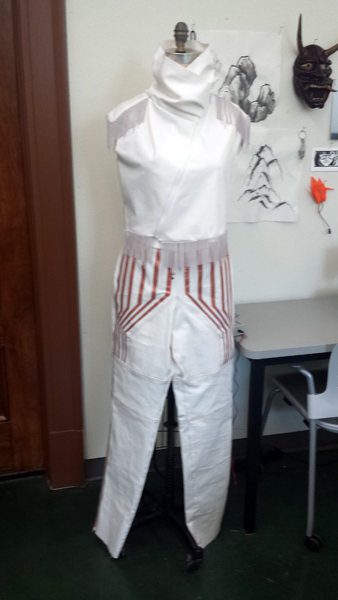
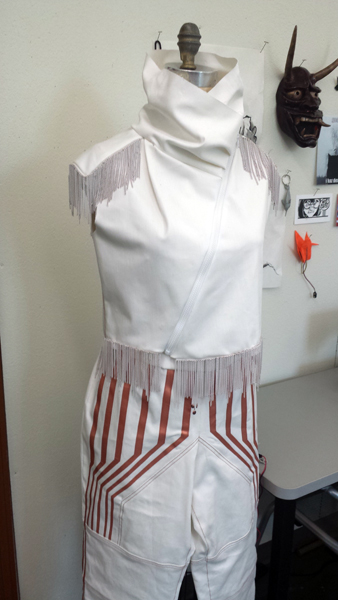
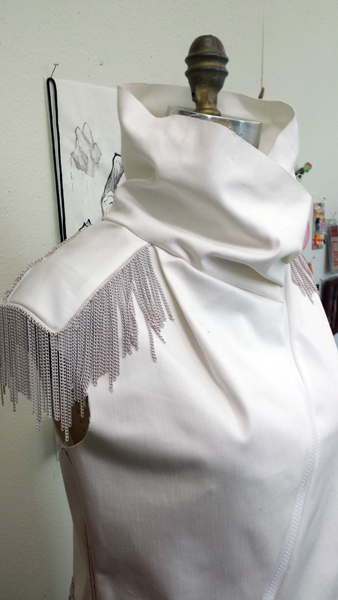
My final project is a white & copper vest and jeans outfit titled “Switch”. (Bonus points if you get the movie reference!)  At this point it is incomplete, but in the final outcome the piece will have a series of integrated tilt sensors, created by copper beads on the vest’s fringe trim that contact copper taffeta strips appliqued to the pants.  The activation of these sensors will trigger LED lights in the vest, creating an organically-generated pattern of their own.

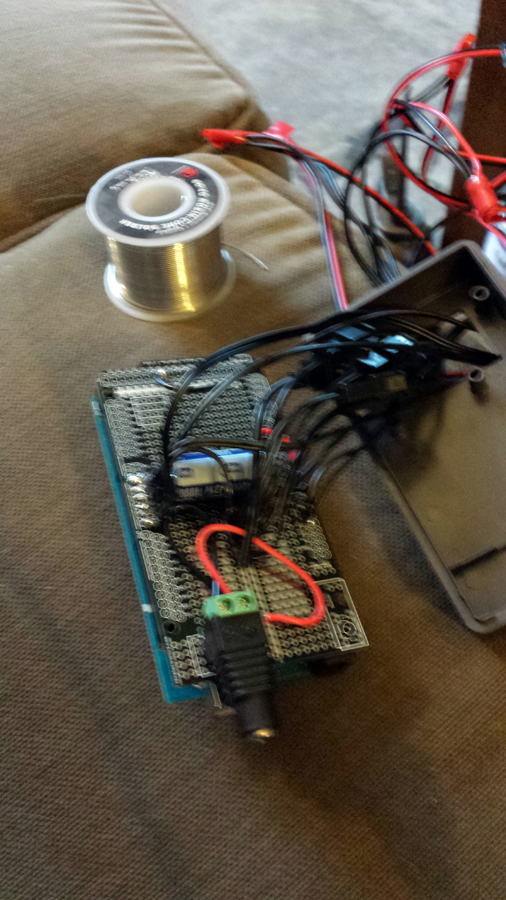
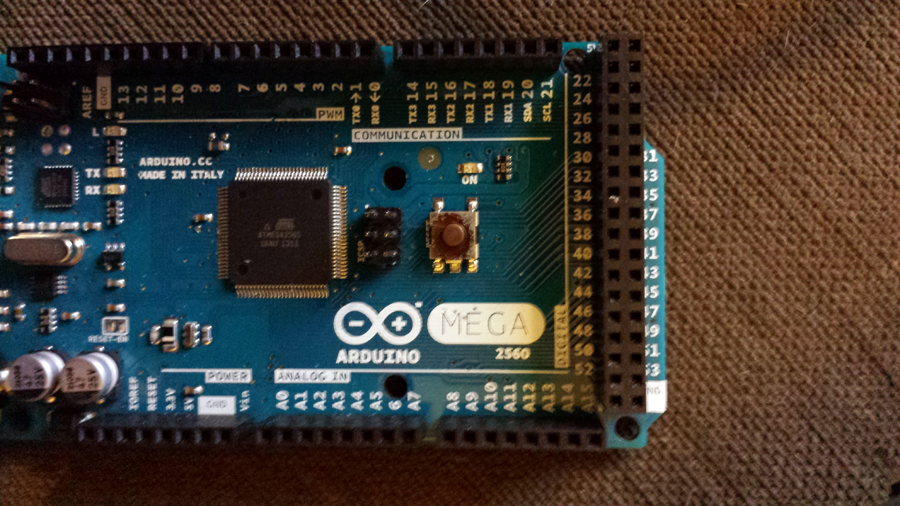
At this moment, the vest and pants are about 85% complete from a base sewing perspective, I’ve completed a successful wiring test and have some basic code written that will be modified once all of the wiring is in place.
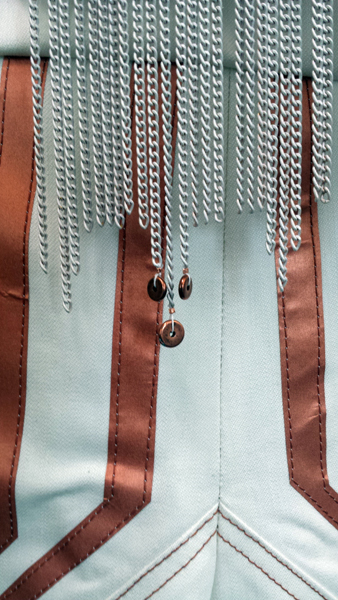
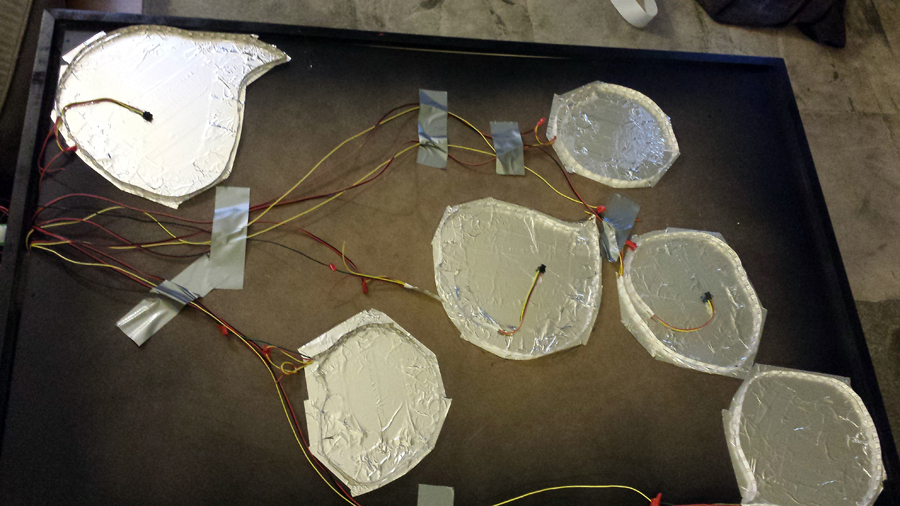
Switch1 Switch2 Switch3 Switch4 Switch5Tilt Switch Test
2) Describe your overall feelings about the project. Are you happy, content, frustrated, etc with the results?

While I’m disappointed to not be further along on my final piece, I am very excited about it’s potential.  I think it will be a great conversation starter piece, as well as a foundational jumping off point for my work going forward.

3) What were some of the largest hurdles you encountered over the semester and how did you approach these challenges.

It seems like everything I attempted this semester ended up being a hurdle, often one that I didn’t clear.  The amount of “failure” I experienced in my experimentation was frustrating, but I feel like I’ve learned a huge amount this semester. I gained some great learnings on the usefulness and limitations of new materials (copper taffeta & addressable LED strips = awesome!  muscle wires = disappointing) that I will be able to apply to my work as I go forward.

The single most important thing I learned this semester is that I need to rethink my entire approach to projects, from a timeline and process perspective.  I’m a very fast and capable seamstress, and I plan my project timelines accordingly.  Normally, I’m able to produce a large quantity of work in a semester, without a lot of trial and error.  Adding electronics has changed everything.  I now need to plan in time for experimentation and, especially, failure.  Accepting that thing will not always (if ever) work as anticipated the first time through has been a huge mental hurdle for me.  Having learned this lesson, I can now plan my work more realistically in order to ensure a more favorable outcome.
4) If you had more time, what would you do next on your project?

Obviously, with more time I would finish my current project.  That completion is currently my plan for summer.  Overall, with more time I feel that I could have successfully completed that projects I attempted to their full potential, rather than being stymied at the last minute by unexpected roadblocks.

Spring Semester 2014

Images hosted and the code is working!

See the Paramecium map here

(spoiler alert: they’re directly in the middle. I probably should have stuck them off to the side just be annoying – when you’re examining these little guys under a real microscope they never stay quite where you want them)

screenshot of full zoom

             screenshot of full zoom

The code itself was freely available online (with only a few minor adjustments to stop it from repeating horizontally) and the Bramus tiling script for Photoshop works like a charm. Exporting the images as jpgs was much faster and takes up much less space than pngs.

I’ve also been playing around with text-based images, back before we solved the hosting/accessing images issue

InFocusAnatomy_smallText
(need to use the “i” as a mask for the tiny letters, rather than trying to make the lines form the image)

Our main hangup was merely finding space where the images could be publicly accessible for the code to use them in the zoomable map. My misconception about Box.com (replacing UW’s “mywebspace”) was that it had image hosting capabilities, though it is really only a folder sharing resource designed for people to individually share files with a selected individual, via a common link that expires after two weeks. Uploading files to it took half an age, as it was only meant for documents, not several hundred small image files.

Looking into renting my own little piece of the internet… I am faced with a number of options. Bluehost is very inexpensive (they have a promotion for $1.68/month for the first year) but various reviews complain of extensive lag and difficulties getting issues resolved. I know that people are much more likely to give a bad review than a good one, so the representation is probably disproportionate. Other review sites give it a generally decent rating, and they claim unlimited storage (but not really).

Myhken’s Webhosting Reviews have lined up several alternatives for comparison: Digital Ocean and RamNode both have good reviews, and seem to be generally comparable.
VPS versus shared hosting vs cloud hosting? The internet seems to thing VPS is better than shared: fewer people grouped onto one server, but cloud is the be-all-end-all at least according to the ones promoting clouds. I’ll probably start with the lowest cost and upgrade when it becomes necessary I suppose.

InfocusAnatomy_webhostingBluehost
Bluehost shared server

InfocusAnatomy_webhostingBluehostVPS
Bluehost VPS

InfocusAnatomy_webhostingDigitalOcean
Digital Ocean (showing 1 GB RAM and 30 GB SSD space)

InfocusAnatomy_webhostingRamNode
RamNode (showing 512MB RAM, and 40 GB SSD)

Main question for the moment: Does the “512 MB RAM” refer to the amount of storage space available at this price, or is 40GB SSD the actual storage?

More research tonight, don’t want to jump into anything…


Zspace and Leap Motion OverView

My final project integrates both the leap motion and the zSpace into the world builder scene. The zSpace is used for displaying the world builder scene and it also is able to draw objects with the stylus. The Leap is used to rotate and zoom in and out of the object. The combination of these two controllers allows the user to more efficiently interact with the object that is drawn.

Looking through my old posts was encouraging because it showed the progress that was made through out the semester. Overall I am happy with the results of my project and have learned a lot this semester.

One of the largest obstacles that I had was getting the tracking to work correctly with the Z Space stylus. The first route I went was to programmatically fix this problem. I needed to find a way to calculate the rotation of the stylus so that it would update correctly on each frame. I turned to quaternions and soon found out that this approach was too complicated and would take some time to complete. Luckily, VRPN supports zSpace so this fixed the problem with the stylus tracking. The next problem was to find out why the stylus was not drawing on the screen. This was fixed by trial and error within the finona config file.

Another obstacle that I faced was to have the world builder scene run independently from the skeletal viewer. The reason for this was because the skeletal viewer needed to start before the world builder scene and running these two applications every time an edit was made took some time. The Leap Motion was also dependent upon the Skeletal Viewer which was annoying because I had to select the skeletal viewer before I would see my hands on the screen. To fix this problem I moved all of the code for the leap motion into the world builder scene. This had to be done carefully because much of the code is scattered across the code base and it caused several files to be edited in order for the conversion to work.

My most recent obstacle was getting the rotation set up for the leap motion. My goal was to get the leap motion to detect the angle of my hand and to rotate the world accordingly. This required some knowledge on how the FinonaLib orients the camera when using the wand. Basically I spoofed this idea and made it work with the leap motion. Currently you activate gestures by placing 5 fingers above the leap motion. Next you can either close your hand and pull in or out to simulate zooming, use one finger to rotate around the x-axis, and use two fingers to rotate around the y-axis. You can stop all of these gestures by placing fingers above the leap motion again.

If I had more time I would make a gesture to reset the camera to its original position. I believe this would help when the user makes a mistake when rotating the object. I would also like to be able to change the colors of the 3D object either by voice or by some type of gesture.

ReKinStruct: To Sum It Up


https://vimeo.com/95045553

What started as a project that would reconstruct point cloud data through Kinect Fusion SDK along with PCL had its limitations that led me to take a detour to getting Time Varying Datasets and finally landing in the Kinect Fusion SDK.

There was a very steep initial learning curve with respect to setting up the drivers and the software. My Macbook was not supporting the Kinect drivers as it had a low end graphics card and I had to use Dr.Ponto’s Alienware laptop with an NVIDIA GTX780 graphics card that was pretty fast. Compiling PCL and its dependencies, OpenNI and PrimeSense was the next step which had a few issues of their own while interacting with Windows drivers. These initial phase was very frustrating as I have not really coded much in the Windows OS and had to figure out how to setup the hardware, drivers and software. It was almost mid-March when I had the entire setup running without crashing in the middle.

Although it was a late start, once the drivers and the software were setup, it was all exciting and fast. I was able to obtain datasets automatically using the OpenNI Grabber interface. I had to just specify the time interval between successive captures and the program saved them as PCD files (Color and Depth). It wasn’t late until I was able to get 400 PCDs of a candle burning down with PCDs captured 1 second apart from each other which would give a realistic 3D rendering of the scenario. The viewer program was pretty similar that took in the number of PCD files and the time interval between the display as arguments and visualized these 3D datasets.

Further on, I also tried learning the Windows SDK that is provided along with the Kinect. The Kinect Fusion basics is a beautifully written piece of code that obtains PLYs when scanned with the Kinect. PCL offers options to convert these into PCDs which was the desired final format. I also tried running multiple Kinects simultaneously to obtain data that would fill in the shadow points of one Kinect but I was not able to debug an error while Windows SDK’s Multi Static Cameras option. Given more time or as a future work, I believe using multiple Kinects to obtain PCD files would be a good area to explore. Working on these obtained PCD files like hole filling and reconstruction would also be good topics to cover in the future.

Here is a comparison of the image that is used in pointclouds.org(the one I put up in my second post as a target) against the image that I have obtained. Both are screenshots of PLYs.

Comparison

Left: Mesh from pointclouds.org; Right: Mesh obtained by me

The datasets can be found at:

Candle: https://uwmadison.box.com/s/j1zheh8b46fbxjs079xs

Walking Person: https://uwmadison.box.com/s/lxkr7a7io5rbz84xy4uw

Office: https://uwmadison.box.com/s/8mfccacpewkptymicx67

All in all, I am happy with the progress of the work. If the drivers were not a big hindrance, I would have had a better start in the beginning of the semester. Nevertheless, it was a great learning experience and an interesting area of study.

ReKinStruct: Time-Varying Kinect Fusion

I have tried to combine Kinect Fusion and the Time-Varying Dataset concept into one by obtaining two time varying PLYs of a scenario and converting them into PCDs. The link to this small dataset could be found at

https://uwmadison.box.com/s/bgw63fi54y5ir5wkedav

Meanwhile, since I did not have OpenNI support in my machine as I have deleted it while installating Kinect SDKs, I could not try running the program to visualise it. Nevertheless, the comparison of the two PLYs looks so in MeshLab.

KinectFusion_Comaprison

The scans look intact and the Kinect’s depth sensors were actually working much better compared to last week since I moved the Kinect slowly across the space.

The codes to the capture and viewing program that I have worked with until now can be found at

https://github.com/nsubramaniam/rekinstruct

For some reason, using the Multi Static Kinects option in the Kinect SDKs which obtains points from two Kinects gives an error while opening the PLY file it saves. The error corresponds to something like “Header has an EoF” which I believe is erroneous metadata. I am looking into it. Will update once I get to know something.!

Rotating the World Builder Scene

As the semester is coming to an end I would like to try to accomplish getting the world builder scene to rotate. From my last video, I really like how the scene can be adjusted by using the leap motion to draw the scene up, down, into, and out of the screen.

Next I would like to be able to rotate the scene along the x axis. So when the hand is closed we would save the position of the hand in the (x,y,z) plane and then rotate about the x axis so that you could see the backside of the figure that you are drawing.

I am hoping to do this action is one finger. When the rotation would be based up the change of x and the finger moves left to right. To accomplish this I will be using the GLrotatef(angle, x,y,z) function where x = change of x and the y and z are both constant. I am having trouble finding a way to calculate the angle for this function. I believe I will need to find the angle between the start point when he hand grabs the world and the ending point when the hand releases the world.

I will be making another video to demonstrate this effect tomorrow.

ReKinStruct: Kinect Fusion Basics

There has been a bit of a change in my approach to obtain PCDs. I have moved on to obtain PCDs(PLY, to be precise) using the Kinect Fusion Colour Basics. It scans the volume for 3D points and allows me to save in one of the three formats (OBJ, STD and PLY). I chose the PLY format as I can easily convert PLYs to PCDs using PCL.

Here is a video of me scanning around the room to obtain the mesh.

http://vimeo.com/93961128

The mesh finally looks like this in MeshLab.

Mesh

The next steps would be to take a few PCDs and probably use the Time Varying PCD program to visualise them like a movie.

Meanwhile, there happened to be a few issues with the datasets in the file locker. So, I have uploaded the files in UW-Madison Box. Here are the links to the datasets.

Candle Dataset 1 second : https://uwmadison.box.com/s/j1zheh8b46fbxjs079xs

Walking Person : https://uwmadison.box.com/s/lxkr7a7io5rbz84xy4uw

Failure, part 2…hundred…

I’ve decided this project is cursed.

Things were looking up at the beginning of the week.  My print finally worked out well and all of my electronics arrived on time. I assembled a nice mounting frame to house the lights and wiring.  Last night I ran some tests via breadboard and worked out some bloated but totally functional code for the addressable RGB LED strips that gave me exactly the pulse effect I was looking for.  I even had the PIR sensor up and running exactly as hoped.  I wired up all of the electronics on the mounting frame, backing each sector of LEDs with aluminum tape to help diffuse the lights through the fabric.

FrameElectronicsI also used an Ardunio Mega shield kit to wrangle all of the wiring and make it easier to swap the Mega in and out of the project.

ArduinoShieldOnce all of the components were mounted, I re-uploaded my code and plugged everything in to verify it all worked before I mounted the felt…at which point I noticed smoke and the distinct scent of fire that accompanied my Mega burning out.

BurnedOutMegaI suspect that the burn out was the result of sloppy 3am soldering, as everything worked fine in the breadboard stage.

Obviously I am deeply disappointed in the outcome of this project.  I have put a major number of hours into every aspect of it, and have almost nothing to show in return. The completed fabric was installed at the site this morning and will be on display until September.

PanelFront PanelSide

Moving onward and upward, here are my initial thoughts on my final project.

FinalProject

I plan to use the etched copper taffeta with metallic beaded fringe to create an integrated tilt sensor.  The triggering of different sensor areas will activate random light patterns in the jacket, so that the patterns are essentially generated by the movement of the wearer.

I am using the below circuit board as my pattern inspiration.  This will be present in the copper etching and a tonal print on the jacket fabric.

Circuit-structuringThe nice thing about using clean lines is that I can tape off the appropriate areas directly on the copper fabric pieces and apply the Vaseline more thickly that screenprinting will allow.  This will create a better result with the etching.

I am planning on re-purposing the addressable RGB LED strips from the felt project into the jacket of the final project, using them to mirror the structured lines of the print.  My plans for this weekend are to construct a few sample tilt sensors from copper taffeta scrap and, once I’ve settled on a specific method, I’d like to get a good jump on creating the beaded fringe.