
This week I was introduced to control and conditional statements in Chapters 5, 6, and 7 of Learning Processing. This is probably the one part I was least looking forward to, simply because loops and conditionals begin to get a little confusing the moment they start to get nested. But they are really the elements, along with variables, that give programming its procedural nature and help automate a lot of tasks and decisions. A few key functions and system variables were discussed: constrain(), random(), mousePressed(), keyPressed(), height ,and width.
random() is the first function we get familiarized with that returns a value. There are a lot of these in Processing. A few that were not discussed in the book that I found useful for coding my Lesson 2 project were dist(), which measures the distance between two points, and map(), which remaps a value from range to another range.

Random function
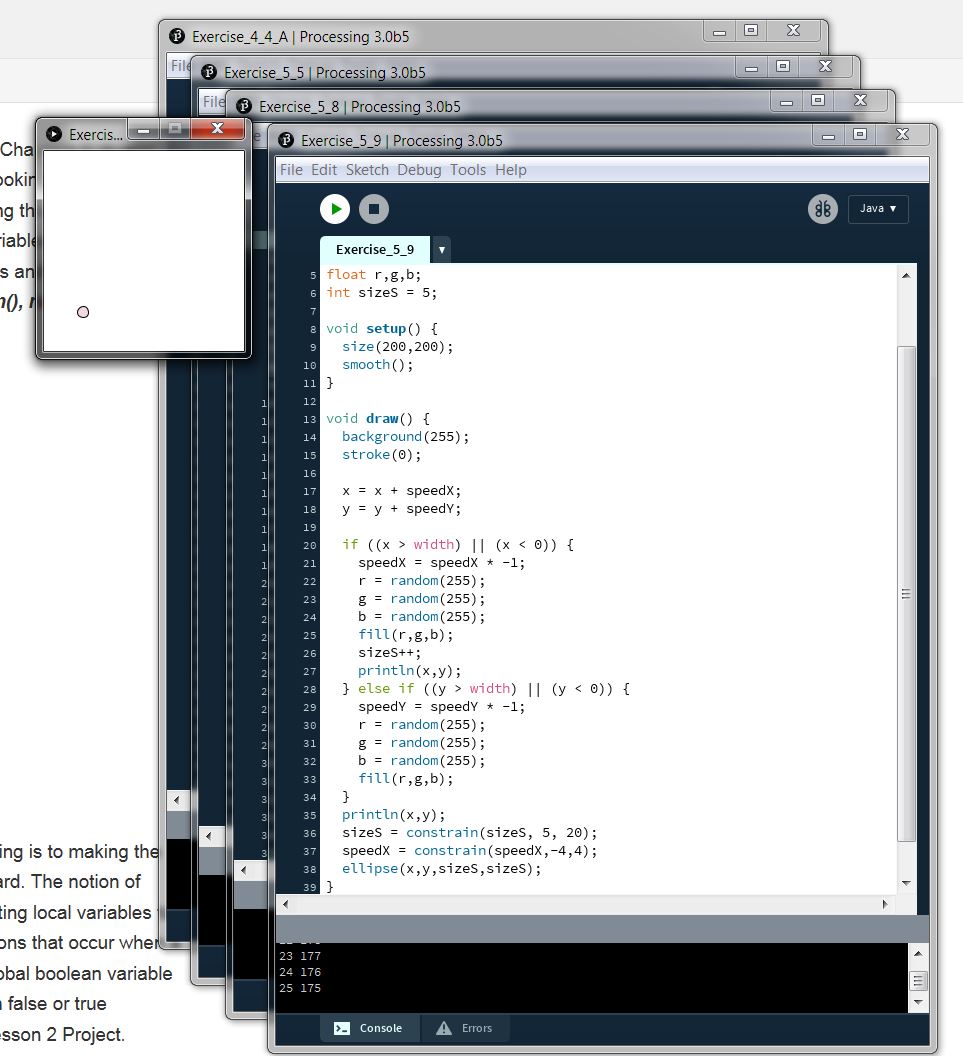
Constrain function at play… Prevents the circle ball from leaving the boundary of the window.
constrain() was introduced as a handy tool for use in simple physics simulation and creating a bouncing ball. Though it would be just as effective to use a conditional to restrain the ball from moving past the edges of the window, constrain() reduces this to a line of code instead of several.
They are pretty self-explanatory and show how well prepared Processing is to making the process of scripting user interactive compositions very straightforward. The notion of local vs. global variables was also emphasized as we started creating local variables to drive our for and if blocks of code. In the context of making conditions that occur when a user presses a key or mouse buttons, the benefit of declaring a global boolean variable was immediately evident as this allows the code to toggle between false or true according to the user actions. A global variable was used in my Lesson 2 Project.
On to Project 2. With the introduction of control loops and if statements, compositions can begin to feel a little more fancy. The author of the book wants you to continue using the first composition from week 1 project but I am opting to start each one from scratch because what was done in a previous week does not necessarily have room for further improvement and it should also allow me more creative freedom.
My goal this week was to create an attractor-based circle pattern. With mouseX and mouseY position data available at my disposal, it would be really cool to see if I could make the cursor an attractor. As Processing allows for interactive compositions, the pattern would be able to change in real-time. I wanted to make the size of the circles vary depending on how close they were from the cursor.
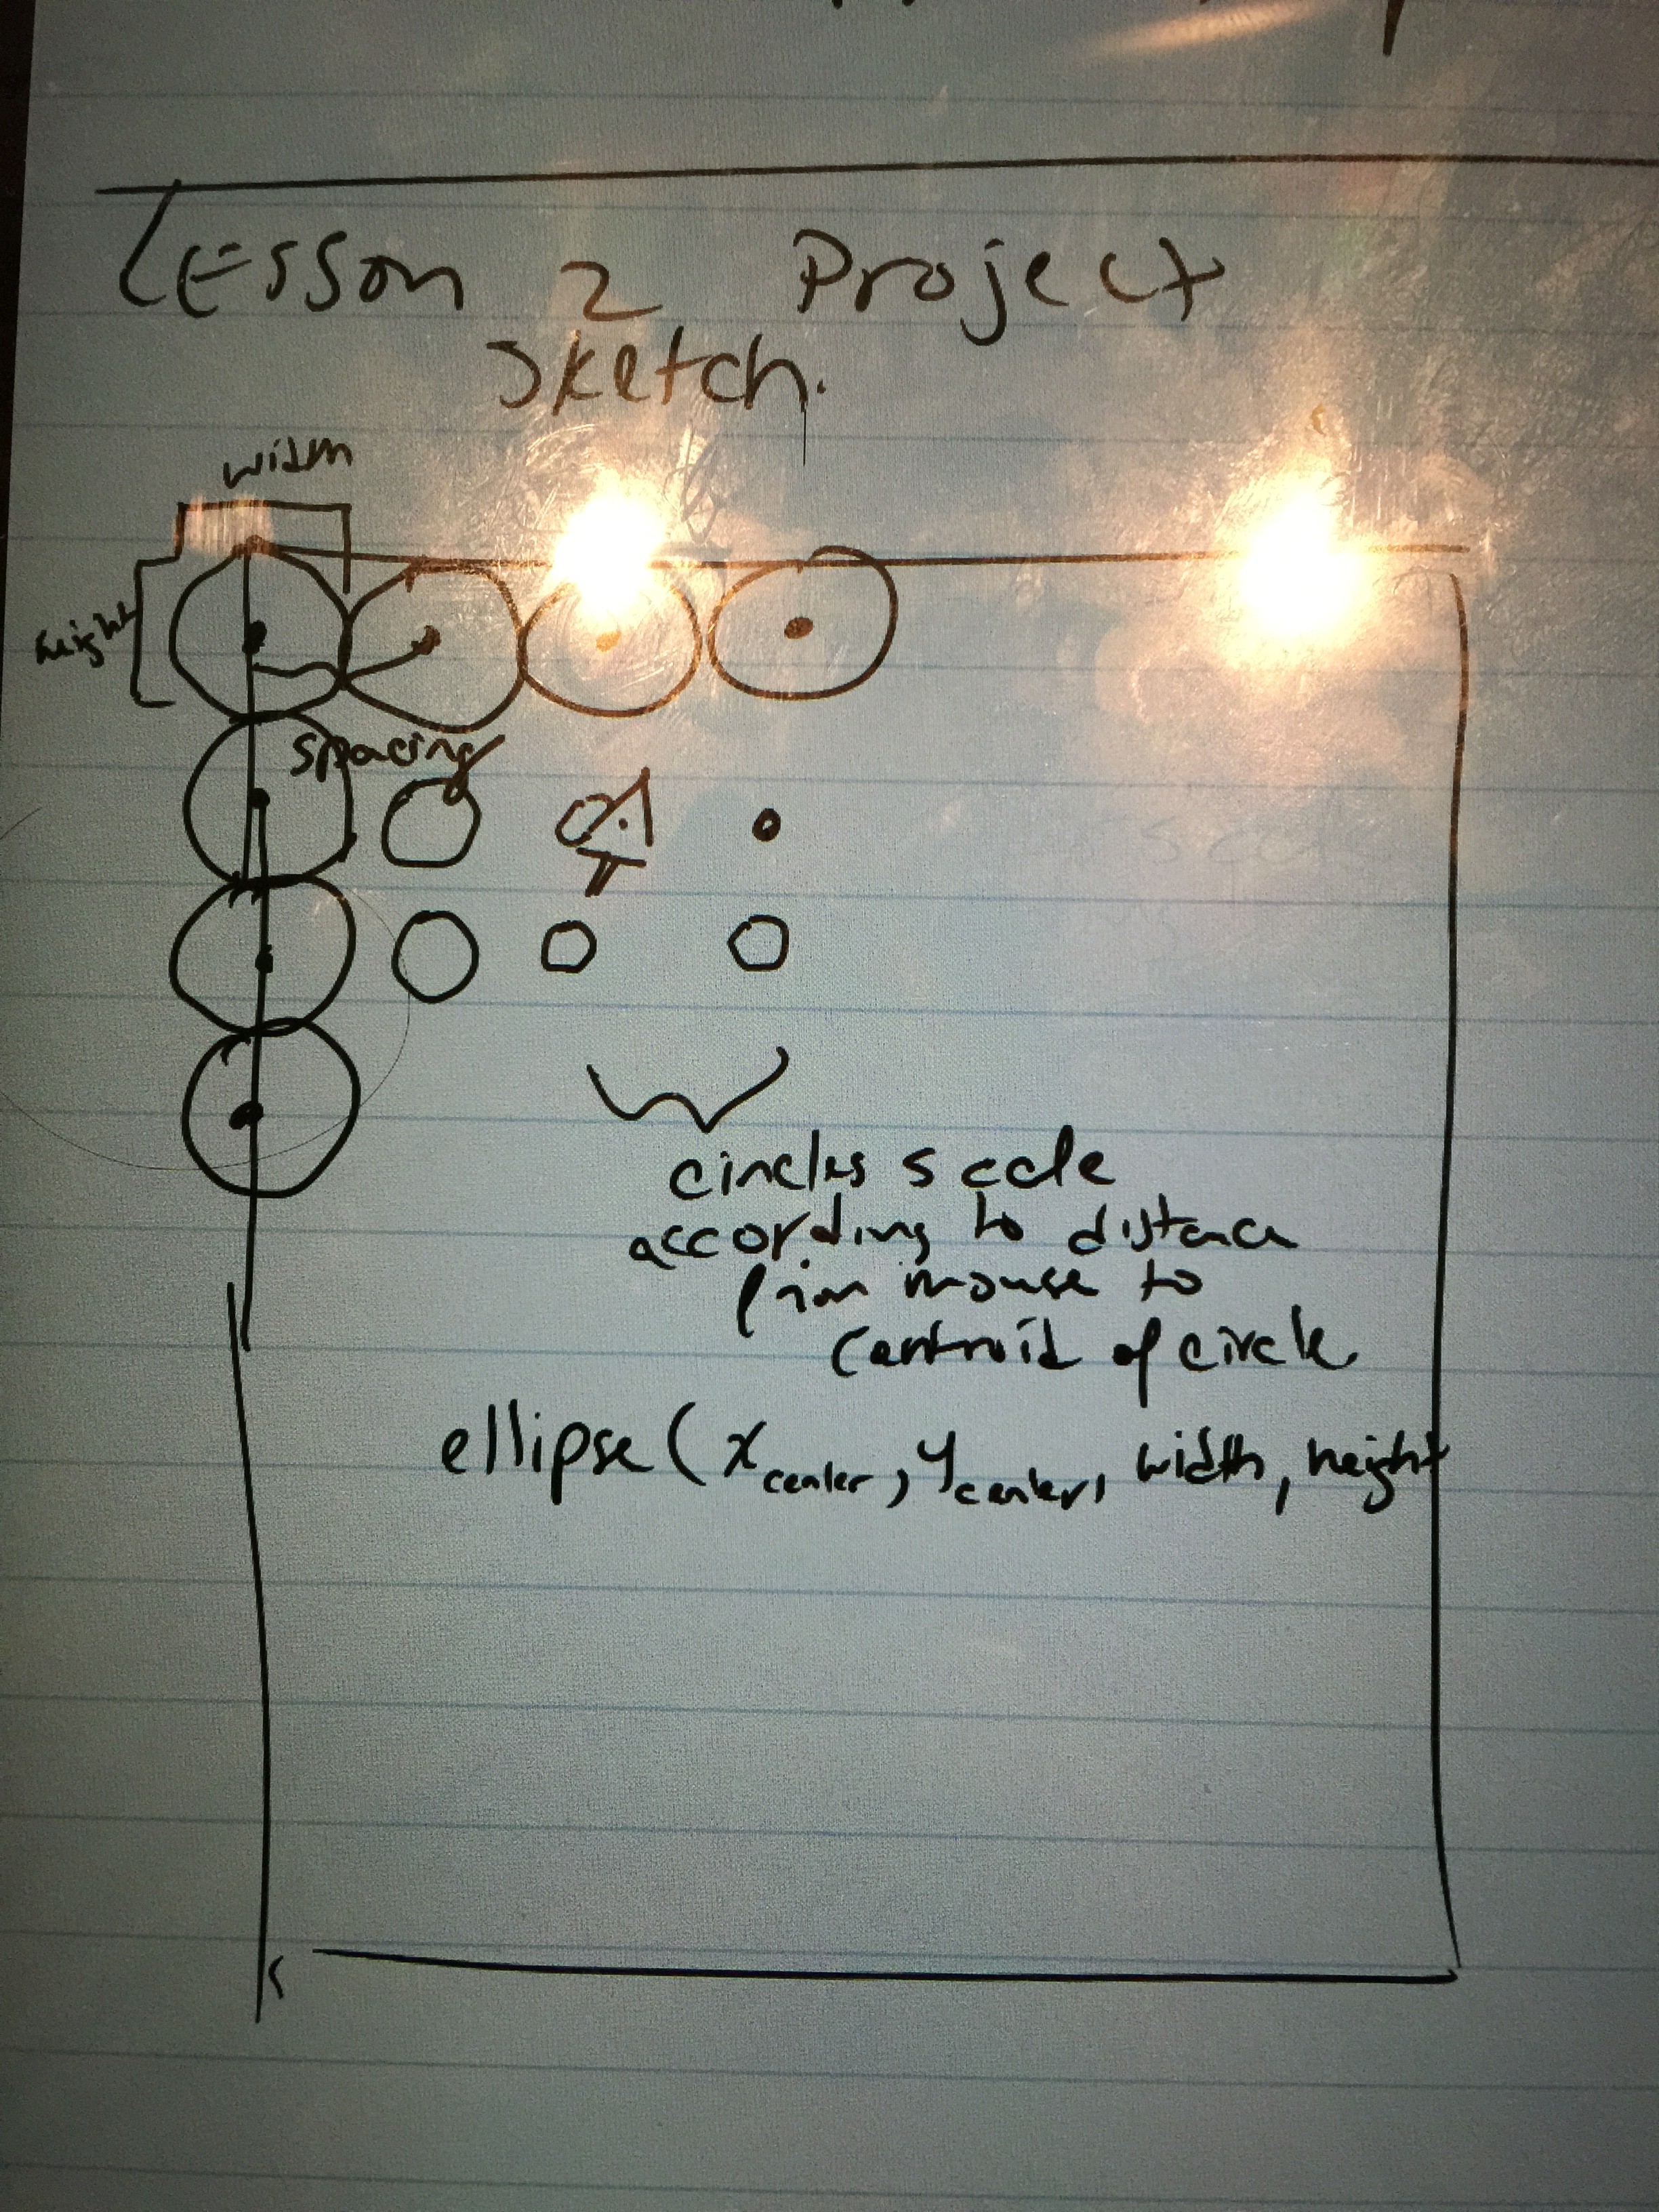
Project 2 Sketch
The main issue was finding a way to translate distance data between each circle into information that could be used for scaling. Obviously I needed to find a way to make values lie in between 0 and 1 and multiply that scaling factor times the width and height of each circle. I discovered the map() function in the Processing reference page and was delighted to find out that it does exactly what I needed. I can already see a lot of uses for this function.
Next week I will learn how to create my own functions and start talking abt objects. This will be very useful in developing my own particle system. And I hope that I’ll be able to create a basic particle system next week or the following.
Click on this link to interact with my Project 2 composition.
See you next week!
Ted