Final Post – Smart Jacket

1) Describe the operation of your final project. What does it do and how does it work?

The video below shows the LEDs in action (sorry for the cheesy music!):

2) Overall, what are your feelings about your project? Are you happy, content, frustrated, etc.?

I was very happy with my final project.  It required a lot of skills that I did not have before taking this class and it was really nice to receive a lot of positive feedback at the exposé.

3) What were the largest hurdles you encountered in your project and how did you overcome these obstacles?

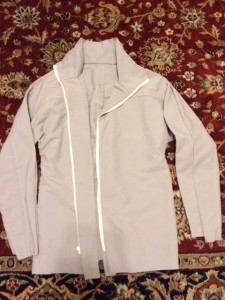
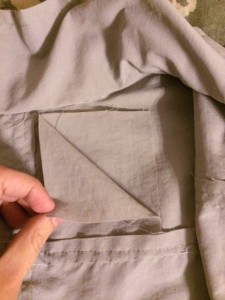
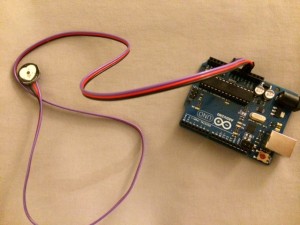
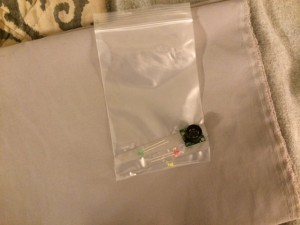
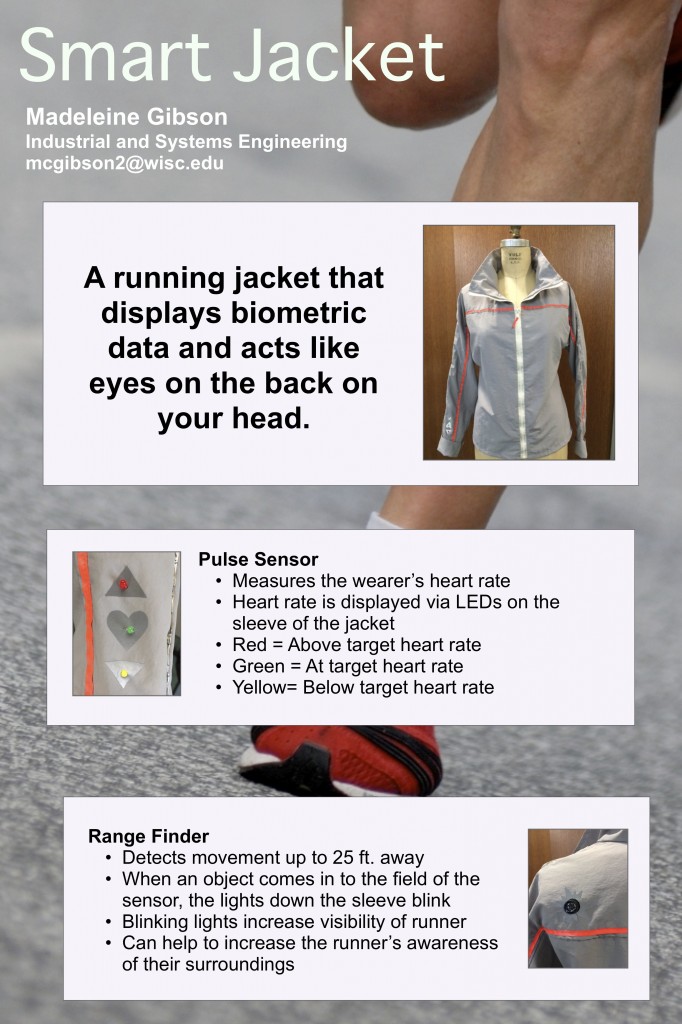
The largest obstacle I faced during this project was that I could not use my code for the pulse sensor with the Lilypad. In order to save time I used the Arduino Uno instead.  However, using the Arduino Uno was not planned for in my design so I had to find a place I would be able to conceal the hardware.  I ended up creating a pocket for it in the lower back part of the jacket which worked well and can be seen in the pictures below.

4) How well did your project meet your original project description and goals?

My project goals remained the same throughout the project. There were only a few minor changes I made to the design.

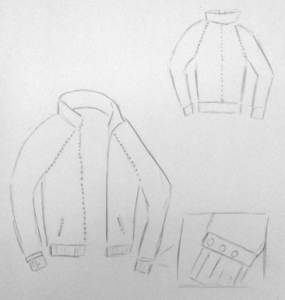
I ended up placing the LEDs down the sleeve of the jacket because it is easier to detect moving objects over static objects (assuming that the runner moves their arms when they run) when illuminated at night.  This placement of the LEDs should help increase the visibility of the runner.

5) If you had more time, what would you do next on your project?

If I had more time, I would want to create an app that would go along with the jacket.  The app would allow the wearer to set the field for the proximity sensor as well as set their target heart rate.

I would have also wanted to do more testing with the pulse sensor.  I was not able to actually run when using the pulse sensor so I am curious to see how well it would respond.

Week 6 – Update

What did you do this week?

I worked on the code for the proximity sensor and pulse sensor.

Describe the problems you encountered.

I had planned to use the lilypad simple for both sensors however I found that the lilypad and pulse sensor would not work together given the code I was using.  I therefore will need to incorporate the arduino uno into the jacket design.

Also I was planning to get the grommet to frame the proximity sensor this evening but due to the road conditions (and the fact that I hate driving in the snow) I will need to get it tomorrow.

Describe the successes you had.

The proximity sensor and string LEDs work!  See video:

When an object comes into the field of the sensor, the string LEDs blink.

Are you on schedule?

I hope so.

What do you plan to do next week?

Finish the jacket!

Week 5 – Update


What did you do this week?

I bought iron-on reflective ribbon and made sure it would adhere to my fabric without any issues (successful! See picture below)

My plan is to use the reflective ribbon to hold the string lights in place.

I finished most of the construction of the jacket but still need to sew on the cuffs and around the bottom edge.

After talking with Emelia a few weeks ago, we decided it would be best to put a small pocket on the inside of the jacket to hide the Lilypad and other wiring.

Describe the problems you encountered.

No serious problems.  I had hoped to have spent some time working with the proximity sensor but didn’t get around to it.

Describe the successes you had.

I sewed in a zipper for the first time!

Are you on schedule?

I am on schedule but will be busy next week.

What do you plan to do next week?

Program the proximity sensor and start sewing/ironing the string LEDs into place.

Week 4 – Update

What did you do this week?

I finishing cutting my pattern for a 3rd (and hopefullly last) time:

The pulse sensor seems to be working properly. I determined that I am able to get the best read from the sensor when it is placed on the inside of my wrist.  I think this will work nicely with the design of my jacket. I will put a velcro strap on the inside of the cuff to secure the sensor to the skin.

Describe the problems you encountered.

No major problems this week.

Describe the successes you had.

I was excited to get the pulse sensor working.

Are you on schedule?

I am on schedule.  Originally I had planned to finish the construction of the jacket first, but it made more sense to get the sensors up and running to determine how they will be best incorporated into the construction.

What do you plan to do next week?

Before Thanksgiving break I would like to make sure the proximity sensor works and start sewing the jacket together.


Week 3 – Update

  • What did you do this week? 
I was able to find an example code for the pulse sensor which seems to function properly using the arduino uno.  I will need to do some more work to get the 3 LEDs to communicate with the pulse sensor.
I also received the proximity sensor, new fabric and LEDs.
I also discussed with Emelia how to sew in a pocket on the back of the jacket in order to hide the Lilypad.
  • Describe the problems you encountered.
  • I have to scrap the pattern pieces I already cut due to the fire incident….
  • Describe the successes you had.
  • The basic code for the pulse sensor seemed to work properly
  • Are you on schedule?
  • While I originally planned to work on the jacket construction this week, I played around with the sensors instead so I think I am still on schedule.
  • What do you plan to do next week?
  • I plan to cut my new pattern and start assembling the jacket.

Week 2 – Update

This week:

  • Received the fabric, pulse sensor, and LEDs
  • Made alterations to the jacket made of muslin (from week 1)
  • Cut the pattern for the jacket out of the new fabric
  • Determined the number of LEDs (from string lights) needed for the jacket and how they would be positioned on the jacket
  • Ordered the proximity sensor and new LEDs

Problems:

  • The LEDs I ordered (luckily only $0.50) were too large so I am purchasing smaller ones.
  • I am not sure if the LED string lights will work after cutting them.  (Emelia sent sparkfun’s tech support an e-mail)

Successes:

  • Determined which proximity sensor to order.  Looking at an adafruit tutorial with Kevin, it seems as though the proximity sensor won’t be too difficult to get working, especially since they provided an example code. (woohoo!)
  • With alterations, the jacket seems more shapely.
  • Discussed with Emelia some options for attaching the LED string lights to the jacket using reflective ribbon.

I am on schedule and hope to get most the jacket sown and start attaching the LED string lights by next week. 

Smart Jacket

Description:

  • A jacket equipped with lighting elements for increased visibility at night.
  • It will also warn the wearer of activity close behind them such as another runner, biker, or car.
  • The jacket will also collect and display biometric data.

Inspiration – Combining elements for some of the following existing products:

  • Reflective gear
  • Nike Flash (reflective glass beaded material)
  • Nike Fuel Band
  • Heart Rate Monitor

Materials and Costs

  • Fabric: $60
  • LEDs: $10
  • LED string lights: $20
  • Pulse Sensor: $25
  • Proximity Sensor: $28
  • Accelerometer: $15

Concept Art

Steps/Timeline

  • Construct Jacket – Finish by Nov. 25
  • Circuit lighting elements – Finish by Nov. 18
  • Add proximity sensor – Finish by Nov. 25
  • Add heart rate monitor – Finish by Dec. 2
  • Add accelerator – Finish by Dec. 9

Backup Plan

  • Decrease the amount of features incorporated in the jacket
  • Add features to an existing jacket