SAFEBAND – 11/23

  • What did you do this week?

We developed the hardware using the accelerometer and the software and its connection to the server.

  • Describe the problems you encountered

At first we were unsuccessful in wiring the accelerometer to the board.

  • Describe the successes you had

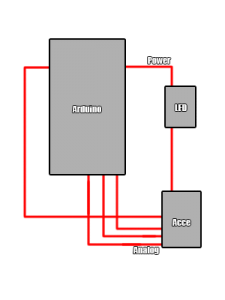
On Thursday class we learned how to wire the 3.3v accelerometer to the 5v Arduino by using a LED as a resistor.

Untitled-1

The app is starting to connect to the server and is synchronizing contacts.

  • Are you on schedule?

We are a little bit delayed on the hardware end. But we are comprehending how things are supposed to work now and everything should be on schedule this next week.

  • What do you plan to do next week?

Wiring the Bluetooth and make the first messages appear on the smartphone app.

Gaming Gloves 11/23

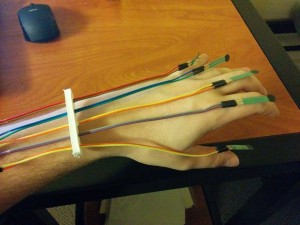
This week we solded the pressure sensors and ordered (again) the bluetooth pin that haven`t reached yet. In the picture below you can see how the pressure sensors were solded to the cables. The next step is to sew up the protection for the fingers which also contains the sensors so the player can press his finger agaisnt almost any surface. We also hope to start the software this week(the only obstacle will be create a program without the bluetooth board to test it).

10822341_740469166007341_1641293816_n

TEB Update 11/23/2014

What did you do this week?

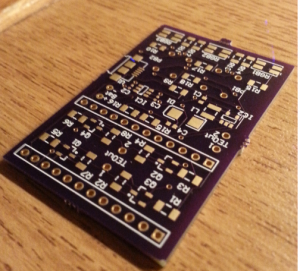
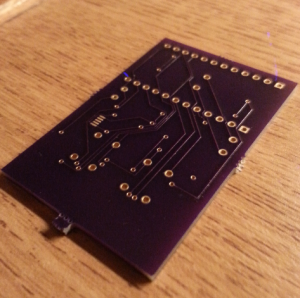
This week, I was not able to do much since I was still waiting for my board to arrive until yesterday.  When I received the board yesterday, I checked to make sure all the components fit on the custom footprints I created and they all did!

front

back

I also discussed with Professor Ponto and Jess (teacher assistant) how I will go about fabricating the wrist strap mounts that attach to the heat sink.  We came to the conclusion that bending square stock will be the best option with the resources I have available to me.

Describe the problems you encounter

No problems this week

Are you on schedule

Assuming I get the board assembled next week, then I am still ahead of schedule

What do you plan to do next week

Next week, I plan to solder the surface mount components to the board and perform a variety of different tests to ensure it is functioning as designed.

11/23 TypeSafe

FInally got to do a bit of work this week.

1) I managed to get the Flora board working on my lab computer, though it is still quite unreliable and needs to be reset all the damn time.

2) To establish I2C communication with my IMU, I had to first make a small modification to the FreeSixIMU library. Apparently in order to get sensor readings from the accelerometer, it is necessary to disable internal pullup resistors on the SDA and SCL pins. FreeSixIMU library did not do this properly for 32u4, which is what Flora uses.

3) Good news end here: data I’m getting from the IMU seems to be junk. While initial readings from the IMU are not always the same, they don’t change at all as I move the IMU around. Also, the device seems to freeze frequently. Assuming the IMU isn’t defective, I suspect wiring issues, some problem with my modifications to FreeSixIMU, or maybe even an issue with serial communication (possibly caused by Flora driver issues.)

My next steps:

1) I plan to switch back to using the LilyPad for my device. Upon further inspection, I have determined there is no reason whatsoever why either LilyPad and LilyPad Simple should lack support for I2C. Moreover, LilyPad doesn’t use the 32u4 chip and therefore doesn’t suffer from Flora’s annoying driver issues. I suspect the reason why I couldn’t get the IMU working on the LilyPad previously was because of the internal pullup resistor thing, and possibly wiring issues (the IMU is very sensitive to those apparently.)

2) Once I get the IMU working properly with the LilyPad, I will be able to start getting sensor data and implementing my prototype device.
11/15/2014 TEB Update

  • What did you do this week? 

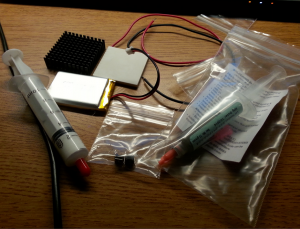
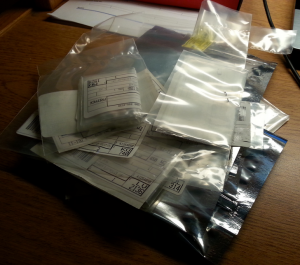
I received all my components from Sparkfun and Digikey, which can be seen below. You may be wondering whats in the syringes. One is thermal paste while the other is solder paste.

  Comp
Here are all the SMD components in their electrostatic discharge bags (too small to be photographed individually)
ESD components
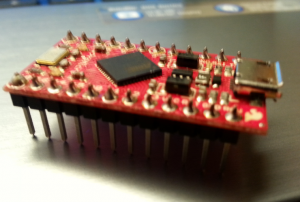
I also soldered headers onto the microcontroller.

I wrote the program for device as well, which can be found here

  • Describe the problems you encountered

One challenge I ran into when soldering the headers  to the microcontroller board was ensuring that the headers were aligned perfectly perpendicular to the board.  This was very important because if they were not perpendicular, it may not fit in the socket on the custom PCB.  I solved this problem  by just soldering one pin to the PCB and then I could adjust it as needed by just applying heat to that one connection.

1

  • Describe the successes you had

One success I had was completing the program that the Thermoelectric Bracelet will run.  Professor Ponto verified that there weren’t any blatant errors so I consider that a success. Of course, there will most likely some small debugging errors that I will have to deal with, but the foundation is there.

  • Are you on schedule?

I am actually currently ahead of schedule because I initially overestimated the time it would take to ship my board. I received an email saying that three PCBs should be here on Friday.

  • What do you plan to do next week?

Next week, I plan to solder the surface mount components to the board and perform a variety of different tests to ensure it is functioning as designed.

Gaming Gloves Update

Hey guys!

This was a hard week for our project because of two things, our Bluetooth module was not delivered and we decided that we would use force sensitive resistors instead of Velostat. The good part is, the force sensitive resistors were already delivered and we already know how to use them after a few test.

So I hope that in the end of this week we will already have a prototype of our project!

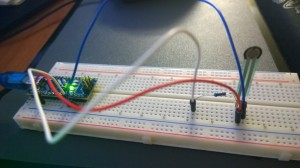
Here are two pictures that I took from my tests with the resistors:

The Circuit:

WP_20141117_01_13_43_Pro

Some of the results from the test:
test1


Emma and Andrew- Jacket Update

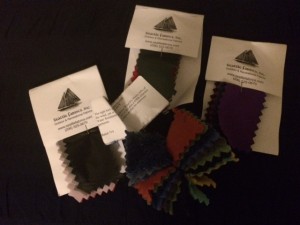
Emma- The materials we ordered finally came in this week! We received a ton of fabric samples to choose from and are planning to make a final decision on Tuesday. We also began creating a muslin of the jacket (a test garment made out of inexpensive fabric). This has been a little challenging and time consuming because I don’t have a ton of experience with draping, let alone menswear, but I feel confident that I will make a lot of progress on it in this upcoming week. As long as I make that kind of progress this week, we should be on schedule!

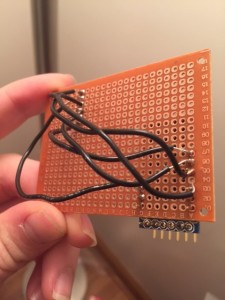
Andrew- I’ve continued to have a bit of trouble prototyping the circuit on the breadboard, so this week I soldered the components to a circuit board, and look forward to testing it further next week.

fabric

board

11/16 : Lights-up Dress weekly post

  • This week I was working on the “Shift Register”. I found the code related to the shift register on the adafruit learning page.  I used the borad to connect the shift register, 8 leds together and I finally connectted to the  lilly pad. And I run the program to see that it works or not. I had problems with the programming the code. Although, the basic code that I got from adafruit worked perfectly, when I changed the codeto make the different pattern the code wasn’t working. I think it is because of the “bitset” that I wasn’t sure about. I think I am little bit behind on my sechedule because I was sick on Tuesday and I missed one class period. Also, I think dealing with the shift register and accelerometer will take more time than I thought. My plan for next week is that I want to finish programming the shift register and start with the accelerometer.