All posts by jeeyoung

Lights-up Dress Final Post

사진 1 (3)사진 2 (3)

Lights-up Dress


  • Describe what your project does and how it works

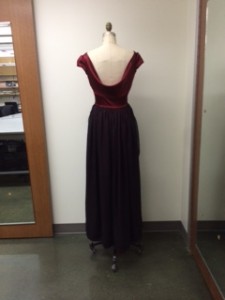
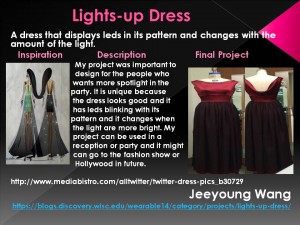
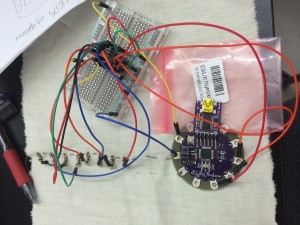
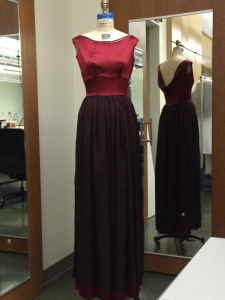
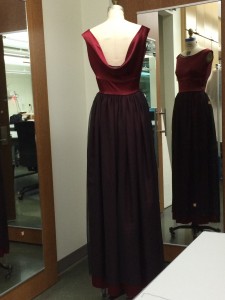
My project was Lights- up Dress and I design my project for people who want more spotlights in the party. Lights-up Dress displays leds in its pattern and changes with the amount of the light.  Dress was having leds hooked up to the shift registersand light sensor. First leds will blink by its order and when the light hits the light sensor, leds will start blinking faster.

  • What are your overall feelings on your project? Are you pleased, disappointed, etc.?

I am quite happy with my overall project  because this technology area was the first time that I entered and I cannot believe that I did this much of the technology work at first time. I know that there were many problems that I had and I need to learn more to proceed my project but, I am pleased with my project for now.

  •  How well did your project meet your original project description and goals?

My final dress did not meet my initial project very well. My original project was that leds will going to blinks by its order and patterns will change when person have a specific movements.  My original project needed the accelerometer but I was having many problems and I couldn’t figured out how to work with it ,so I changed my input to the light sensor which was my backup plan. However, the final project did met my original project goals which was the dress is for people who wants spotlight in the party.

  • What were the largest hurdles you encountered?  How did you overcome these challenges?

The largest hurdles I encountered were the programming the code and dealing with the accelerometer.  Programming the code needs the overall knowledge of the technology and engineering and I wasn’t the person who was familiar with technology and engineering because this was the first time that I had chance to learn about technology.  Therefore, programming the code was one of my hardest part throughout the semester. However, I asked help from Professor Kevin and TA Jess to figure out the programming and I think I overcame little bit of the programming the code. But, I think I need to study and research more to be more familiar with the programming to program new materials in the future. Another hardest part that I encountered was dealing with the accelerometer. It is because accelerometer did not give me the proper information when I was trying to programming the code and I wasn’t sure the accelerometer was working or not. So, I couldn’t overcome with this problem and I changed the input from the accelerometer to the light sensor which was my backup plan.

  •  If you had more time, what would you do next? 

If I had more time, I want to spend more time to sew leds, shift registers and light sensor carefully to my dress to not make a shorts and I want to add more leds to my dress. Also, I want to change my leds to neopixels because my leds took lots of the spots to sew. And I want to change the position of the light sensor to shoulder to catch more lights.
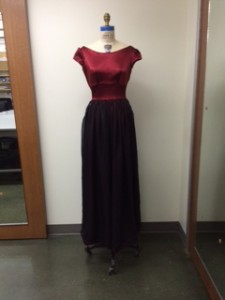
12/7 : Lights-up Dress Weekly Post

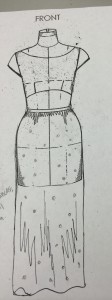
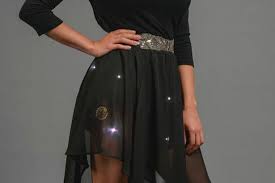
This week I was working on the sewing the shift regiesters and leds to my dress. I will use two pattern in the picture below to sew the leds and  I will use two blinking patterns that I found last week and speed of them. This week I did not had problems to solve these patterns without that I couldn’t control sewing speed  because the dress is so long  and the leds are very small. I think that the size of leds are the problems because they are really small so it will not be that recognizable when I have only  some of leds. I think I am little bit behind on my sechedule because I think dealing with the shift register and accelerometer will take more time than I thought and I have no idea how to work throgh them by myself. My plan for next week is that I want to start programming the accelerometer and accelerometer with shift register together.


사진 1 (1)사진 2 (1)

11/30 Lights up Dress Weekly Post

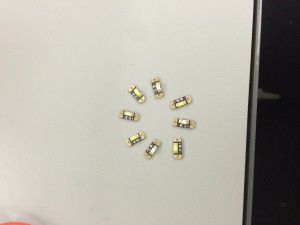
This week I was working on the “Shift Register” again.  I was keep working same thing from the last week but added little more. I was founding how many leds can be light up with one shift register with the equal power and how many patterns that I can create from the shift regiester.  Same as last week, I used the borad to connect the shift register, 8 leds together and the  lilly pad. After I sew and connected each other, I run the program to see that it works or not. And I finally figured out that I can use two blinking patterns and speed of them. This week I did not had problems to solve these patterns without that I cannot control the leds individually. I think that it is the problems with the programming the code but, I don’t really know how to solve that problems. So, I think my dress will only have two blinking patterns with different speed. I think I am little bit behind on my sechedule because I think dealing with the shift register and accelerometer will take more time than I thought and I have no idea how to work throgh them by myself. My plan for next week is that I want to start programming the accelerometer and accelerometer with shift register together.

http://youtu.be/kTyIGkHyD14

http://youtu.be/VxULorsW7BU


11/23-Lights up Dress Weekly post

I was working on the “Shift Register” again. I was founding how many leds can be light up with one shift register because last week when I was working with the shift register, all the 8 leds aren’t turned on and when the leds truned on the power wasn’t equal between all the leds. Same as last week, I used the borad to connect the shift register, 8 leds together and  the  lilly pad. I wasn’t run the program because I just wanted to know  how many leds can be light up equally with one shift register. So, I just connected to the computer for the power. The problem I had this week was that I might not able to make the pattern that I want to make because I cannot really control the leds individually.  But, I finally figured out how to trun on all the leds equally. I think I am little bit behind on my sechedule becauseI think dealing with the shift register and accelerometer will take more time than I thought. My plan for next week is that I want to finish programming the shift register and start with the accelerometer.


picture1


11/16 : Lights-up Dress weekly post

  • This week I was working on the “Shift Register”. I found the code related to the shift register on the adafruit learning page.  I used the borad to connect the shift register, 8 leds together and I finally connectted to the  lilly pad. And I run the program to see that it works or not. I had problems with the programming the code. Although, the basic code that I got from adafruit worked perfectly, when I changed the codeto make the different pattern the code wasn’t working. I think it is because of the “bitset” that I wasn’t sure about. I think I am little bit behind on my sechedule because I was sick on Tuesday and I missed one class period. Also, I think dealing with the shift register and accelerometer will take more time than I thought. My plan for next week is that I want to finish programming the shift register and start with the accelerometer.


11/9 Weekly post for Lights-up Dress

This week I got materials that I ordered from Adafruit last week.

  • ADXL335 – 5V ready triple-axis accelerometer (+-3g analog out)
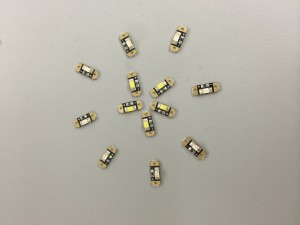
  • ž13 x Adafruit LED Sequins – Warm White & Ruby Red
  • žShift Registers
  • žHook-up Wire
  • žConductive Thread

Fristly, I reaserched on the internet about what is the accelerometer and shift register and how they works.  And then I tried to work with the 5V ready triple-axis accelerometer(+-3g analog out). So, I used conductive thread to sew accelerometer and lilypad to a piece of the fabric and tried wheather it was working or not throgh programming. However, I did not get the result that I wanted to have and it seems not working which I think maybe it is the connection problem. Therefore, next week I will tried to soldering it rather sewing and see if I got a better concultion.

ž


11/2 Lights-up Dress

Project Title – Lights-up Dress

  • Project Team Member – Jeeyoung Wang
  • Description of what you are going to do –  žLEDs blinks when a person have the specific movements.žMake the different pattern of LEDs’ blinking to match the each of the proper and different movements.
    1. Person Turns- LED make patterns and blinks from top to bottom until stops.
    2. Person Walks- LED blinks one by one in order & LED keep blinks from top to bottom.
    3. Person Stops – Led stops.


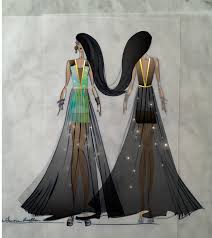
  • Concept Art
  • 사진
  • 사진 1사진 2


  • Description of what inspired this project
  • images1YM72XWNimagesPDJC6VB5


  • Description of Materials you plan to use along with the costs for these materials –
  1. žADXL335 – 5V ready triple-axis accelerometer (+-3g analog out)- $14.95
  2. ž13 x Adafruit LED Sequins – Warm White & Ruby Red -130EA – Maximum $100
  3. Shift Registers – $20
  4. žHook-up Wire – $10
  5. žConductive Thread – $20
  6. žLilypad
  • Backup Plans / Fallback plans –žWhen LEDs effected by the environment[Sounds and Lights] not a person’s movement.
  • Steps/Timeline – žOct 30 : Garment will be doneNov 4 : Decide all the materials and orderžNov 6 : Research about the materials & programming                                 žNov11 ~ 18 : Work on sewing the LEDsžNov 2o ~Dec 2: Programming the

                       Accelerometer

    žDec 4~ 9 : Test the programming

    žDec 11 : Ask final Questions & Make the

                   Project Poster

Initial Project Pitch

  1. I want to make a dress that has leds and when a person moves or dances the leds will be on with the random pattern. Also, if I have time than I want to make a flapping butterfly brooch that flaps the wing
  2. I want to work individual because I want to put it in to my protfolio
  3. I feel okay with making clothes and putting leds to the dress and I think I am less confident about the controlling the sensors and making arduino program.


사진

Prework Project

https://youtu.be/Ob2dtZMEpj0

https://youtu.be/61P30aDy13Y

https://youtu.be/3AoZ6rbsjlI

Input: Light Sensor, Button

Output: LEDs, Buzzer, Vibration

Discription: My prework project is that the leds will blink at first, and whenever the highest led blinks the buzzer and vibration will  ring. Also, there is a light senser dealing with the leds, so, when you put the lights on, led will reacts to the light’s voltage and they will turn up.  Of course the button will going to stop everything!