Category Archives: Projects

11/23 TypeSafe

FInally got to do a bit of work this week.

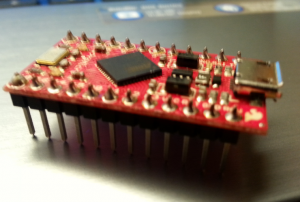
1) I managed to get the Flora board working on my lab computer, though it is still quite unreliable and needs to be reset all the damn time.

2) To establish I2C communication with my IMU, I had to first make a small modification to the FreeSixIMU library. Apparently in order to get sensor readings from the accelerometer, it is necessary to disable internal pullup resistors on the SDA and SCL pins. FreeSixIMU library did not do this properly for 32u4, which is what Flora uses.

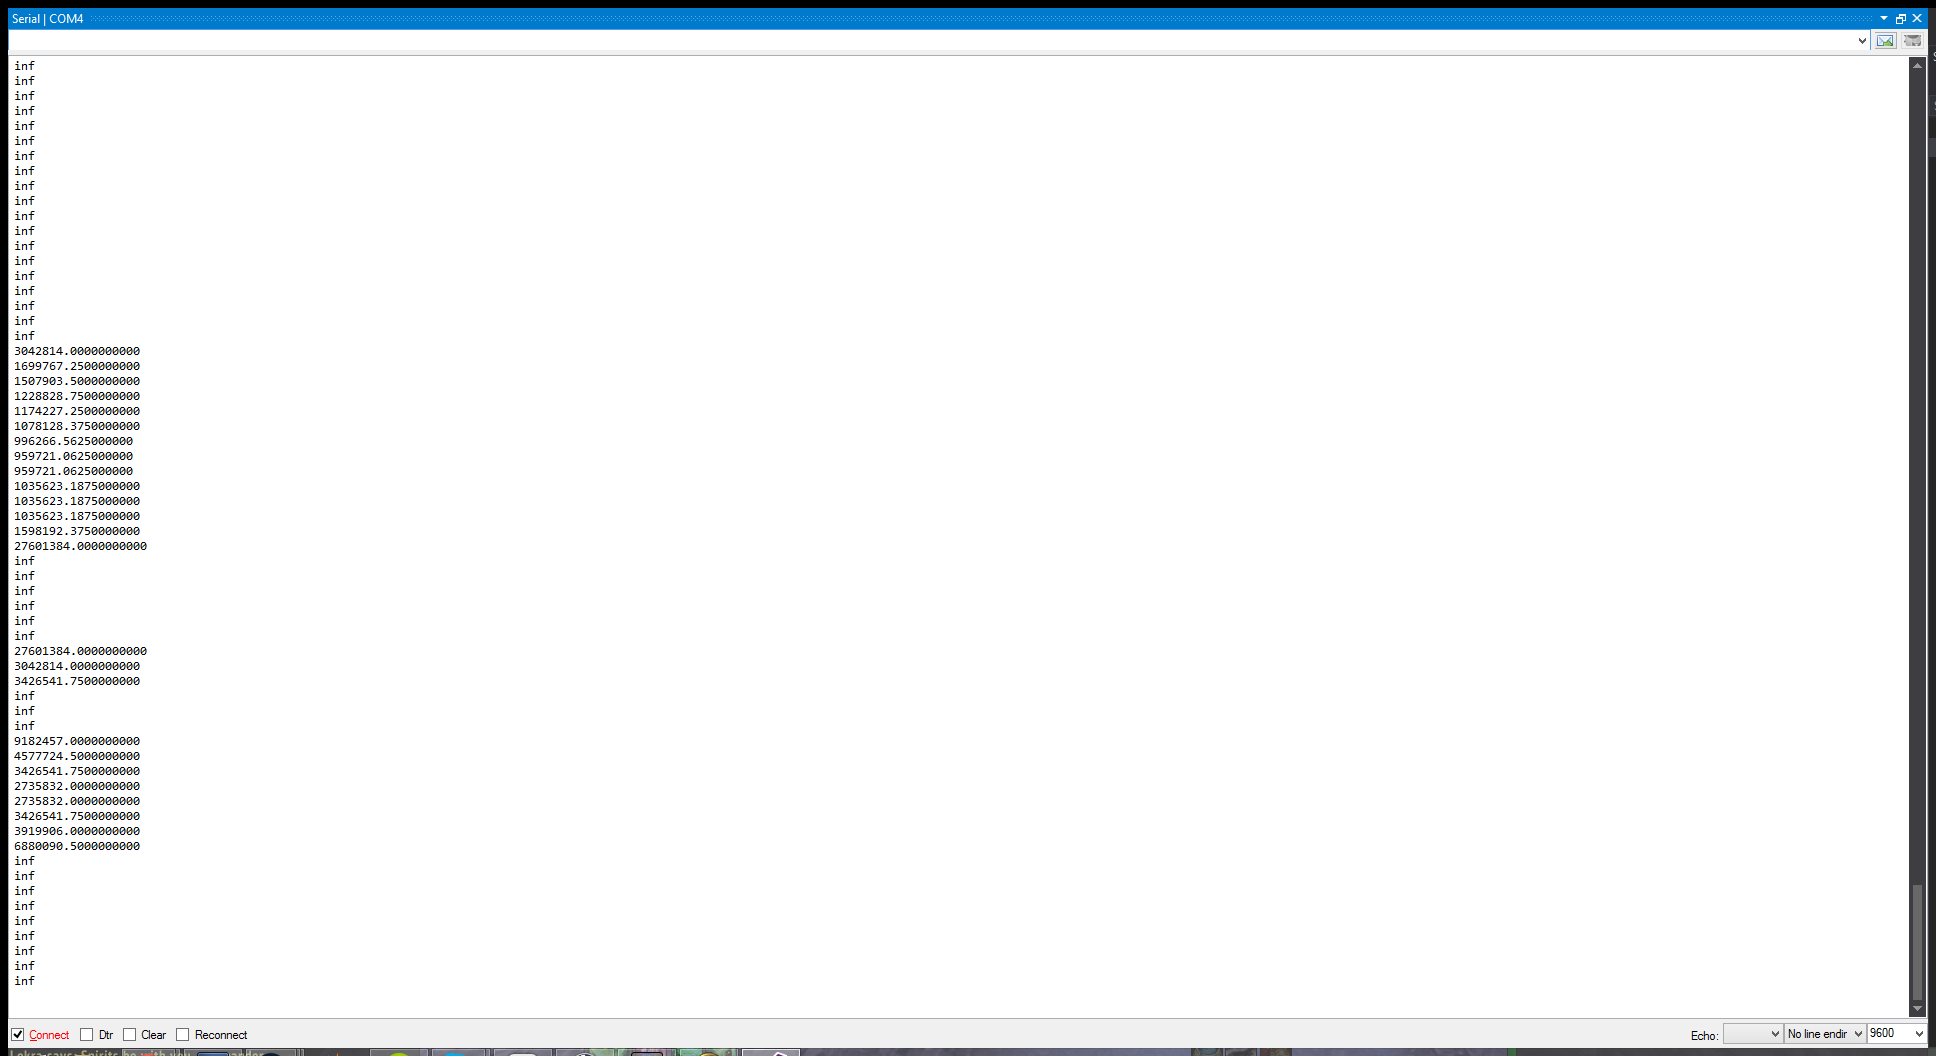
3) Good news end here: data I’m getting from the IMU seems to be junk. While initial readings from the IMU are not always the same, they don’t change at all as I move the IMU around. Also, the device seems to freeze frequently. Assuming the IMU isn’t defective, I suspect wiring issues, some problem with my modifications to FreeSixIMU, or maybe even an issue with serial communication (possibly caused by Flora driver issues.)

My next steps:

1) I plan to switch back to using the LilyPad for my device. Upon further inspection, I have determined there is no reason whatsoever why either LilyPad and LilyPad Simple should lack support for I2C. Moreover, LilyPad doesn’t use the 32u4 chip and therefore doesn’t suffer from Flora’s annoying driver issues. I suspect the reason why I couldn’t get the IMU working on the LilyPad previously was because of the internal pullup resistor thing, and possibly wiring issues (the IMU is very sensitive to those apparently.)

2) Once I get the IMU working properly with the LilyPad, I will be able to start getting sensor data and implementing my prototype device.

11/15/2014 TEB Update

  • What did you do this week? 

I received all my components from Sparkfun and Digikey, which can be seen below. You may be wondering whats in the syringes. One is thermal paste while the other is solder paste.

  Comp
Here are all the SMD components in their electrostatic discharge bags (too small to be photographed individually)
ESD components
I also soldered headers onto the microcontroller.

I wrote the program for device as well, which can be found here

  • Describe the problems you encountered

One challenge I ran into when soldering the headers  to the microcontroller board was ensuring that the headers were aligned perfectly perpendicular to the board.  This was very important because if they were not perpendicular, it may not fit in the socket on the custom PCB.  I solved this problem  by just soldering one pin to the PCB and then I could adjust it as needed by just applying heat to that one connection.

1

  • Describe the successes you had

One success I had was completing the program that the Thermoelectric Bracelet will run.  Professor Ponto verified that there weren’t any blatant errors so I consider that a success. Of course, there will most likely some small debugging errors that I will have to deal with, but the foundation is there.

  • Are you on schedule?

I am actually currently ahead of schedule because I initially overestimated the time it would take to ship my board. I received an email saying that three PCBs should be here on Friday.

  • What do you plan to do next week?

Next week, I plan to solder the surface mount components to the board and perform a variety of different tests to ensure it is functioning as designed.

Gaming Gloves Update

Hey guys!

This was a hard week for our project because of two things, our Bluetooth module was not delivered and we decided that we would use force sensitive resistors instead of Velostat. The good part is, the force sensitive resistors were already delivered and we already know how to use them after a few test.

So I hope that in the end of this week we will already have a prototype of our project!

Here are two pictures that I took from my tests with the resistors:

The Circuit:

WP_20141117_01_13_43_Pro

Some of the results from the test:
test1


11/16 : Lights-up Dress weekly post

  • This week I was working on the “Shift Register”. I found the code related to the shift register on the adafruit learning page.  I used the borad to connect the shift register, 8 leds together and I finally connectted to the  lilly pad. And I run the program to see that it works or not. I had problems with the programming the code. Although, the basic code that I got from adafruit worked perfectly, when I changed the codeto make the different pattern the code wasn’t working. I think it is because of the “bitset” that I wasn’t sure about. I think I am little bit behind on my sechedule because I was sick on Tuesday and I missed one class period. Also, I think dealing with the shift register and accelerometer will take more time than I thought. My plan for next week is that I want to finish programming the shift register and start with the accelerometer.


SafeBand – 11/09

Week’s Accomplishments:


This week we started to develop our mobile application for our project. We’re using a backend framework  and cloud storage called Firebase (www.firebase.com). This will save us a lot of time because we will not need to develop our own backend REST API.


We are also using a project management system called Trello( www.trello.com). Using this tool we can keep track of our work and schedule our next steps.


We finally bought all the hardware that we will need for our prototype, it included:

  • Arduino pro Mini 328 – $10,00
  • Accelerometer ADXL 335 – $15,00
  • Bluetooth device – $25,00


Problems:

We were planning to use a pulse sensor, but we figure out that most of them just works when you put the device on the tip of the finger or the device required a really precise position at the wrist to work.

Due to this problem we decided to change the pulse sensor for an accelerometer to detect falls. We are planning to detect when someone falls and stay on the floor for more than 10 seconds, if it happens we will send an alert e-mail at the same way as if someone had pressed the button.


Next week:

We are planning to finish the basic features from the mobile application and if the hardware arrives we will test if everything is working fine making sure that we can do everything that we want.

Project Post 11/9

We have spent most of this week waiting for things to come in the mail so it has been a little anticlimactic. Without being able to see and feel fabric it’s hard to know the exact material we’ll want to use for the jacket. Because of this we ordered sample packs of Nylon, Ultrex, and Polartec Power Shield from a fabric supplier called Seattle Fabrics. Once those come in we’ll be able to make a pretty quick decision about what material we need to order.
We also ordered our materials on the electronic end. The Arduino Pro Mini and headers have arrived, and lights, and accelerometer should be here shortly. Also, We have already started writing the code for the computer.

Everything should be in by sometime next week so we’re excited to really get started building!

Gaming Gloves project week 2

This week we learned more about the behavior of the velostat fabric. It is very sensible and we need to use it with neoprene to get better results. Our Bluetooth board didn’t arrive yet so we could not use it to start creating the code (we need to do some tests with the board). The seller sent us an email saying that we are supposed to receive the board in the next Tuesday. We didn’t met any cute animal to take pictures by the way :(.

11/9 TypeSafe

This week involved a lot of futile effort to get some data out of my IMU. I’m using a library called FreeSixIMU to get 6DOF tracking data.  The library in turn uses Wire library to communicate with the hardware using I2C. However, when trying to do this on my LilyPad simple board, Wire library fails to communicate with the IMU, possibly because the board does not support the SCL and SDA pins needed for I2C. I then tried to achieve the same on a second microcontroller, Adafruit Flora (which exposes the required pins). I barely managed to get Flora working on my machine (barely – Arduino likes to freeze a *lot* when using it), but still had no luck getting any kind of meaningful response from the IMU.

I plan to take the following steps to resolve or work around these issues:

1) Do a bit more testing with the Flora – I need to check whether I can get a simple example working on it, just to ensure that basic features like serial communication work properly.

2) Try the IMU on somebody else’s board/machine to make sure the thing isn’t defective.

3) I’m planning to reformat/reinstall the OS on my laptop, for unrelated reasons.  If the problem is on the software side (quite possible, given all the trouble I had installing Flora), maybe it’ll go away.

I don’t have any tangible results to show for this first week, so I’ll instead post a picture of a cat that looks like Hitler:

hitler_car

He’s actually a very sweet cat and not racist at all. I met him on the grounds of Dolmabahce palace in Besiktas, Istanbul. There are many stray cats like him around here and they are all very docile. However, he’s the first one I found that resembles a genocidal dictator. I call him “Fluffy the Führer.”

11/9 Weekly post for Lights-up Dress

This week I got materials that I ordered from Adafruit last week.

  • ADXL335 – 5V ready triple-axis accelerometer (+-3g analog out)
  • ž13 x Adafruit LED Sequins – Warm White & Ruby Red
  • žShift Registers
  • žHook-up Wire
  • žConductive Thread

Fristly, I reaserched on the internet about what is the accelerometer and shift register and how they works.  And then I tried to work with the 5V ready triple-axis accelerometer(+-3g analog out). So, I used conductive thread to sew accelerometer and lilypad to a piece of the fabric and tried wheather it was working or not throgh programming. However, I did not get the result that I wanted to have and it seems not working which I think maybe it is the connection problem. Therefore, next week I will tried to soldering it rather sewing and see if I got a better concultion.

ž


11/8/2014 TEB Update

I spent this week reviewing my circuit design because this is a very complex board with traces everywhere so its very easy to make a mistake.  Luckily I did take a second look at it because I caught several faults that would have been detrimental to the functionality of the circuit. I’m hoping I caught all the errors, but realistically, I probably did not and will have to make another board.

With that said, I found this company called Oshpark that fabricates high quality PCBs for a very low cost. I ordered 3 PCBs for $13 including shipping which is phenomenal when it comes to PCB fabrication.  Granted my PCBs are only about an 1″ x 2″, that’s still an amazing deal.

Submitting the PCB was a process in itself.  I had to export all the required Gerber and drill files by Oshpark.

Upon doing that, I ordered all the components from Sparkfun and Digikey.