The Purpose
When initially planning for this class project, every idea I came up with had some component that couldn’t be washed (like a battery), or that required more soldering than sewing (most sensors), alongside some component that could be sewn directly into the garment. This seemed like a general trend in wearable electronics: some electronics can be integrated directly into fabric, but some are not durable or comfortable when subjected to the rigors of daily wear, some cannot be washed, and it may be desirable to remove some, to charge or otherwise manipulate away from the garment. So, that became my project: find a way to interface fabric-unfriendly electronics with the fabric component of the garment, in a durable, comfortable, and aesthetically pleasing way.
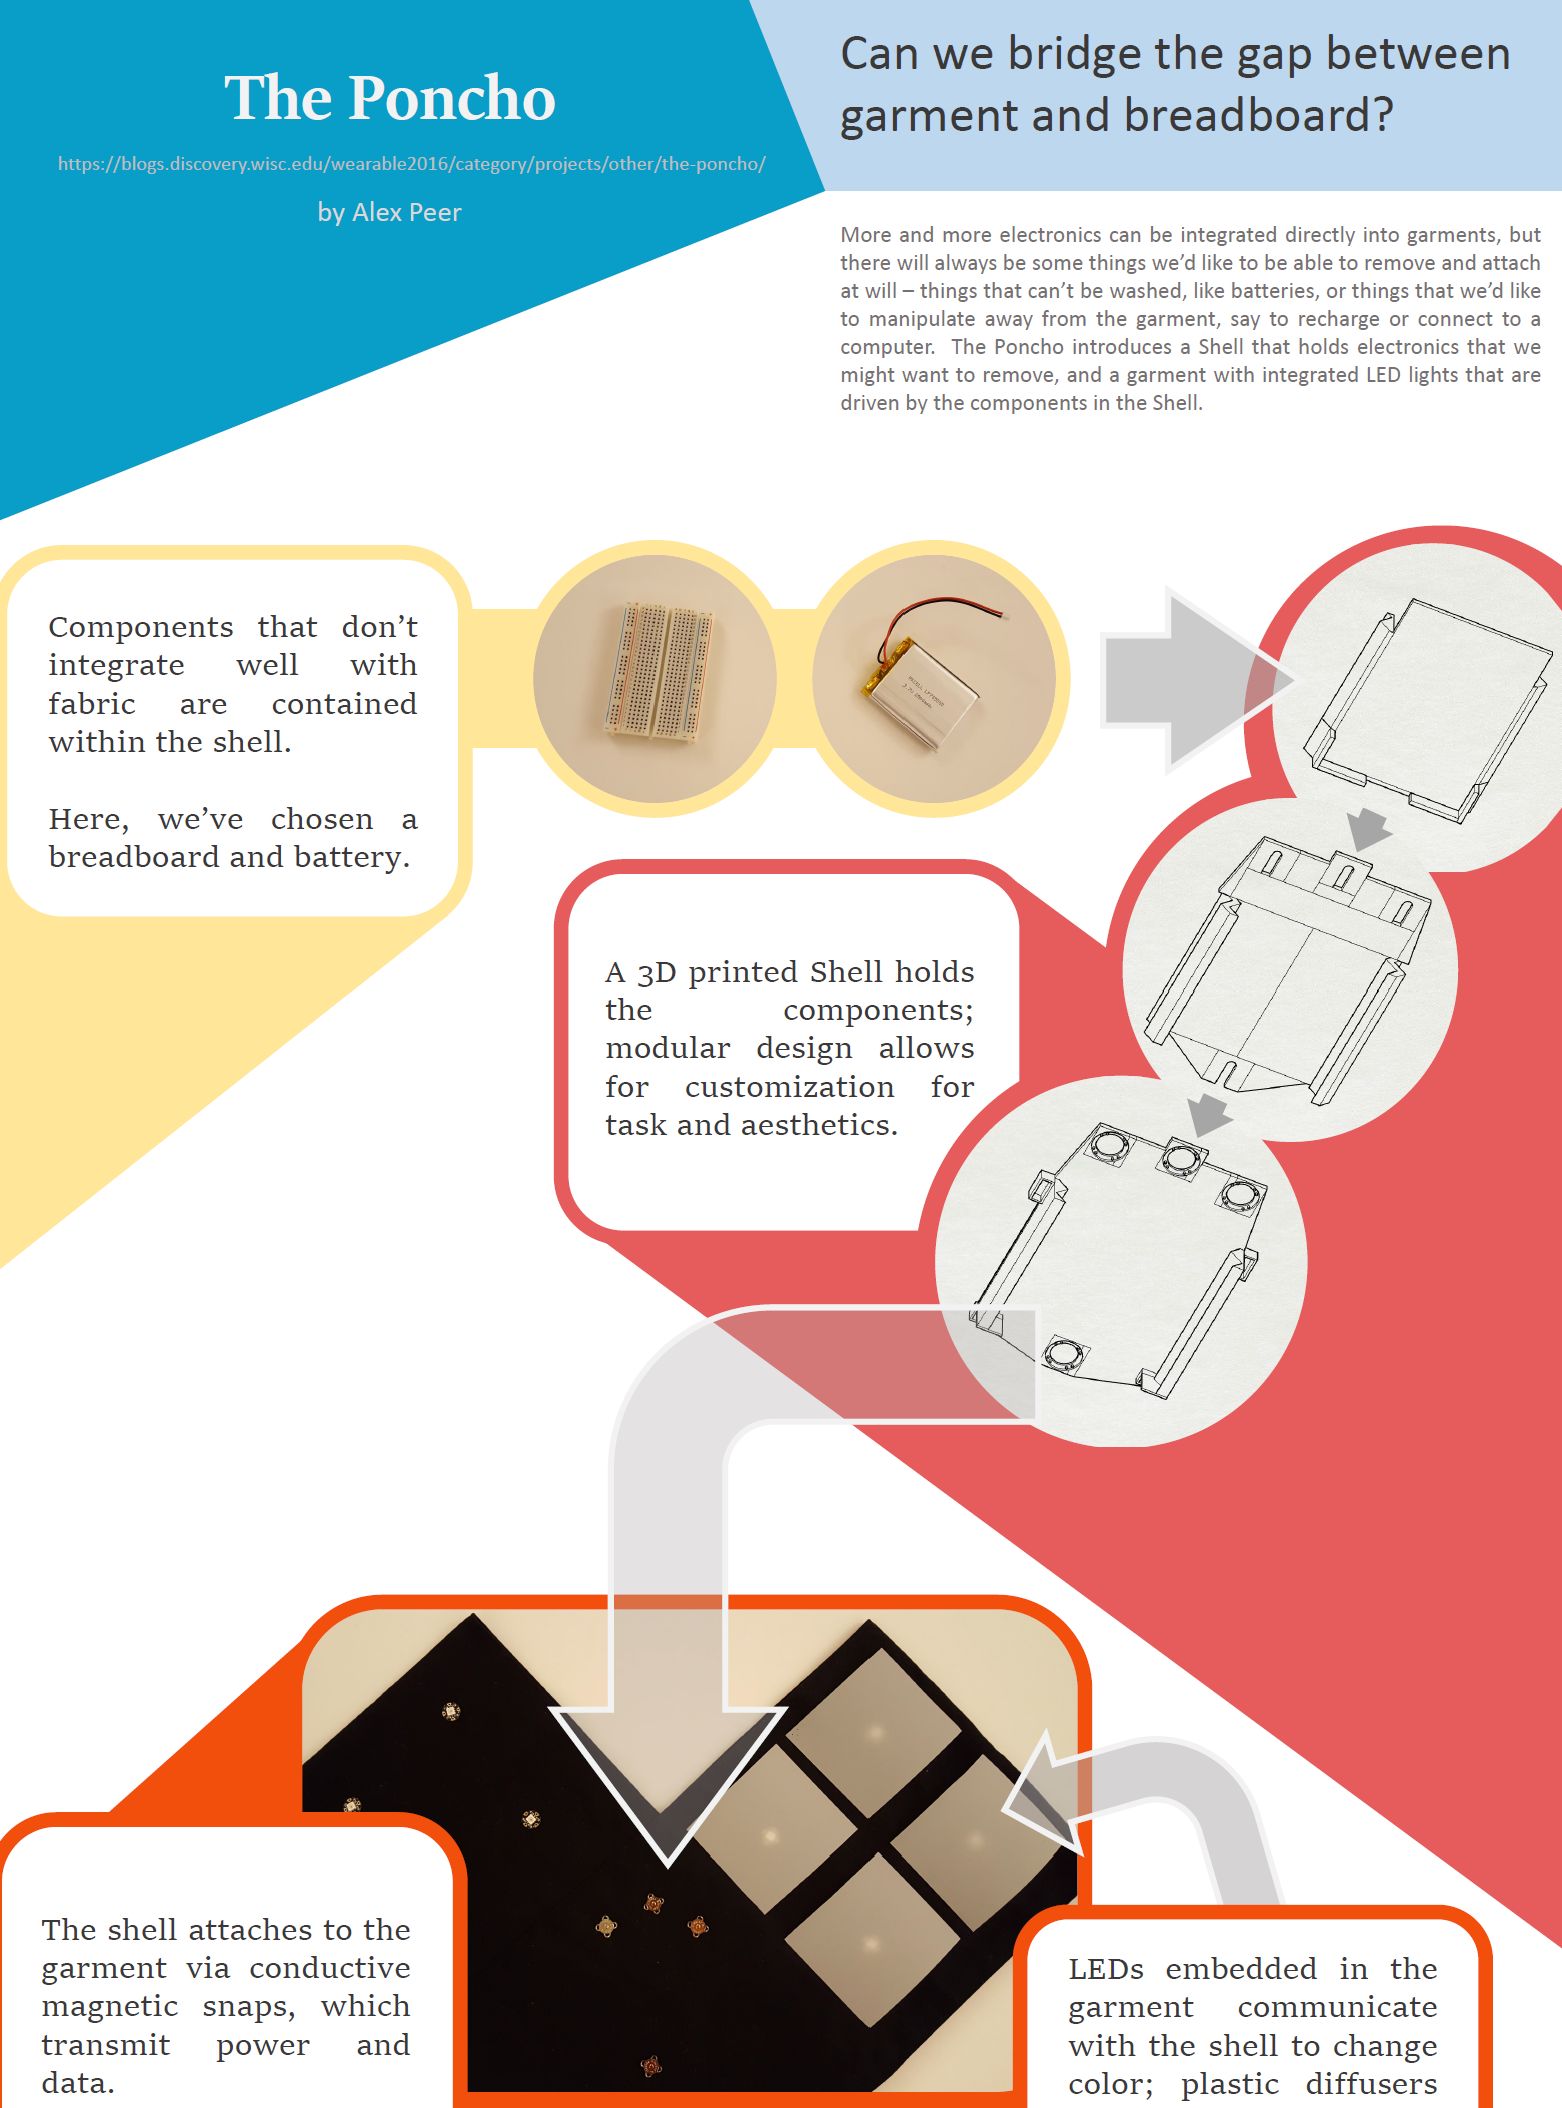
Final Poncho – Dissasembled

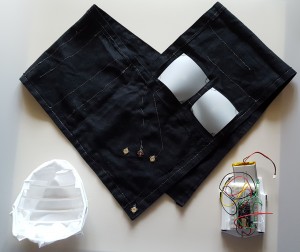
Final Poncho – Assembled
The Product
The Poncho accomplishes this by encasing the removable electronics in 3D printed plastic shells, and using magnetic snaps to attach the shell to the fabric portion of the garment, as well as carry power and data between the in-shell and in-fabric electronics. The shell has a removable cover held on by magnets, allowing easy access to the battery, full breadboard, and microcontroller inside; the fabric portion of the garment contains sewable NeoPixel LEDs, powered and driven by a battery and microcontroller in the shell.
The shell has four snaps — one each for power and ground, and two for data. Having two allows for I2C communication (clock and data); in the final design, only one data snap is used to drive the sewable NeoPixels.
Also, I’ve sewn in some plastic diffusers that sit above the LEDs; shaping and guiding light was a side-interest this semester that I didn’t have so much time to explore, but what’s here works fairly well.
The Reflection
The initial goal (bridging designed-for-wearable electronics and not-) was fairly broad, and while the final product certainly meets it, I’d hoped to squeeze in a bit more: I’d had grand plans of many shells with different purposes, causing the garment to act in different ways when connected (LEDs matching colors when an RGB sensor is attached, or being driven by motion when an IMU is attached). To make these effects interesting, many more LEDs and a few more shells would be needed. However, it takes a long time to design and print shells (7+ hours per full print), and LEDs are expensive, a little power hungry, and take some time to sew in with my meagre skills; scaling the current Poncho up to that grand ideal is feasible, but not within the scope of this deadline. I’d also wanted to experiment more with the aesthetics of the plastic shell’s covers — to demonstrate interchangeable designs — but again, 3D printing took much longer than I’d expected.
Similarly disappointing, I had to switch which side of the magnetic snaps were in the case and which in the fabric at late stage in the project: in early tests it seemed I could solder to the magnets fast enough that they didn’t lose much magnetism, but during final assembly they lost almost all magnetism. Soldering to the non-magnetic half of the snaps worked fine, but the 3D printed cases weren’t shaped to hold them as precisely, and there was no time left to redesign and reprint the case; this means the act of attaching the shell to the fabric is a bit fiddly, where another iteration on the design (likely, affixing the snaps to the plastic using needle and thread) should make it effortless.
But, I’m not completely displeased. My design works, is relatively easy to customize, and is a sound proof-of-concept for how to scale up to more complex arrangements. And as-is, jamming a breadboard onto the fabric makes for fast prototyping.
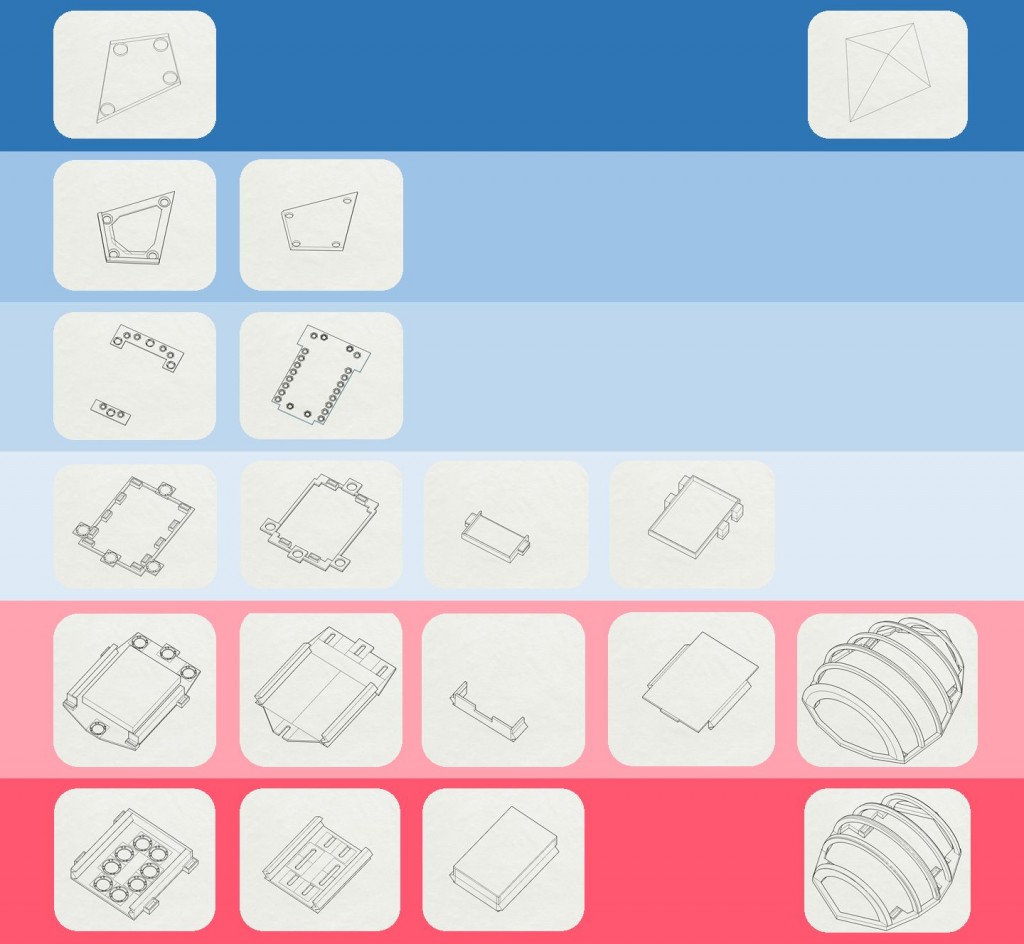
Evolution of shell designs; rough ideas on top, flowing through a variety of attempted fastening schemes — sliding, 3D printed threaded screws, magnets on everything, through to the two final designs that use a combination of slides and magnets. The design seen on the final poncho is the second from the bottom.
The Next
The next iteration has already been planned, and a first test print was completed. This version has two snaps each for power, ground, and both data channels, with each pair connected by wires so that the channel passes through to the other side of the shell. Shielded wires in the shell can safely cross, but conductive thread in the fabric can’t; this in-shell pass-through allows simpler in-fabric circuits designed for multiple shells. There may be more work in deciding how many connections are needed for different purposes, and maybe some standard taxonomy of shells — batteries only need two, an I2C master that also controls NeoPixels and is designed to be chained together needs maybe ten. A shell that has more doesn’t need to use them all, though it takes up more space; one with too few for its purpose doesn’t function at all.
The aesthetics are currently a bit utilitarian; different shell cover designs, different designs for the fabric portion, perhaps interchangeable fabric modules also fastened by magnetic snaps, as well as a fancier array of LEDs … there’s a lot more I’d like to play with here.
There are also other ways to attach things to fabric and carry electricity. Off the top of my head: conductive hook-and-loop, any sort of friction-fit JST-style or socket connector, inductive power and communication together with simple pockets … I’m sure there are more, and their advantages and disadvantages relative to my solution would be worth exploring.
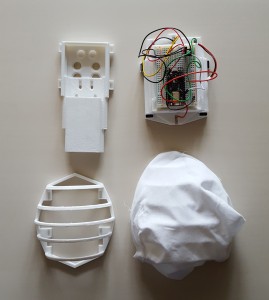
Comparing Shells – Gen 1 on the right, (dissasembled) Gen 2 on the left.