2/09/2015 TEB Update

What I accomplished this week

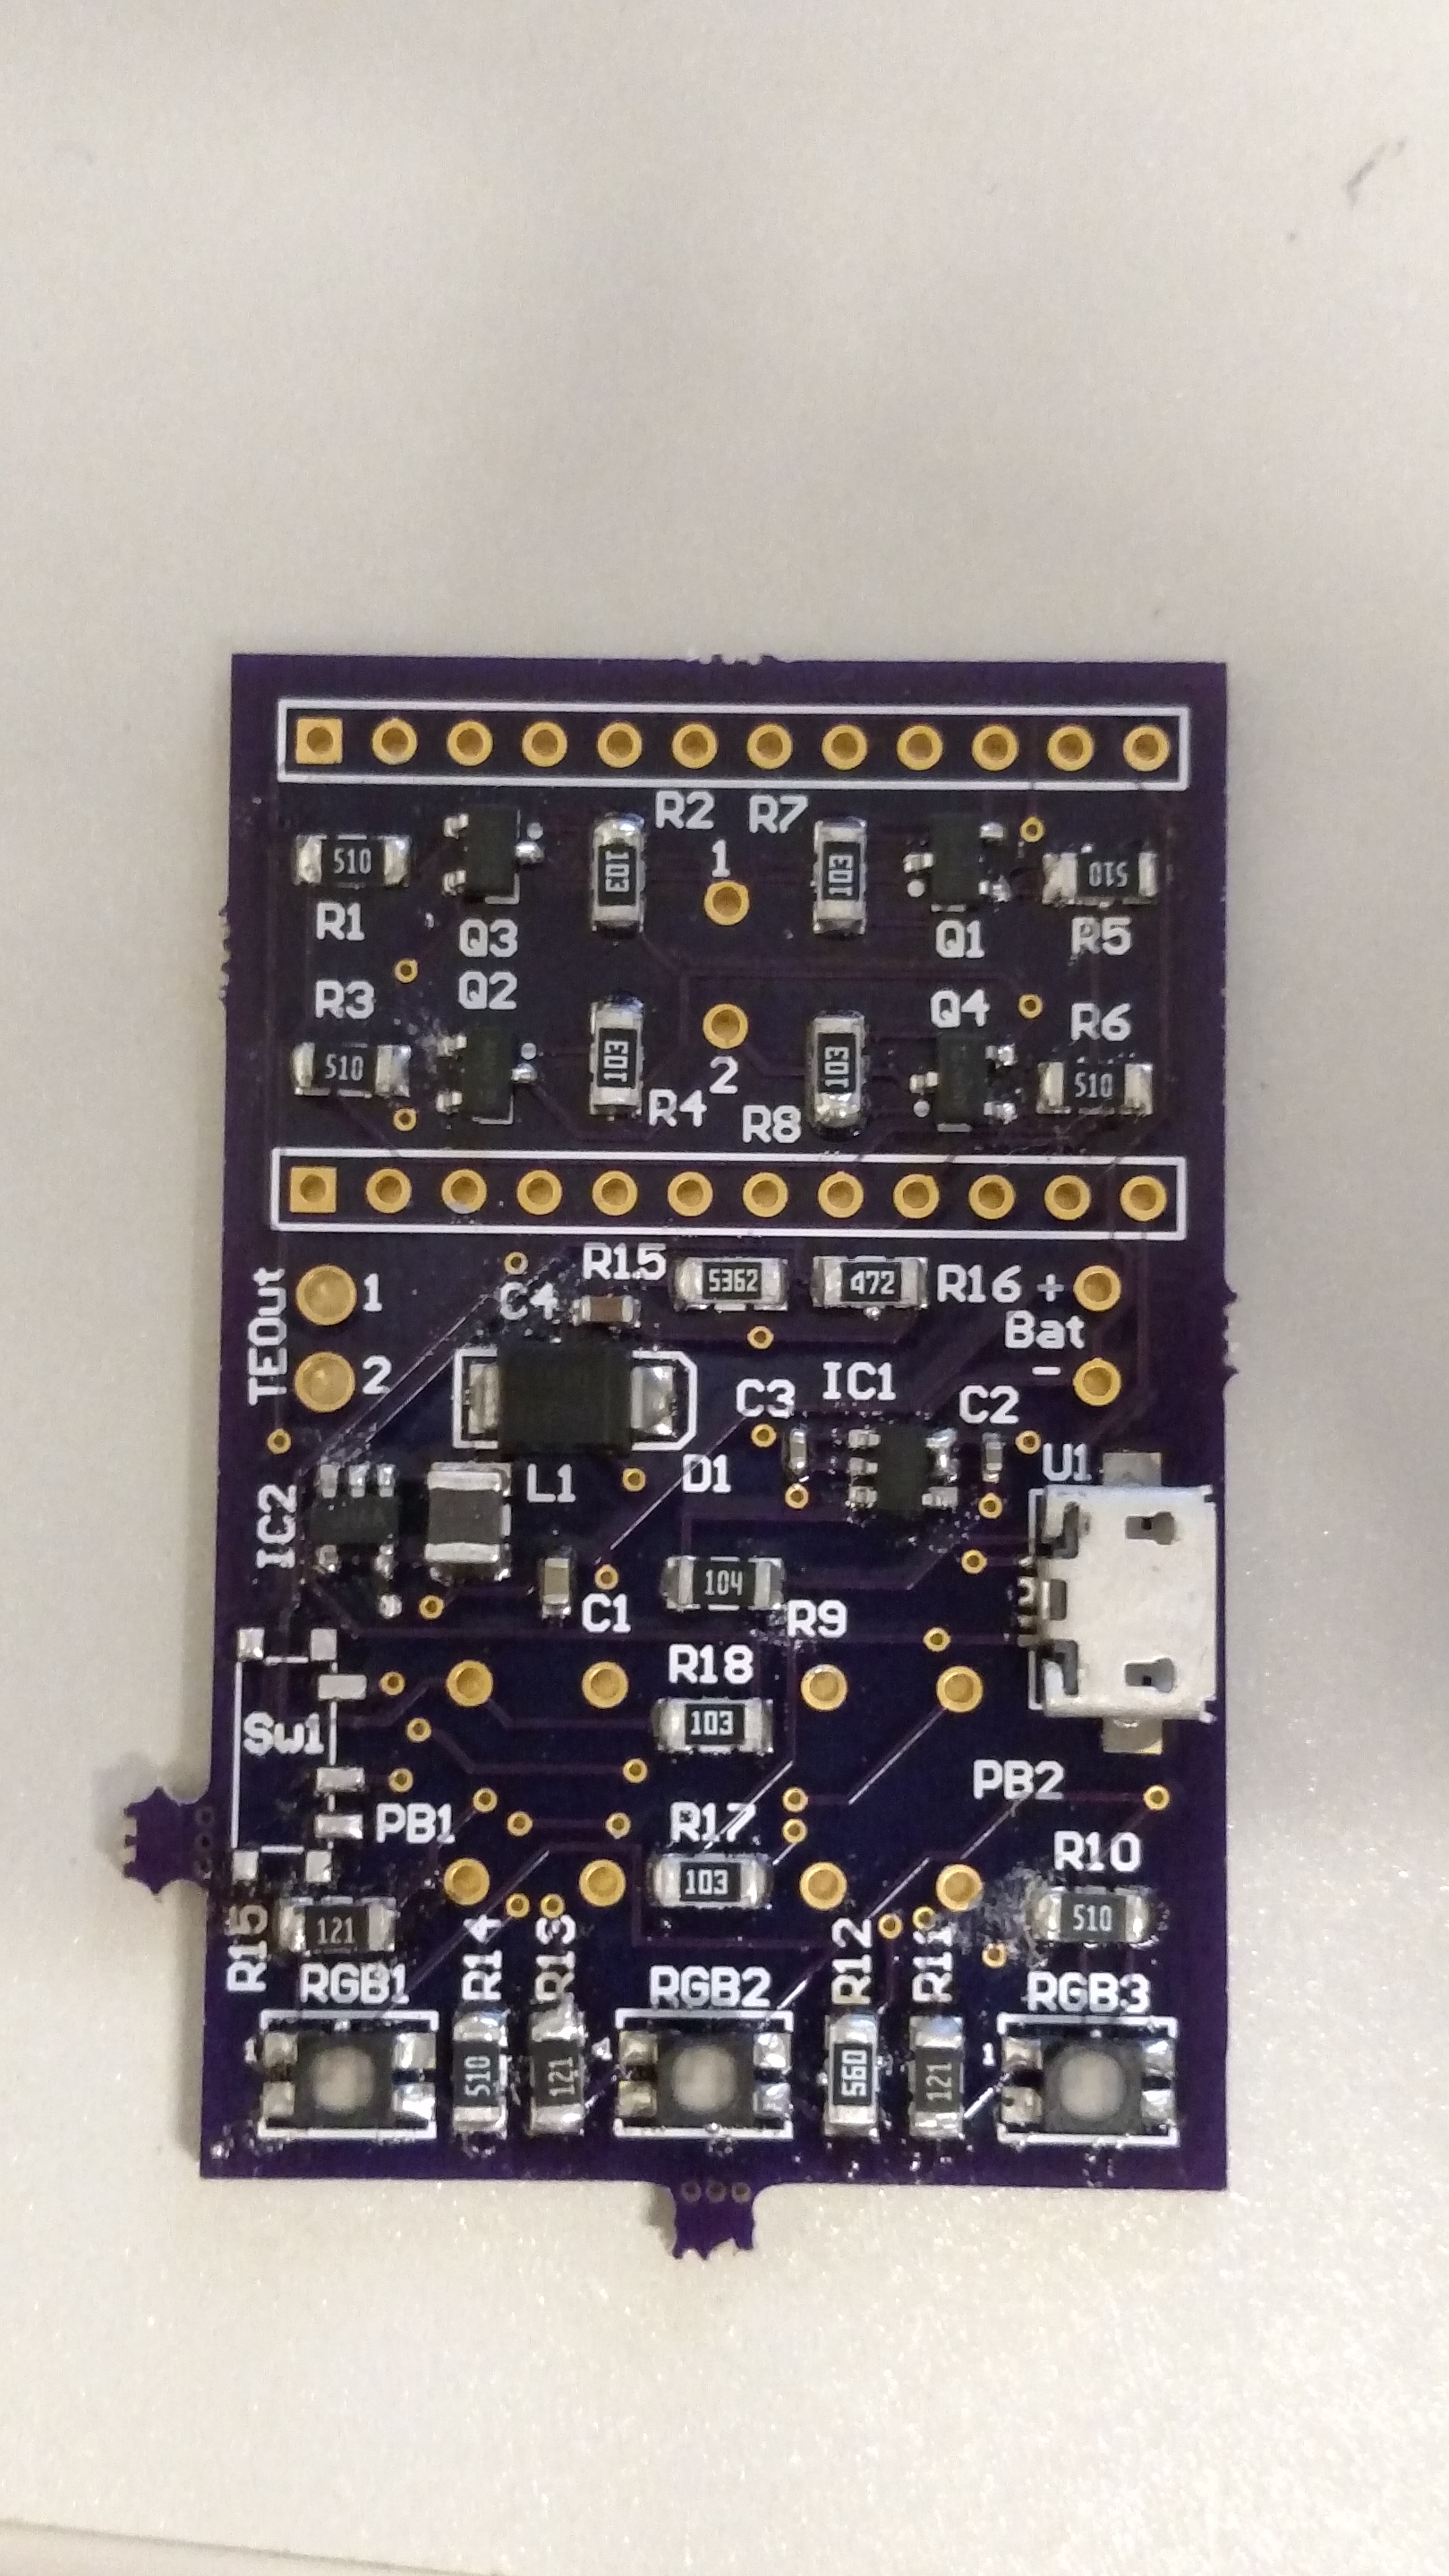
Due to copious amounts of schoolwork and being ill, I did not accomplish as much as initially planned for this week.  I did receive the final components needed from Digikey to complete the process of populating board (SMD slide switch, push buttons, and female sockets for the MCU), which I was able to do without any major issues.

Problems

When soldering the slide switch, I noticed the pad spacing for the switch layout was slightly off.  I was still able to soldering the switch to the board without a problem, but the spacing should be adjusted for the next iteration of the PCB.

There are also small protrusions from the bottom of slide switch that were not accounted for when designing the PCB. For this iteration, I just used a fine Hobby knife to cut these protrusions off the switch, but holes will have to be added to the next PCB design to accommodate these protrusion.

Next Week’s Work

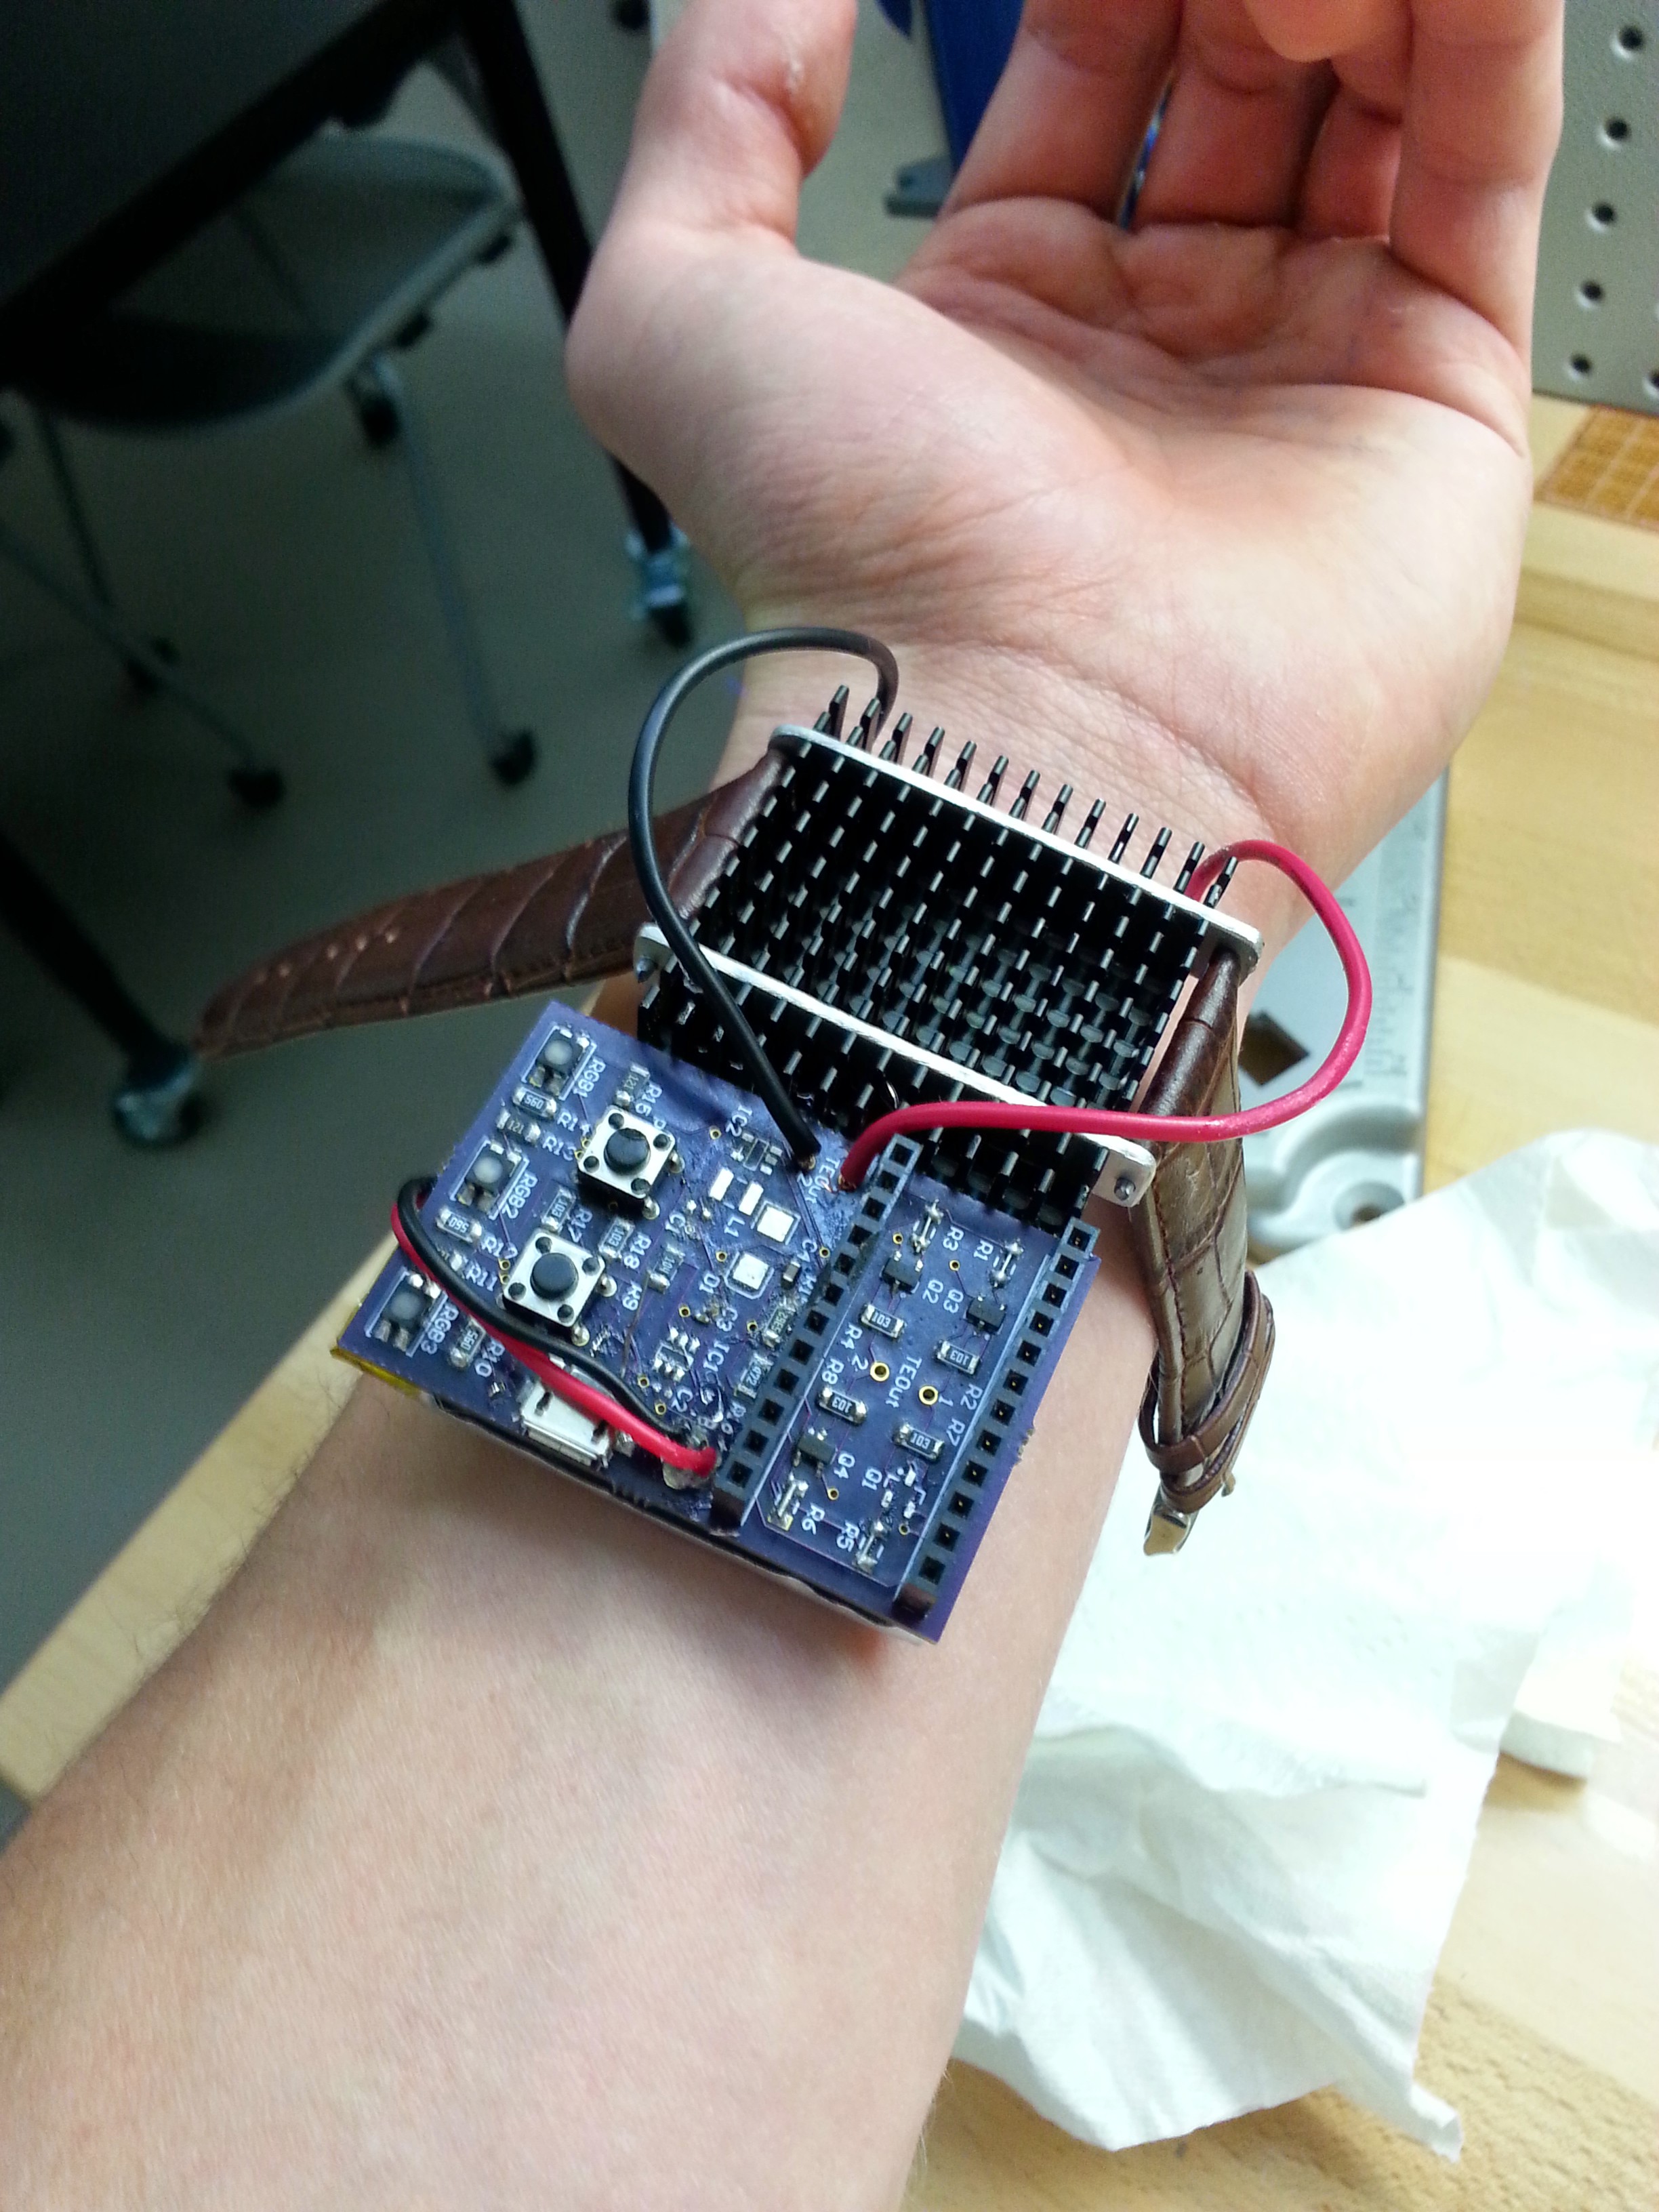
This next week, I would like to test the board to see if it is functioning properly and doesn’t fry any components when you power it uplike the last one did. The main concern addressed with Iteration 1.2 of the PCB was the H-bridge section which is responsible for enabling the voltage to be applied across the thermoelectric cooler in either direction. If it is does work without issue, then the next step will be to start the process of rewriting the code to utilize the hardware interrupts.

2/1/2015 TEB Update

What I accomplished this week

  • Finished moving into the new office
  • Ordered the rest of the equipment and tools needed to complete my research
  • Populated the PCB with all the surface mount components. The process is as follows
    • Apply solder paste to component pads
    • Using tweezers, place components onto pads
    • Preheat oven to 400 degrees Fahrenheit
    • Place PCB in oven and wait a few minutes until you see the components ‘pop’ into place
    • Remove PCB and inspect joints. Use solder wick to remove solder if there is excess amounts and/or solder bridges
    • Clean PCB of remaining flux using toothbrush and isopropyl alcohol

Problems

  • Accidentally snapped a pin off the slide switch which rendered it as useless so I had to purchase more

Next week’s work

  • Solder the slide switch, push buttons and headers to PCB
  • Test PCB for functionality (Any fried components or smoke coming from PCB?)
  • Conduct electrical measurements using multimeter

Below is an image of the board for prototype 1.2

IMG_20150131_132557529

TEB Research Introductory Post

Hello world,

I just thought I’d introduce myself and tell you a little bit about who I am and my research.  My name is Jason Sylvestre and I am currently a freshman studying Electrical Engineering here at the University of Wisconsin-Madison. I will be working under Professor Kevin Ponto’s supervision on a project I started last semester for his Wearable technologies class. What I am trying to build is a thermoelectric bracelet that can be used for personal body temperature regulation.  TEB (stands for ‘Thermoelectric bracelet’) can be thought of as a personal air conditioner that can be used to improve thermal comfort.  Research has shown that when you apply a temperature change to a local part of the body, your brain perceives it as a change in your entire body temperature.  It is this psychological effect that I am trying to leverage with my device.

Currently I am in the process of building the second prototype, but once I have a fully functional device and have optimized pulse duration and intensity, I will perform a user study to see if this device actually makes a difference in personal comfort and plan to publish the results.

What I accomplished this week

I just moved all my equipment into my cubicle in the basement at the Wisconsin Institute for Discovery and began to populate the rev 1.2 PCB with the SMT components. I also gathered a list of supplies needed to complete this second iteration.

Next week’s work

Depending on how quickly Kevin can get me an oven for the soldering procedure, I am going to try to populate the rest of the board. I will also be modifying the code to make use of the hardware interrupts that the buttons are connected to. By utilizing hardware interrupts, there will hardly be any delay now in the program, which was a minor issue with revision 1.1

I look forward to a great semester of research. Thanks

Jason Sylvestre

Below is an image of prototype 1.1

20141210_181231