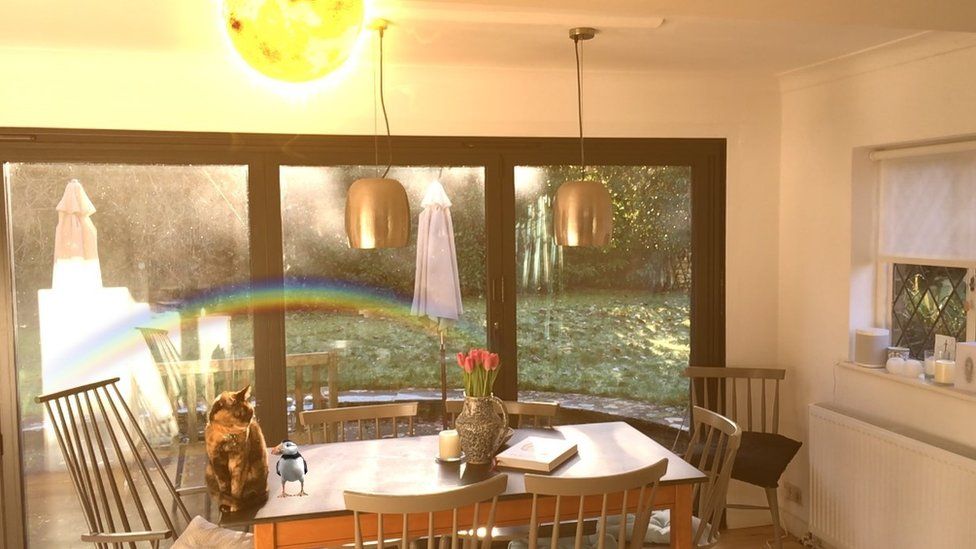
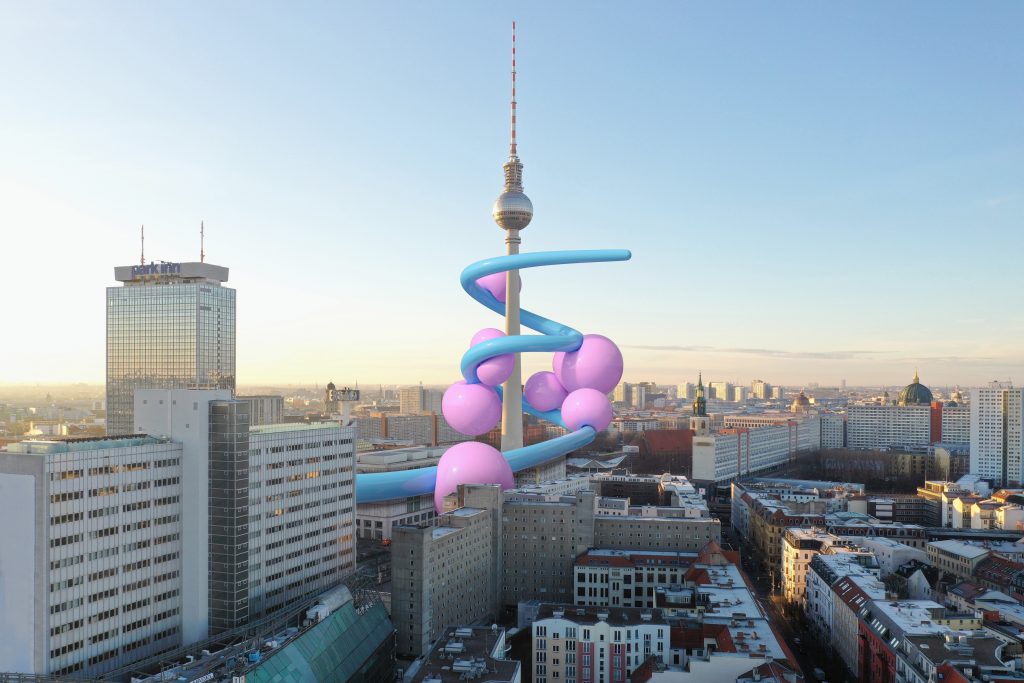
Weekly accomplishments: This week I focused on starting to research what already exists in the AR space. I’ve been mostly drawn to the usage of AR in the fine art world and how it’s transforming gallery spaces, but something else that stood out to me was the art of Olafur Eliasson who created experiences for people to enjoy in their homes during the pandemic. There is an article of note here: Augmented reality art: Where your home becomes the gallery – BBC News
I’ve also been finding some great tutorials on how to get my workflow set up in AR.js and getting a better idea of what I’ll need to get started. It looks like I should be able to host the project for free on a website called glitch.com
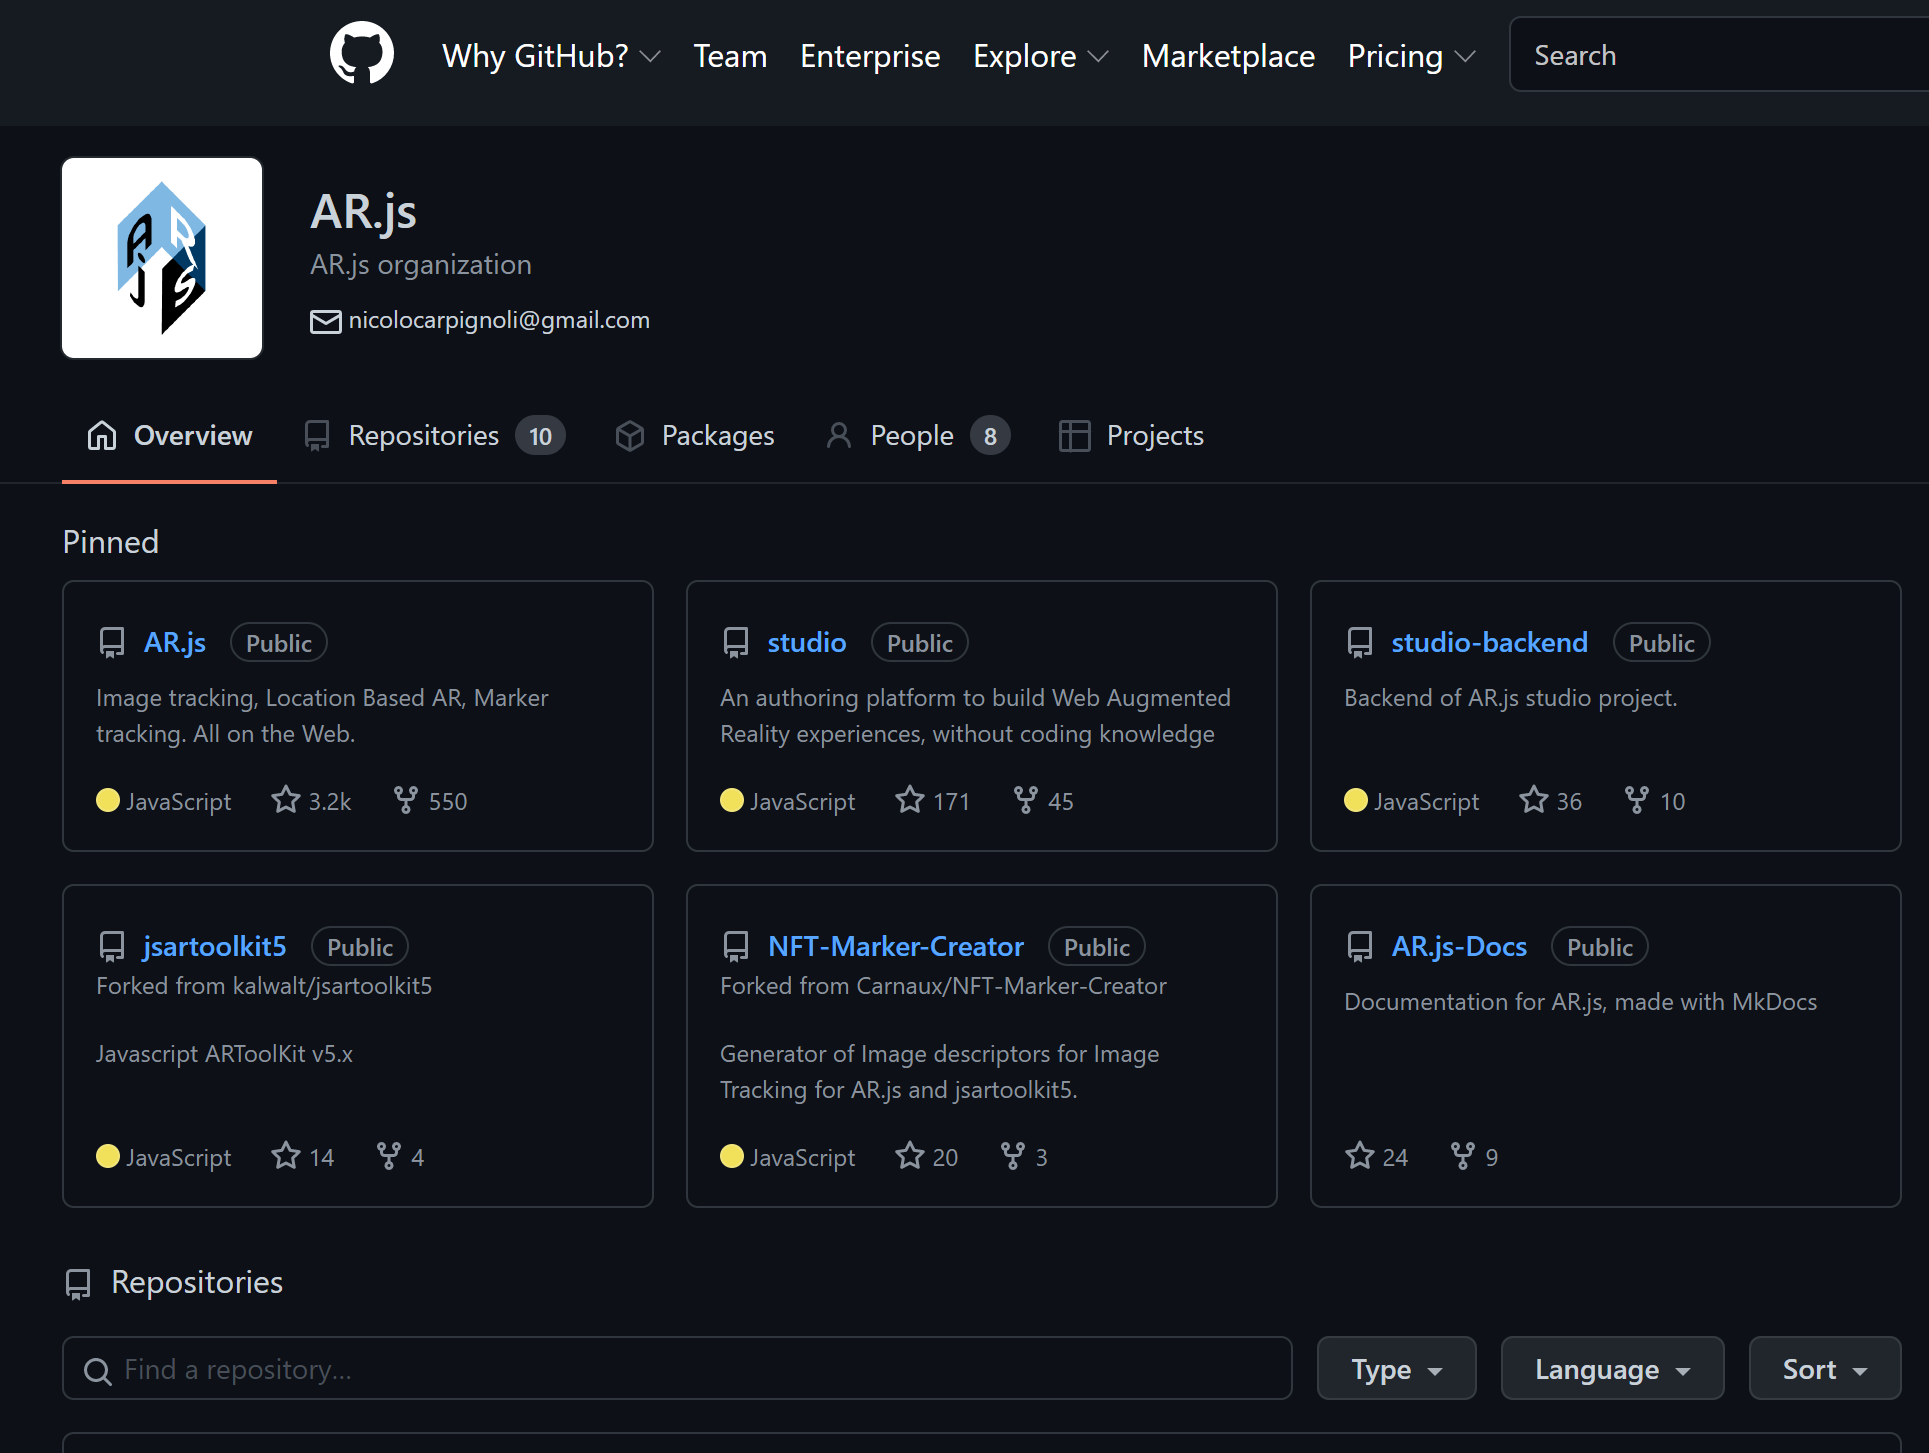
Challenges: It seems like the main challenges for Web-Based AR project is in the distribution, many of the software and apps I found require the user to download the app, which is why I’m leaning towards AR.js, but I’m staying open minded as I continue my research. Another software that looked helpful me is Adobe Aero, but the issue of distribution is the same.
Future work: Next week I’ll be continuing to research of software and existing art, as well as watching all the tutorials I found to dive deeper before I am set on my ideas.
Weekly accomplishments: To begin my first phase of my independent study in “WebXR” or web-based augmented reality, I’ve been researching and exploring options for location-based artwork using augmented reality, since I’ve determined I want to be involved in web-based AR for ease of use it seems like utilizing AR.js could be the best option.
Challenges: My main challenges will be learning more about using GitHub and diving deeper into the world of coding, but there seem to be many resources in how to get started available, with the basic knowledge of coding and interactive design I’m confident I’ll find the information I need to get started.
Future work: I’m going to be continuing my research and getting the correct dev environment and workflow set up, I’ll be modeling the digital artifacts themselves in Blender3D. Also, next week I’ll be researching more about what has been done already for artistic inspiration.
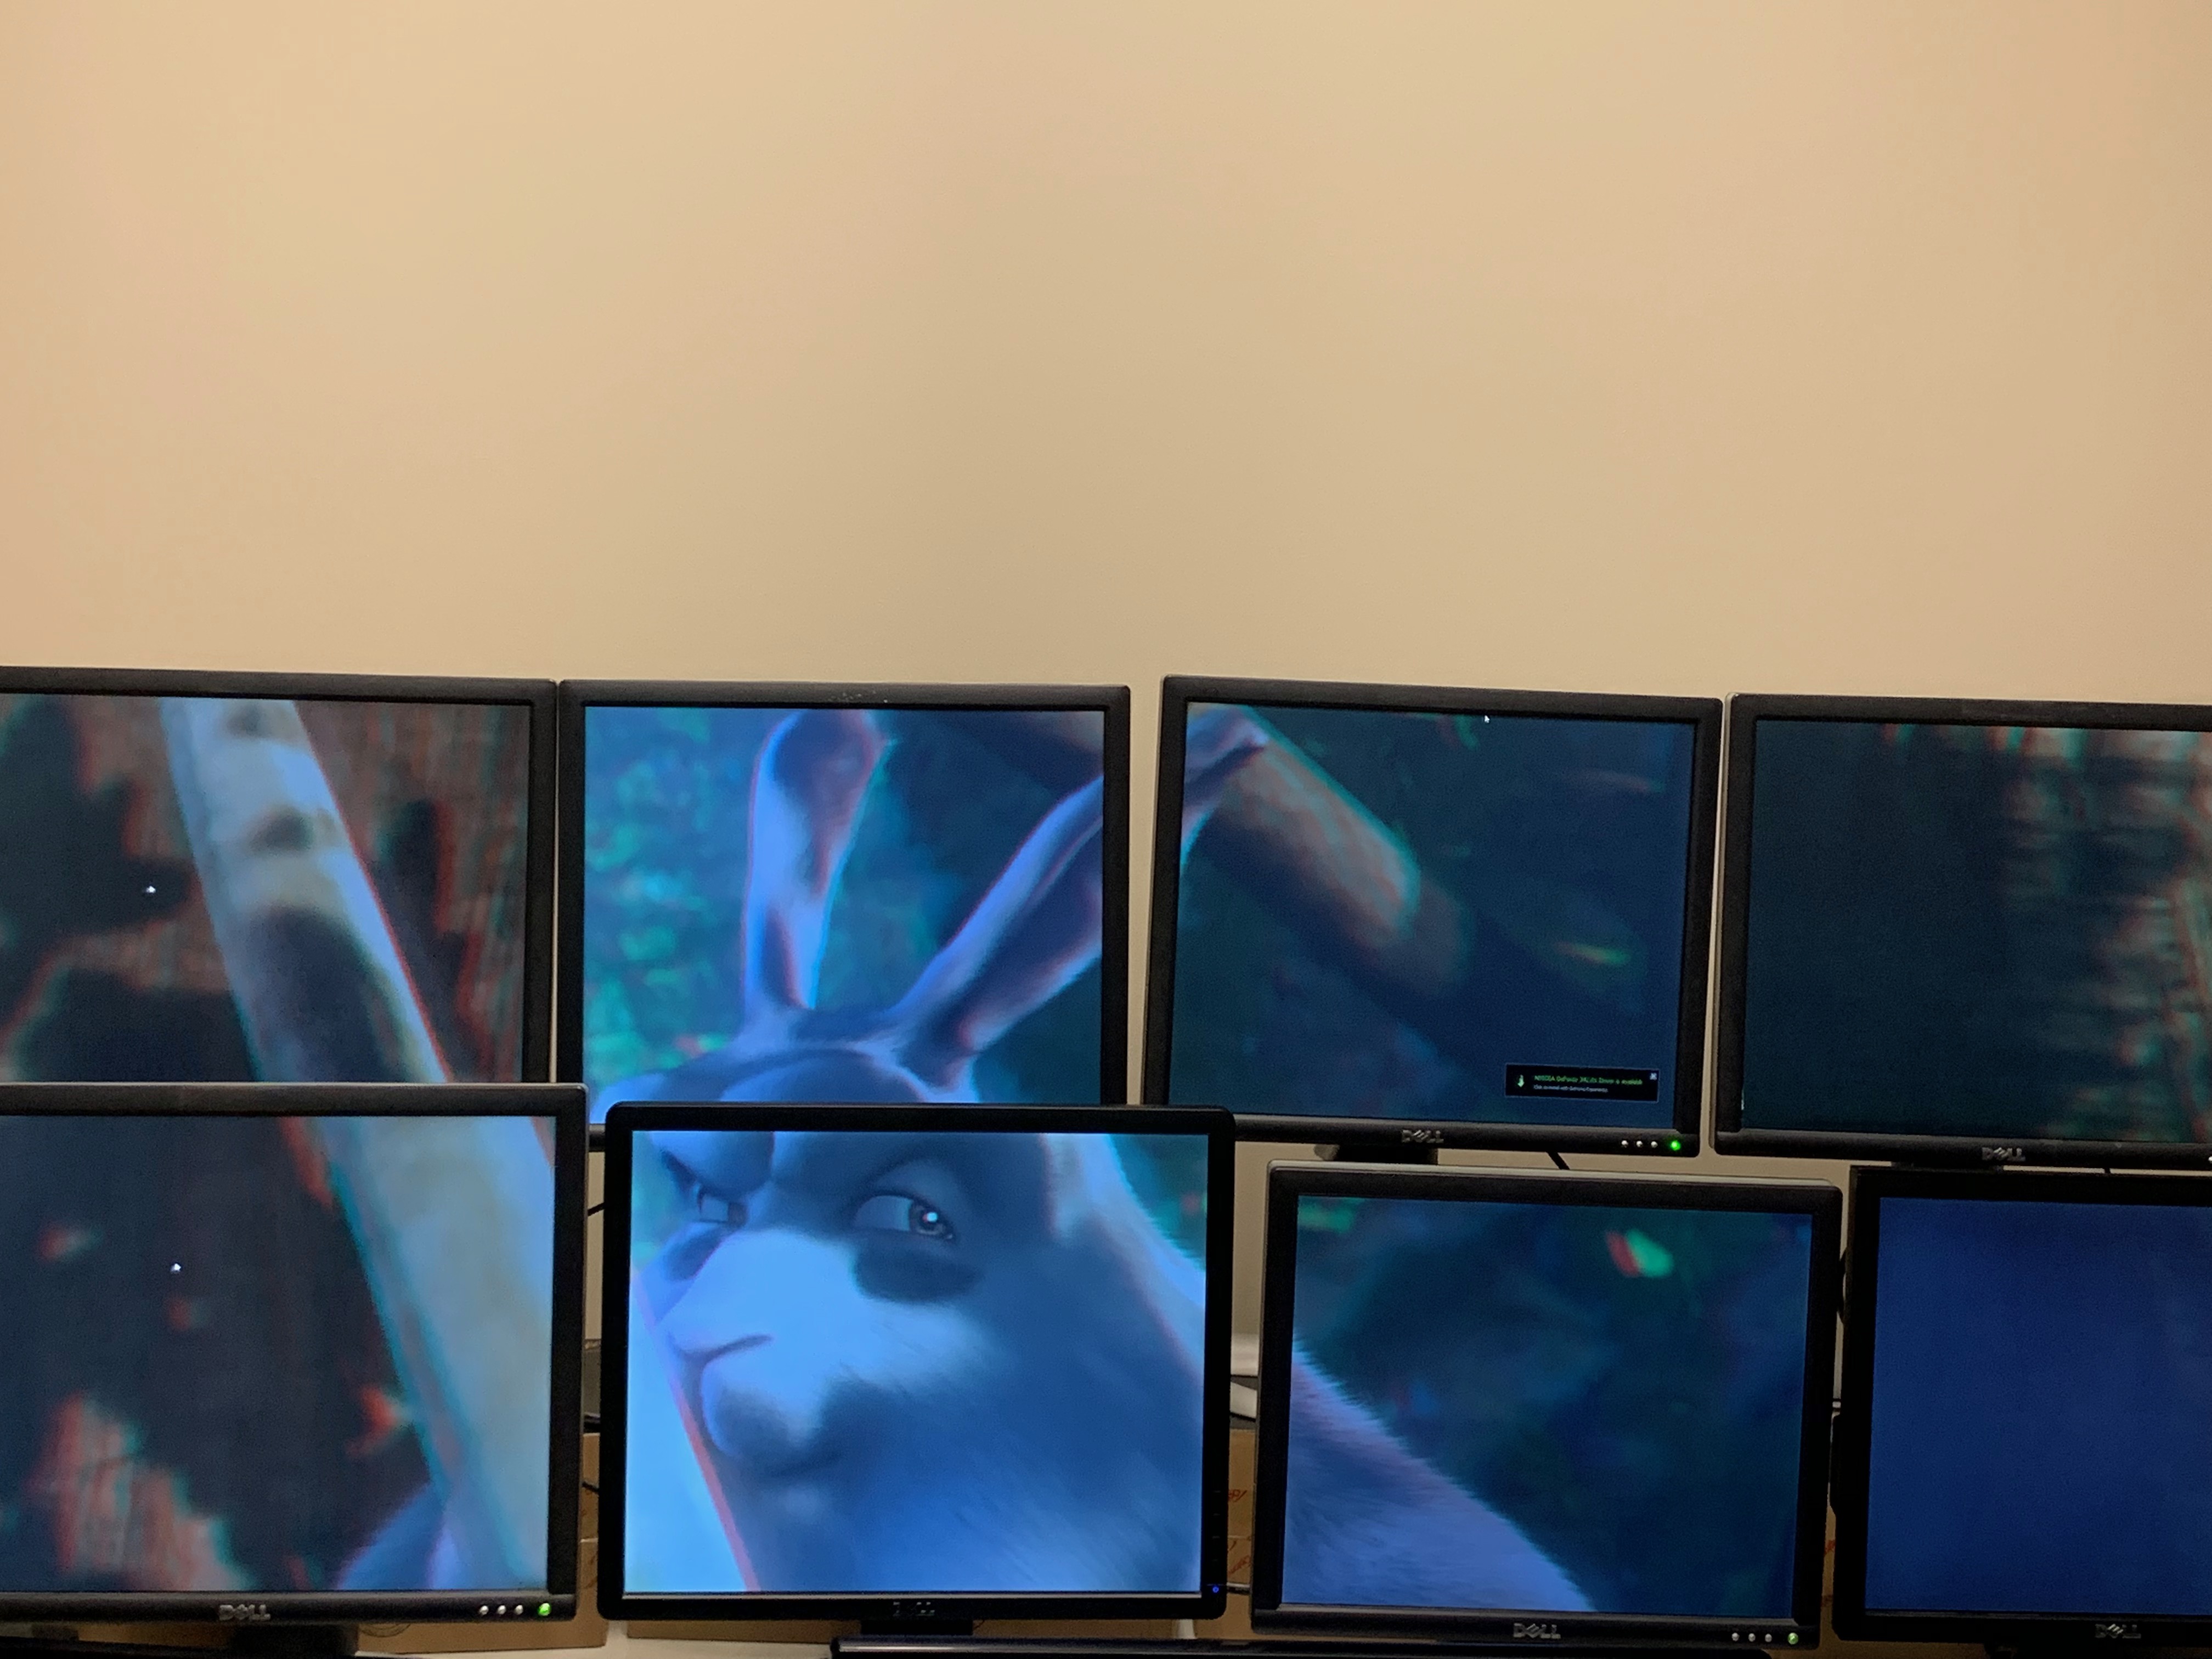
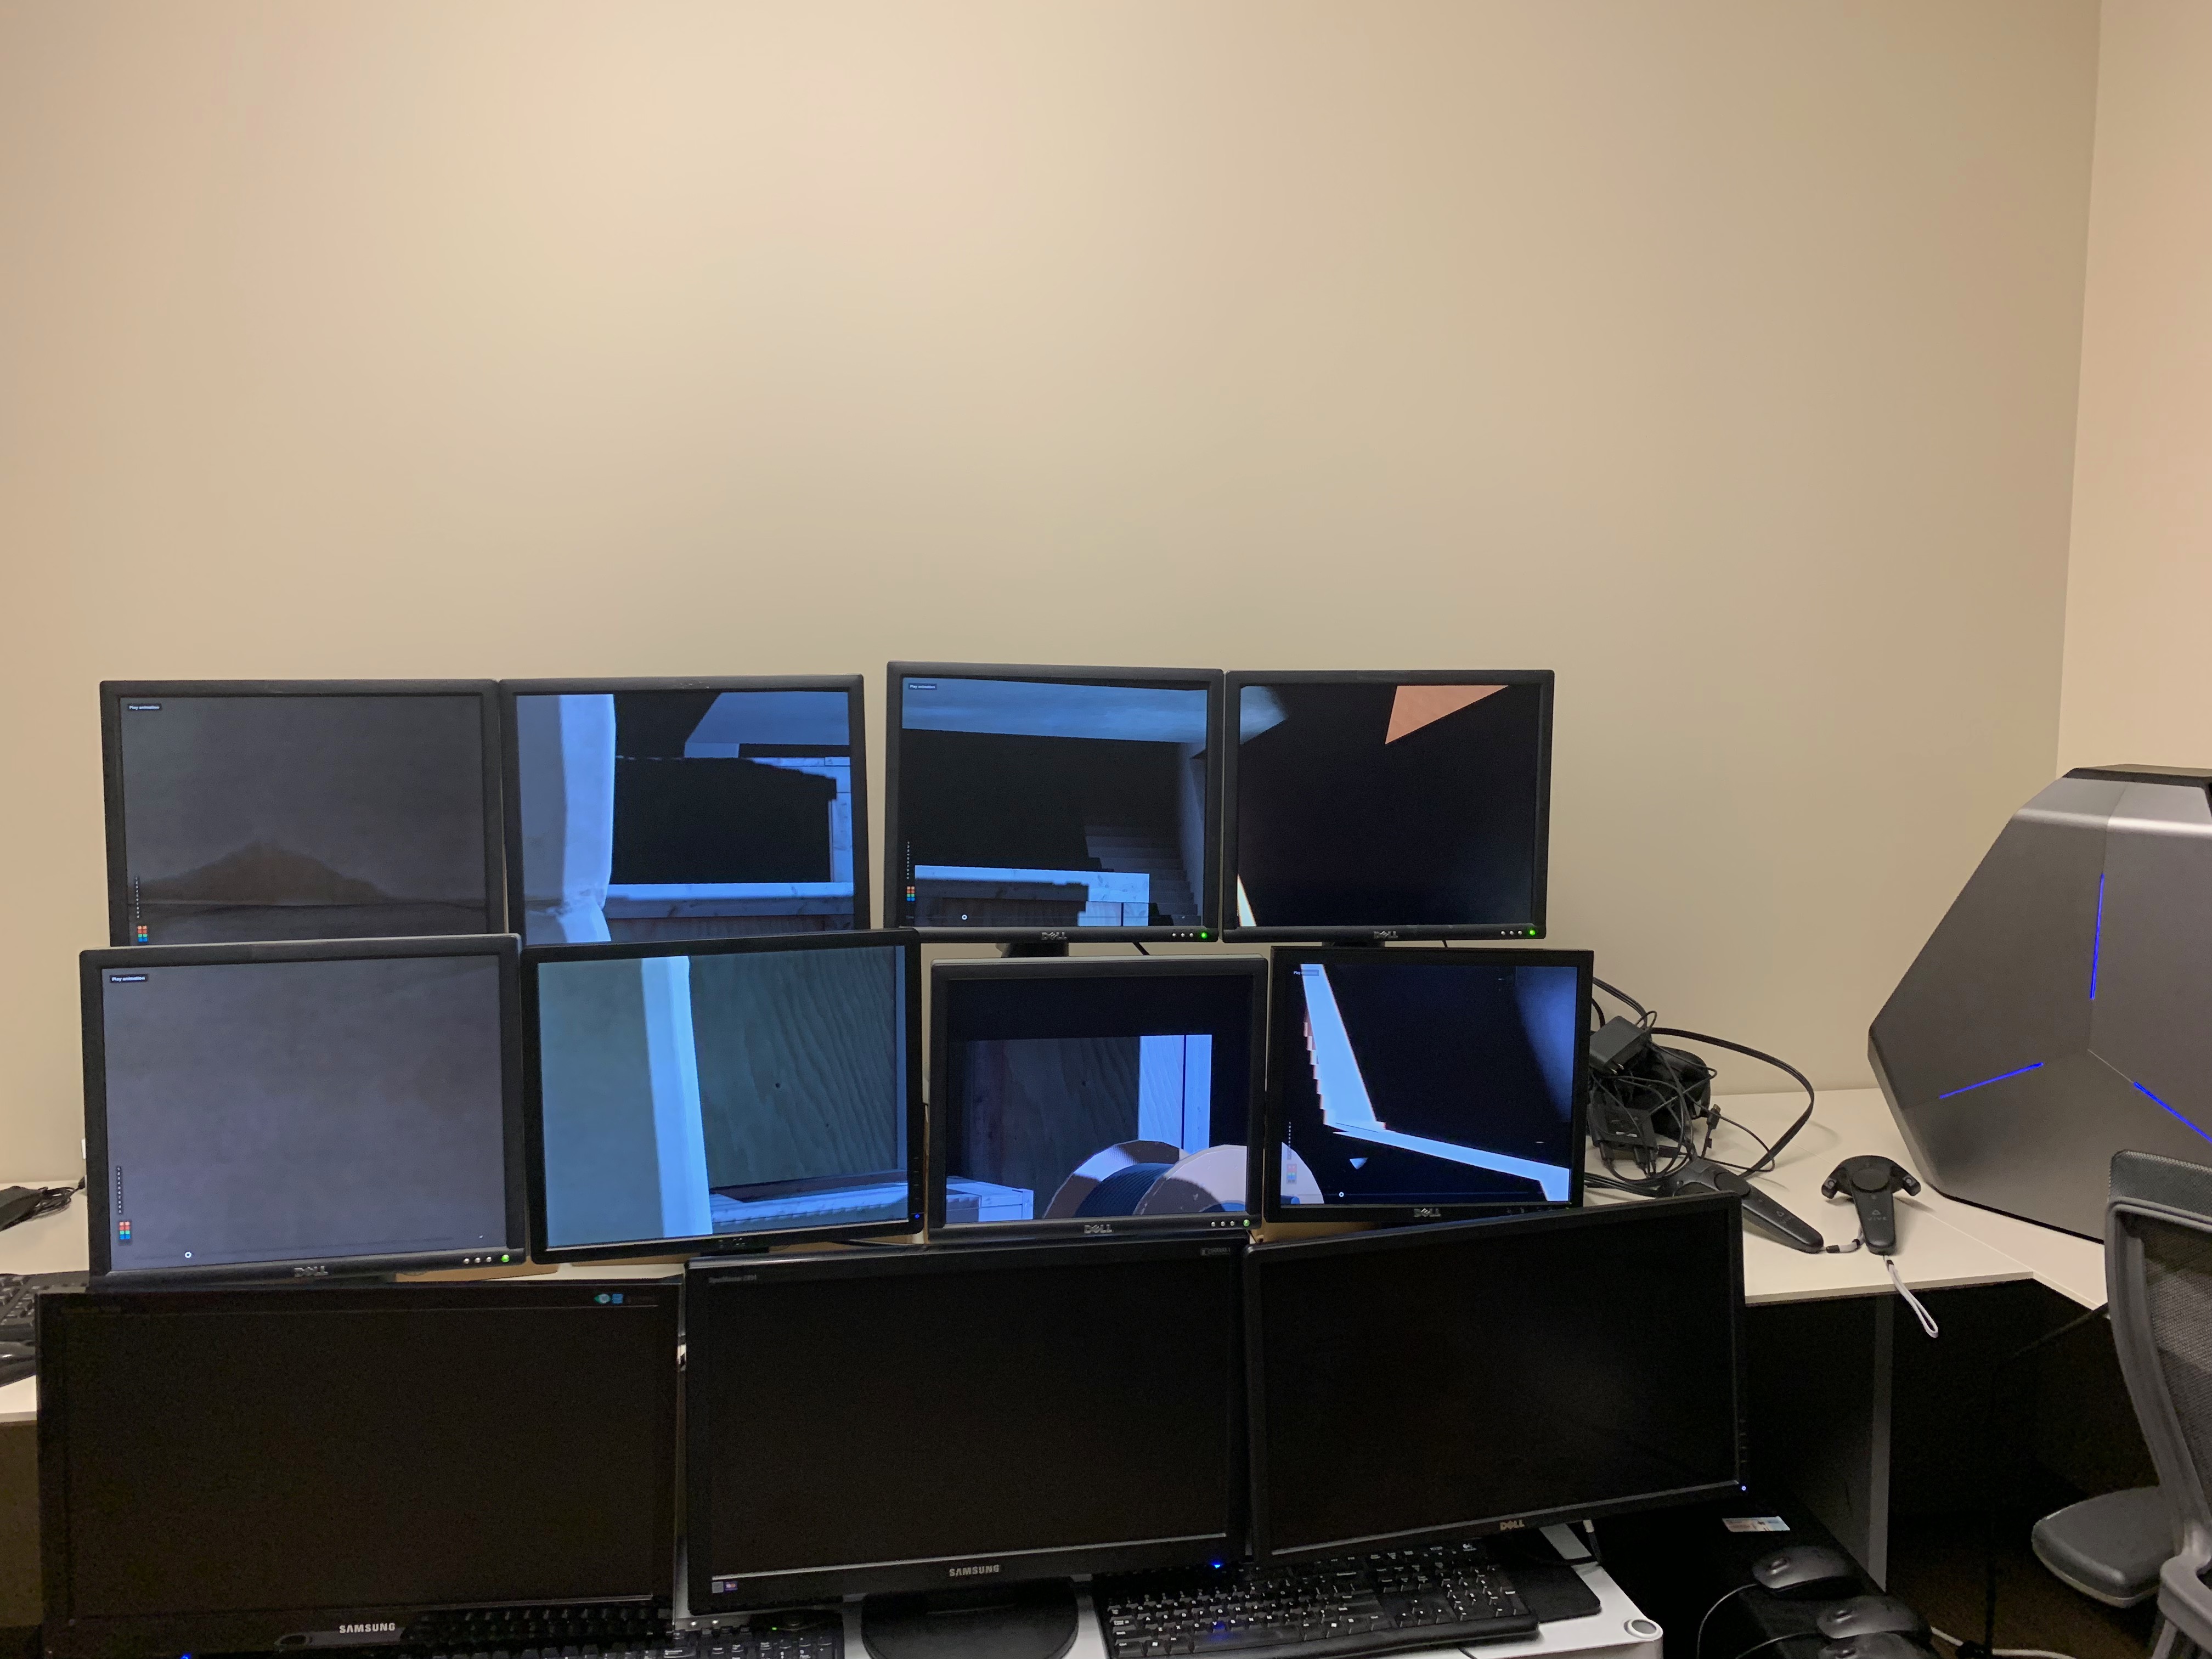
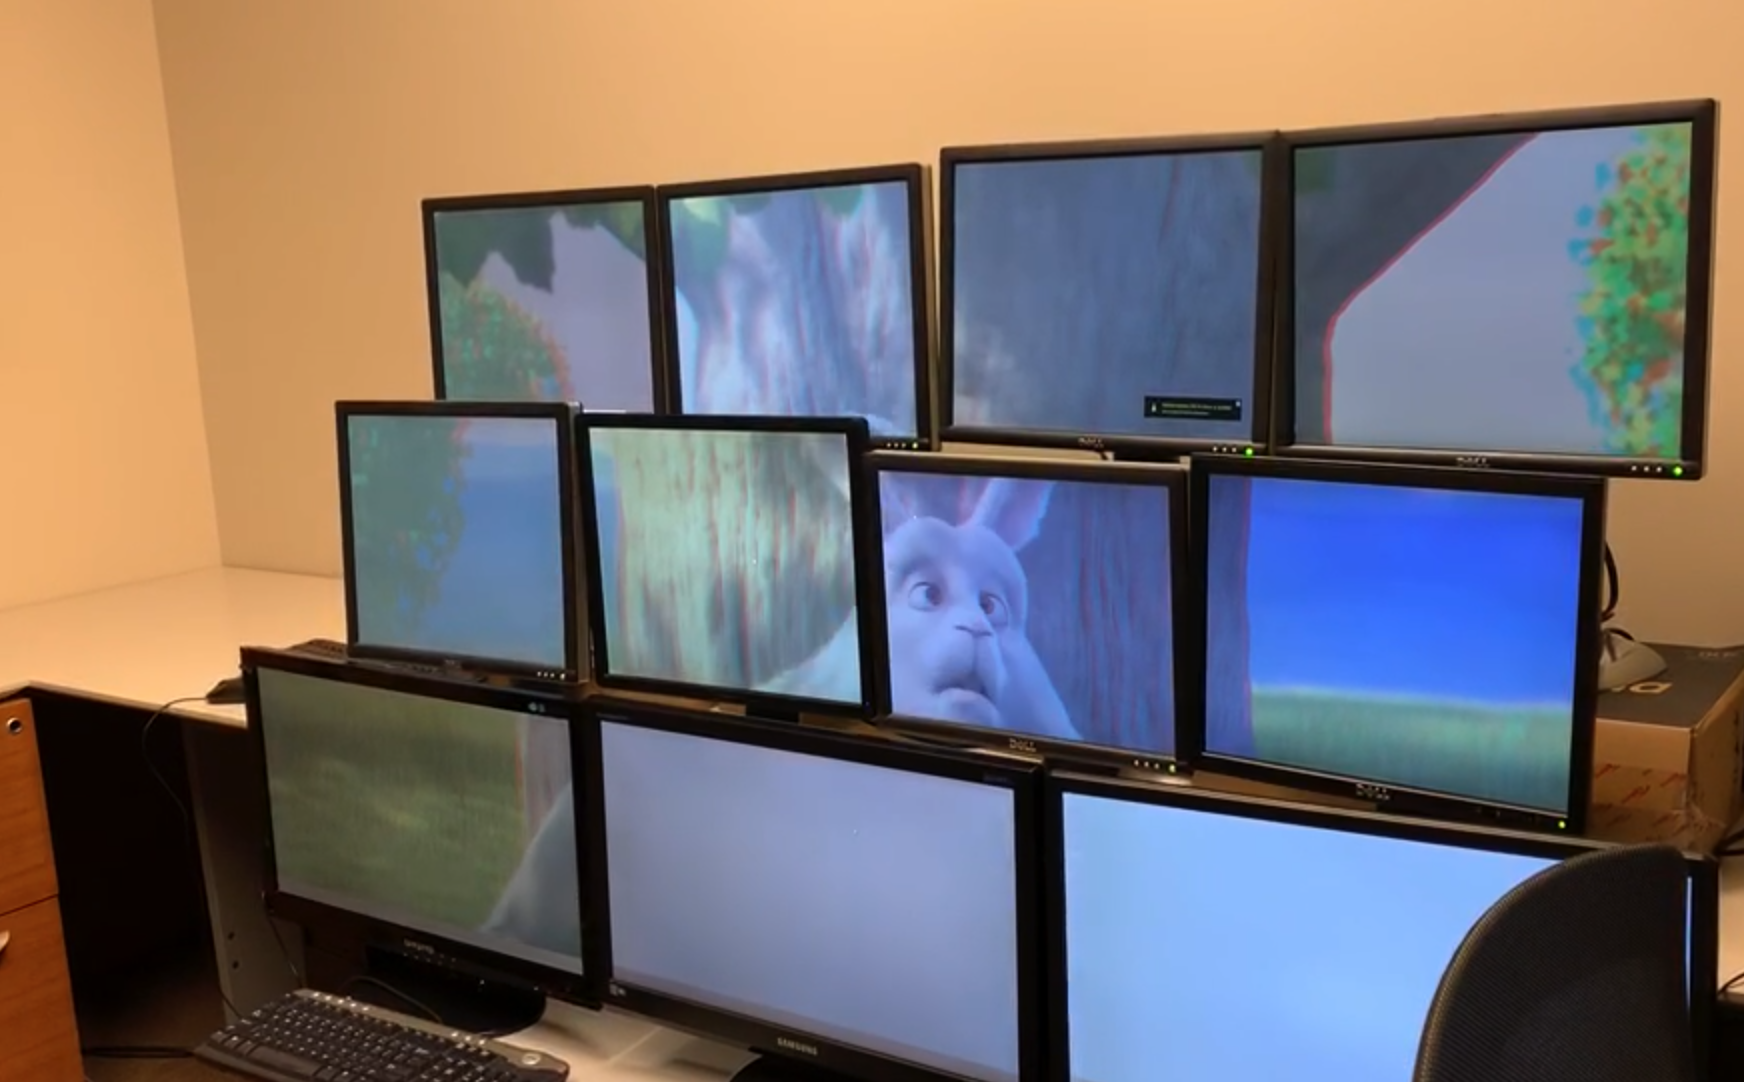
This semester I successfully built and tested two Unity projects: one for 3D video, one for 3D scene for the tiled display system, including 6 machines and 11 monitors connected by the network. For the 3D video project, the goal is to show a high resolution 3D video on this system. To achieve this, I successfully built the tiled display environment, and then attached the 3D video to the scene. For the 3D scene project, the goal is to attach the prefabs controlling the tiled display environment for a 3D scene project, and to make sure the display system shows the correct picture from the 3D scene.
For both of the project, the first step is to build the tiled display environment to make the monitor array look like a series of windows on virtual scene from a given perspective. In order to achieve this, I used two UniCave prefabs: Network_Manager, and Tri_Monitor for projects. UniCave is the a Unity3D plugin for non-head mounted virtual reality display systems provided by the Kevin’s group. I changed the parameters with correct IP address of corresponding computer host for the head node and all the sub (display) nodes. With Yuzi’s help, we measured the relative position and size of every monitor corresponding to the head (audience’s eye position). After the adjustment, we set the head at the center of the monitor array (XY plane) and about 3 meters away from the monitor (z axis).
After that, I attached the 3D video, a few minutes animation which is found from online source. After adjusting the position and the size the video to fit the display array, I successfully built and tested the 3D video project. In order to test the project conveniently, I also used python script to realize cluster launching, which enables starting the executable on all of the machines through the head node.
For the test part, there were some spatial misalignments since Yuzi and I had not measured the relative position of the monitors precisely. The performance looks much better after tuning the monitors. Also, I tested the time alignment, the tiled display environment successfully check and tune the frame to the similar number for each monitor automatically.
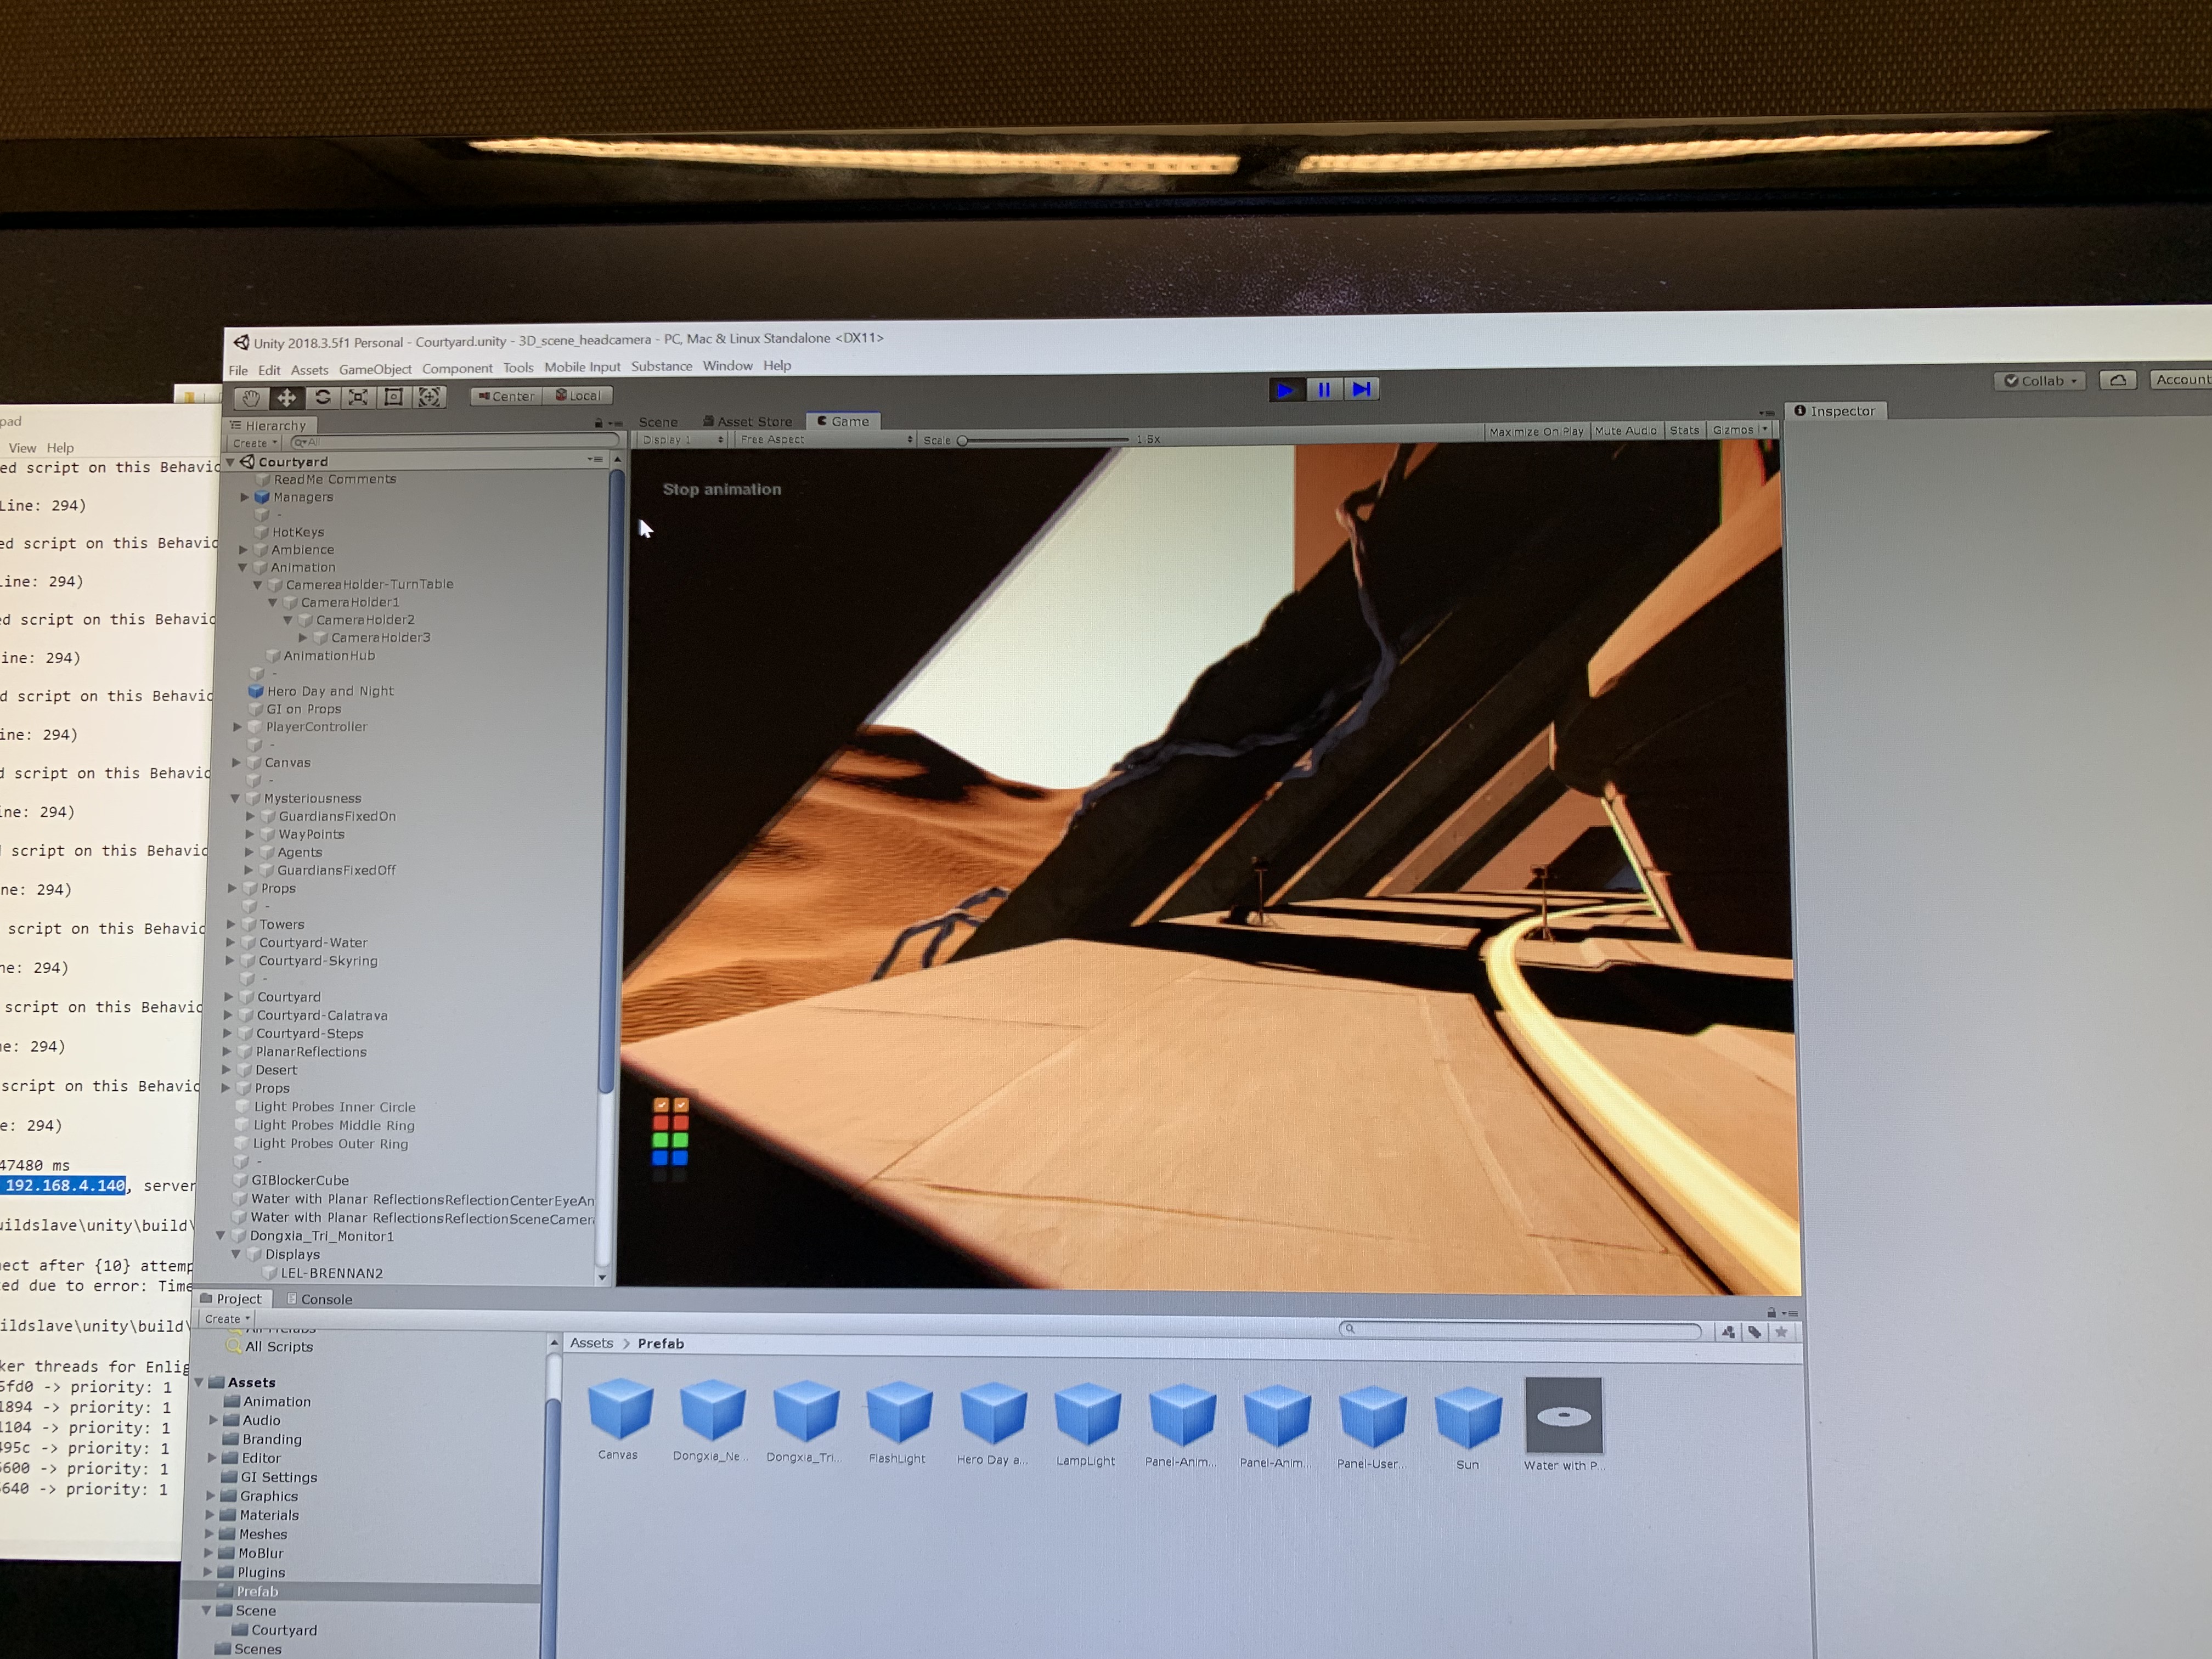
For 3D scene project, the concept is to make my prefabs for tiled display system work for other 3D scene project. In order to achieve this goal, I used the courtyard as our 3D scene, which is a free source provided by unity, and tried to add the prefabs I made for 3D video project to realize the tiled display function since these two project shared the same physical display system. The method seems straightforward: just add the prefabs under playerController object as its child in order to getting the same position and rotation information from controller. However, it seems that these UniCave prefabs will get confused about which cameras to be selected when there are more than one camera for different purposes. Therefore, I deleted all the cameras instead of the camera for player controller.
Feelings:
I feel happy of what I have achieved this semester. Since I didn’t have much background of VI, computer graphics, and special software like Unity and Microsoft Mixed Reality tools, I was really struggling on my HoloLens project. But things become better after I switch my project to tiled display system. Thanks for help from Kevin, Ross, and Benny, I successfully finished 2 projects for 3D video and 3D scene implementations. During this process, I kept challenging myself and learnt new things independently, especially the knowledge of Unity. Now I am feeling more confident to use this powerful tool for future project.
Challenges:
One of long-standing challenges is the connecting process from the head node. Since these two projects are all based on the tiled display system, they are highly dependent on correct and fast network connecting from head node to each sub nodes. However, firewall system for each machine sometimes can be very annoying for our system. The cluster launching scripts were able to work before. But after all machines updated to Windows 10, it somehow does’t work.
Another challenge for both 3D video and 3D scene project is the frame difference for different displays. When looping to the start point, the frame difference became more apparent. I have changed the related parameters, but the performance didn’t improve a lot. Such problem may result from different graphics card settings and hardware configurations for different displays.
Finally, the courtyard demo I chose for the 3D scene project is a very large and complicated scene. There are many cameraHolders and objects for controlling. These objects are related with each other, which makes it challenging to figure out their function and relation. I tried to delete unnecessary objects to make it simple and find the right position to add the prefab to inherit the right position and rotation from the playerController.
Future work:
I will be very excited if I can apply what I have learnt from this semester’s work to new 3D display system. It seems that the physical performance of our display and computer is not very good and becomes a limiting factor. For example, the system sometimes has a serious delay when playing. It will be interesting to see the performance of tiled display system with new displays and computers.
Also, I want to apply UniCave prefab for polymorphic device system such as building a virtual reality display environment in a room combined with display and projector. Compared with 2D display array system, I think this way will generate a more immersive feeling.
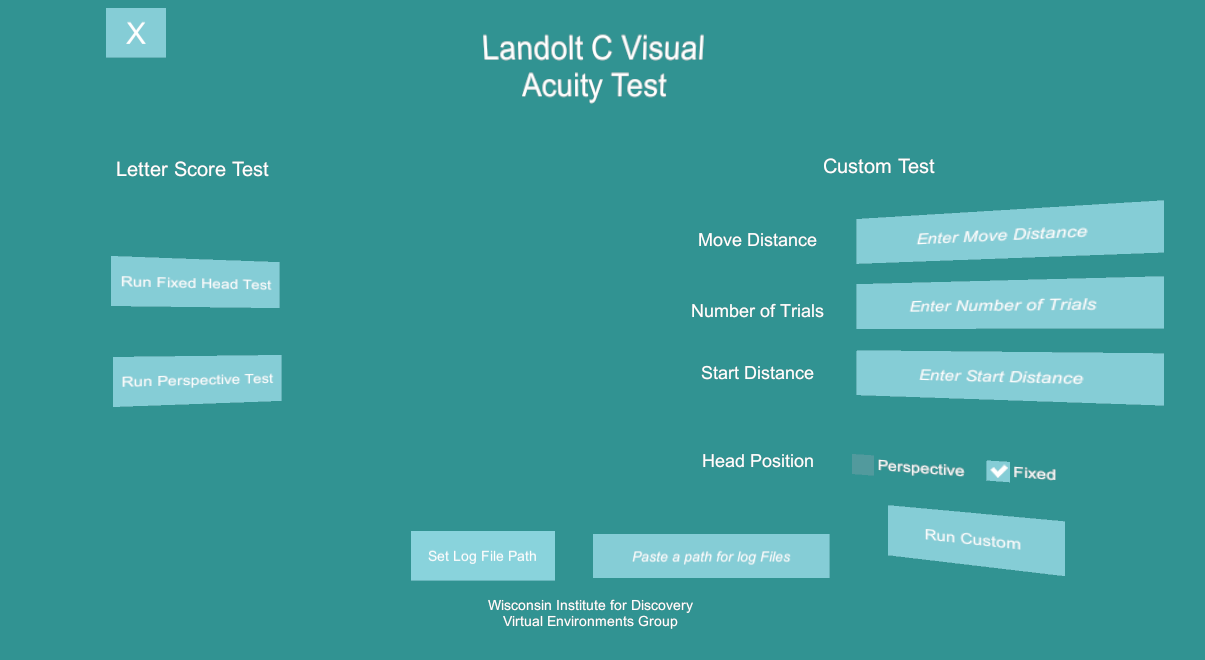
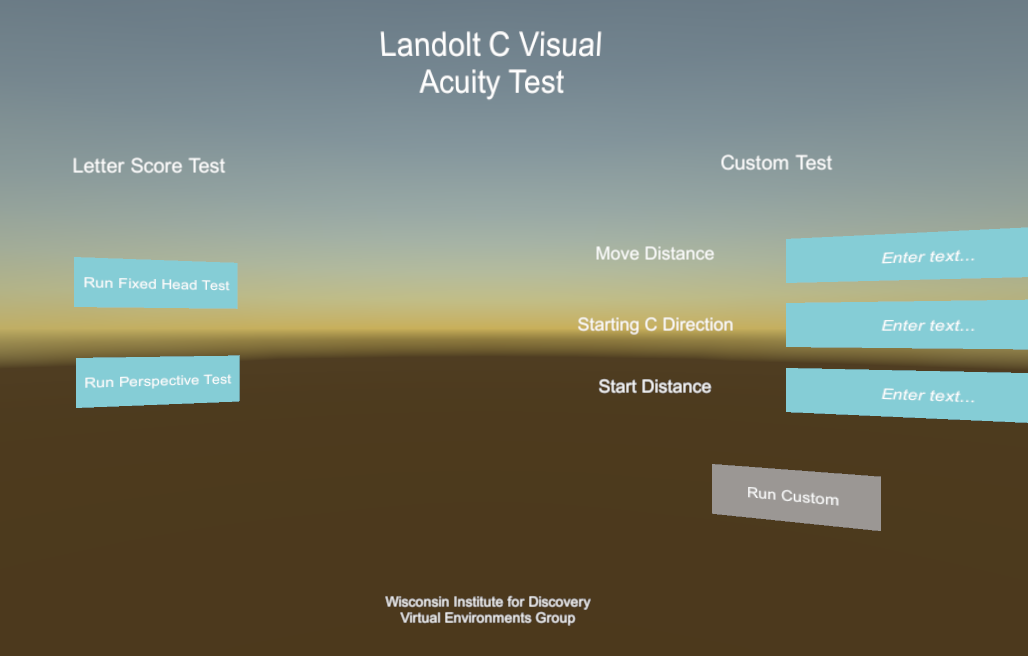
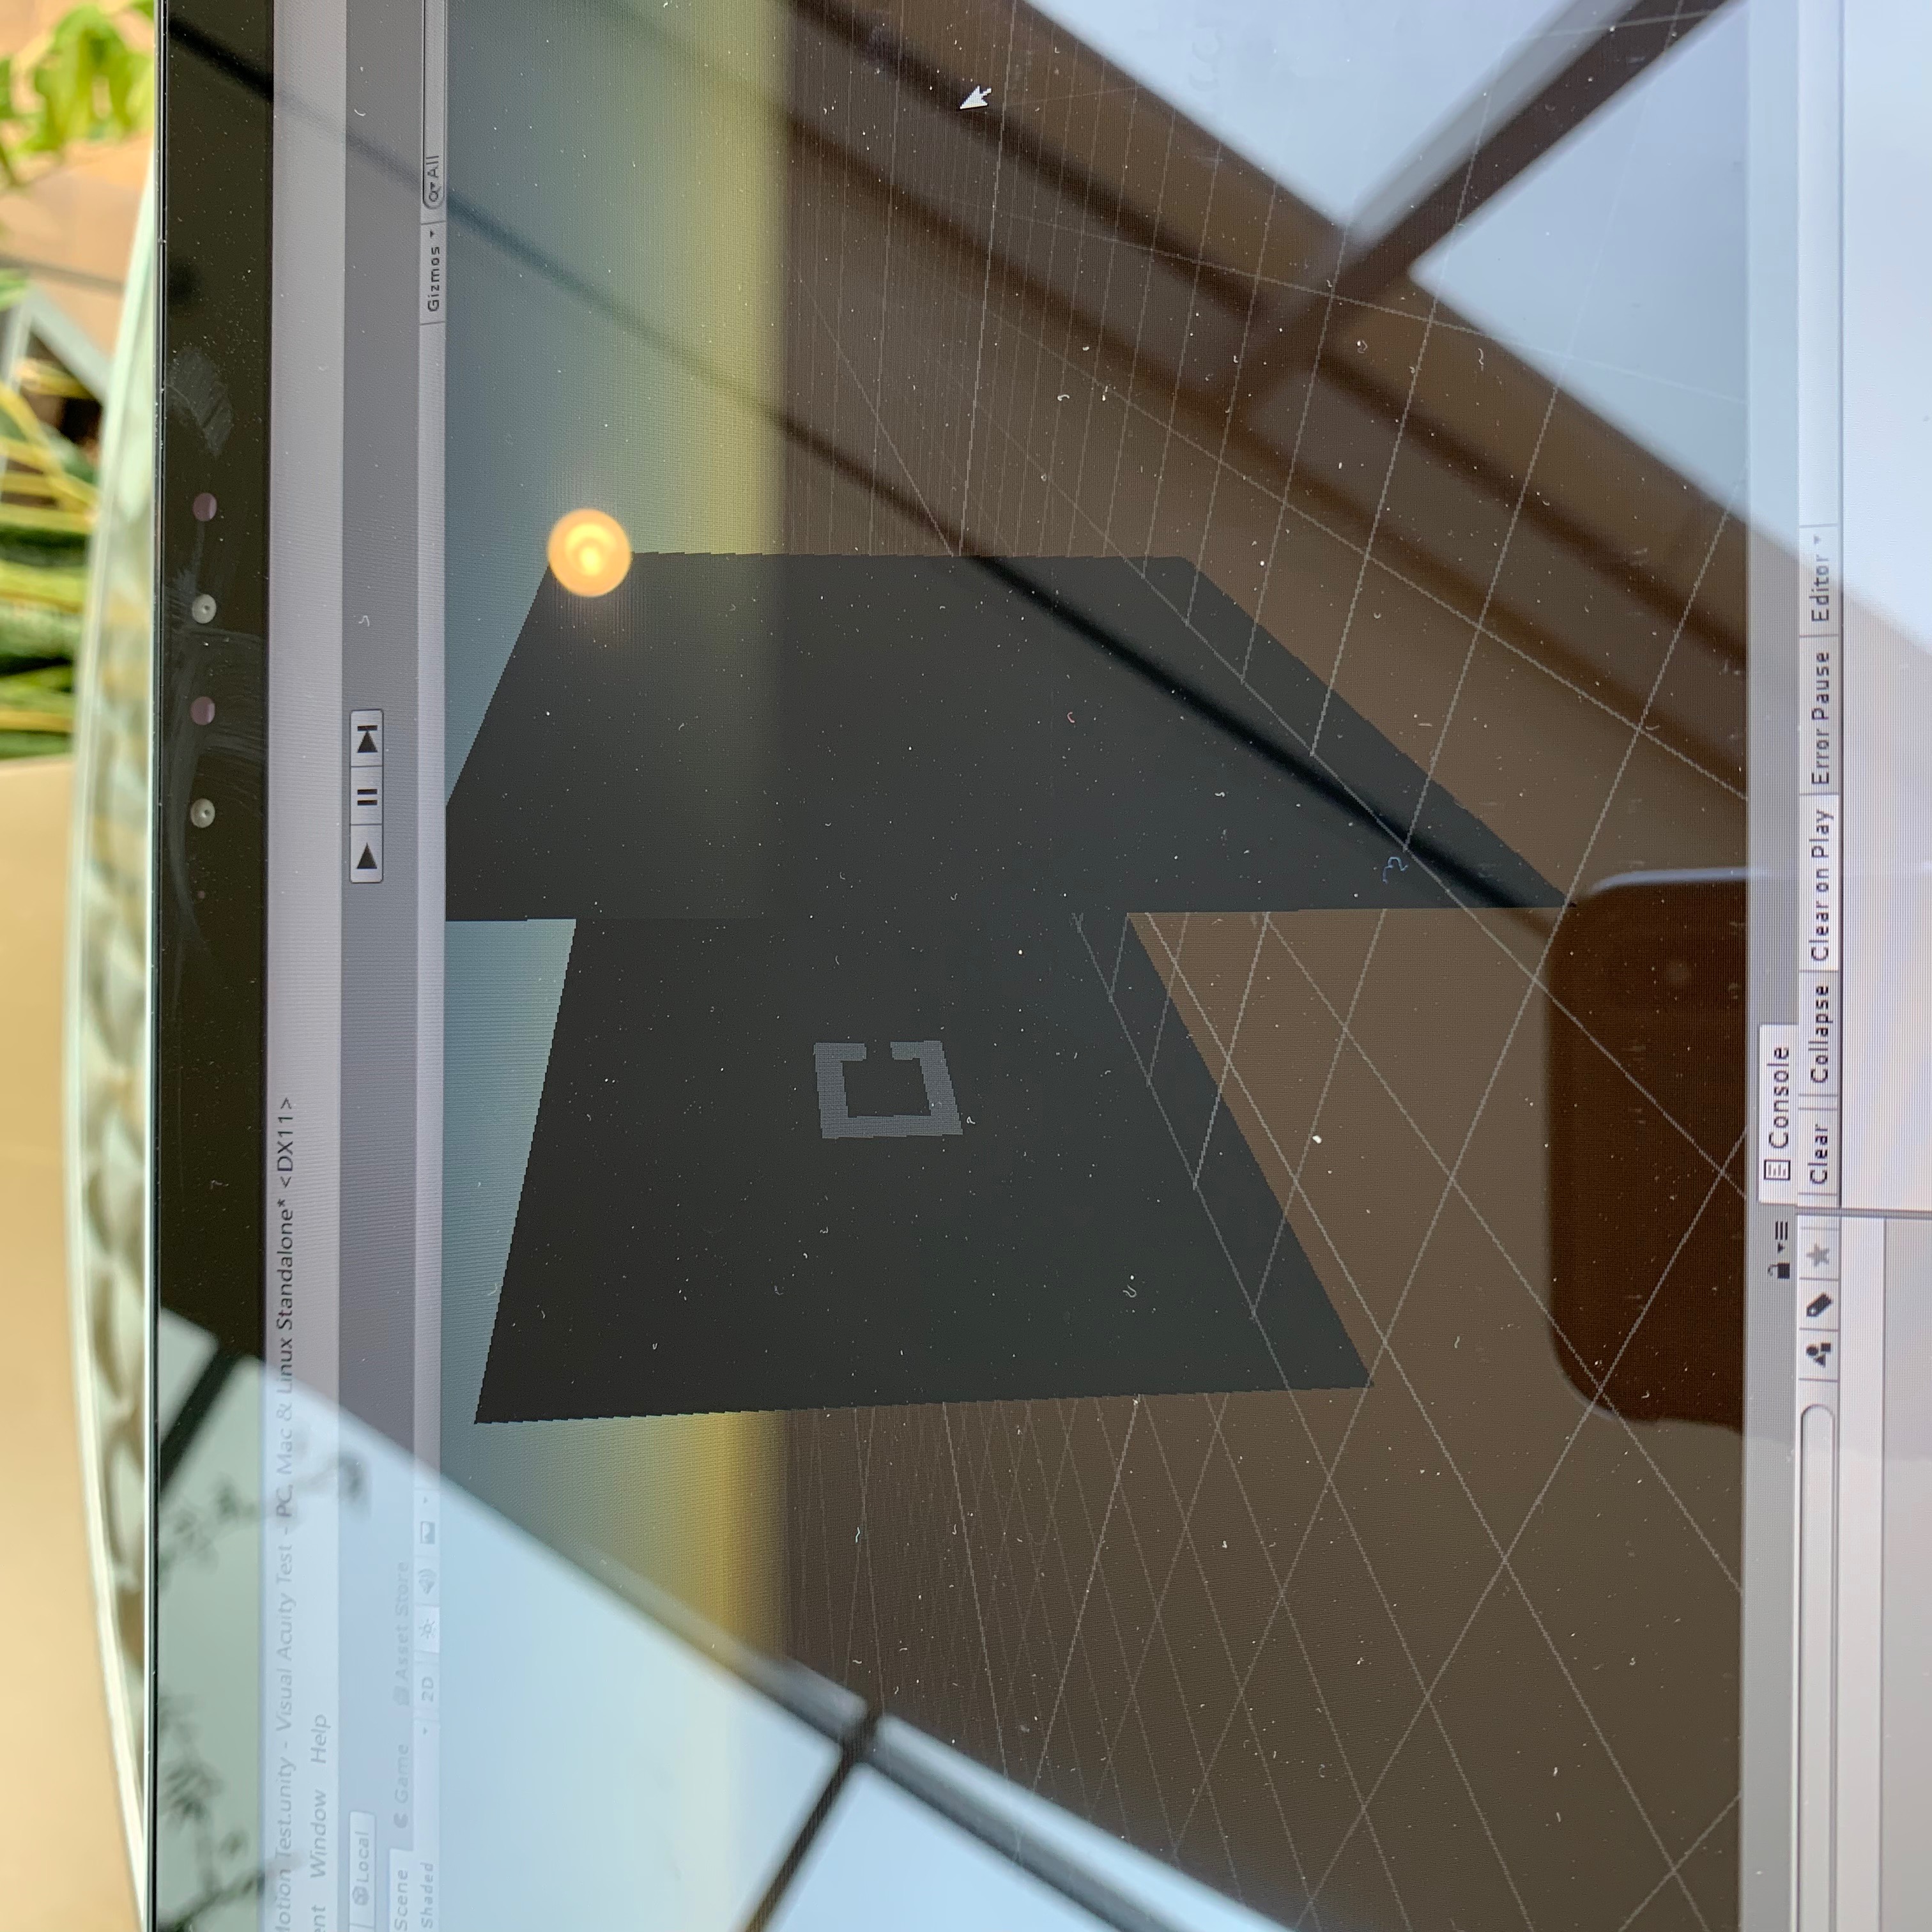
The final outcome of this semester is the Landolt C Visual Acuity VR application, or Landolt VR. This application allows a user to run the Landolt C visual acuity test in three configurations across all devices compatible with Unity’s mixed VR plugin. The goal of which is to better measure both individual visual acuity in a single device, and visual quality output by different devices.
The three configurations are a fixed head perspective standard 70 trial test, a free head perspective standard 70 trial test, and a custom test that can be run in either head position. The custom test allows the user to change the start distance of the C object, the number of trials before the test completes, and the linear movement distance.
The procedure is best explained in the context of the 70 trial standard test. When this option is selected, the subject will be asked to decide the direction the C object faces 5 times per 14 different distances, with the C distance increasing each time. Between each guess, there is a brief rest period where a blank screen is displayed. Upon completion of the test, a Snellen Letter score will be displayed on the screen, and the user can exit the test to the main screen. Also upon completion a log file is created that contains all information pertinent to the test, and includes a record of each individual trial.
Creating this project took several weeks of research prior to the start of coding. In those weeks I learned the founding principles of visual acuity testing, the standard optometry procedures for issuing a visual acuity test, analysis of visual acuity testing results, and finally, how to construct and validate new visual acuity tests using standard symbols. I also had to learn some basic physiology of the eye to familiarize myself with vocabulary ahead of conducting other research.
Project Feelings:
I’m quite happy with the results of this semester. Having been a relative novice in terms of developing VR applications, it was satisfying alone to create a fully functioning project on my own. On top of that, I was challenged to learn material outside of my field, and bring results from research into a new medium. While there was plenty of content regarding visual acuity testing, and the basics of optometry practice, there was little to nothing about administering such a test on screen, let alone in VR. While I initially found that frustrating, it became something I found enjoyment in, working on something that perhaps no one has done before.
This is only my second time developing a VR application, and the first time it’s been non-game related. I found that I was able to create something functional, and relatively easy / aesthetically pleasing to use. Unity is a complicated but rewarding tool to learn, after this semester I feel much more confident in my development skills using it. The final product, combined with the improvement of my research and Unity skills was, and is satisfying.
Project Challenges:
The biggest hurdle was the lack of information out there with any relation to what I was attempting to build. I had a good idea of what I was trying to accomplish fairly quickly, but without anything to reference I was pushed outside the comfort zone of feeling what I was doing was correct. I still wanted to produce something accurate, that performed as close to a standard as I could get. It took some realizing that things like these are never done perfectly the first time, and validation comes from experimentation in the case of doing something new.
The next considerable challenge was threading. It took a good few weeks to figure out how to time things for the periods of rest and the periods of trial. While the co-routine / invoke functions unity provides work perfectly fine, my lack of Unity knowledge pushed me towards my C# comfort zone. As someone who uses C# for .NET web development, I foolishly thought Unity would play nice with C# timers, and even went so far as trying to write my own multi threading setup using them. Guidance ultimately put me back on the right track. Asking for help is never bad.
More time:
Given more time I would have loved to see this through testing. I feel like this is something useful, and would have preferred to run more trials on people that I don’t know so well. Not only to verify the process, but to improve the design of the application.
The next thing I would’ve liked to focus on is design. While it’s pleasant enough to look at, I would’ve liked more time to learn more about certain alignment techniques for Unity UI’s. I think that would be a small improvement that could make this product better.
It would’ve also been nice to run this past an Optometrist. While I was confident enough in my own research regarding the basic principles, I’m sure there are inaccuracies in my procedure that someone with more experience could help iron out.
This week we successfully realized the synchronous playback of our 3D scene project: the courtyard project. The main problem last week is that the monitors and head node show different screens. We solved it by change our node to the same position of the FPS controller. Then we changed the position and direction of our display array to cover the same area of the camera in the camera holder. We also found that the controller of original project can not rotate beyond XY plane. By changing our prefabs under the camera holder to inherit more controller information, we successfully solved the problem.
Challenges:
The challenge is that there is a delay problem when we used the controller for this 3D scene. Benny said that the main limitation is from the hardware, which we cannot improve. But I will try to delete some of the complicate objects shown in the 3D scene to make it more simple, and see if it will improve the performance.
The application is done and ready for testing. I’ve run it on myself and a few friends thus far with consistent enough results to merit further tests. I’ve finished the UI finally, and the rest of the code needed to make the different components communicate. A user is now able to transition between tests, and return to the start screen / abort tests as desired.
While the application will calculate a Snellen letter score, and it seems to put out something close to physical tests, I’m not sure I’m sizing the letters right (which for me means adjusting the distance the C object moves each time).
Struggles:
The actual letter size still alludes me. Mostly because all of the information out there on sizing Snellen letters for a LogMAR test pertains to physical tests, where the actual size of the letter is first measured, then scaled to append 5 minutes of arc at different test distances.
Next Week
Talk with Alex and/or Kevin about further testing
Go over design, come up with features for custom tests
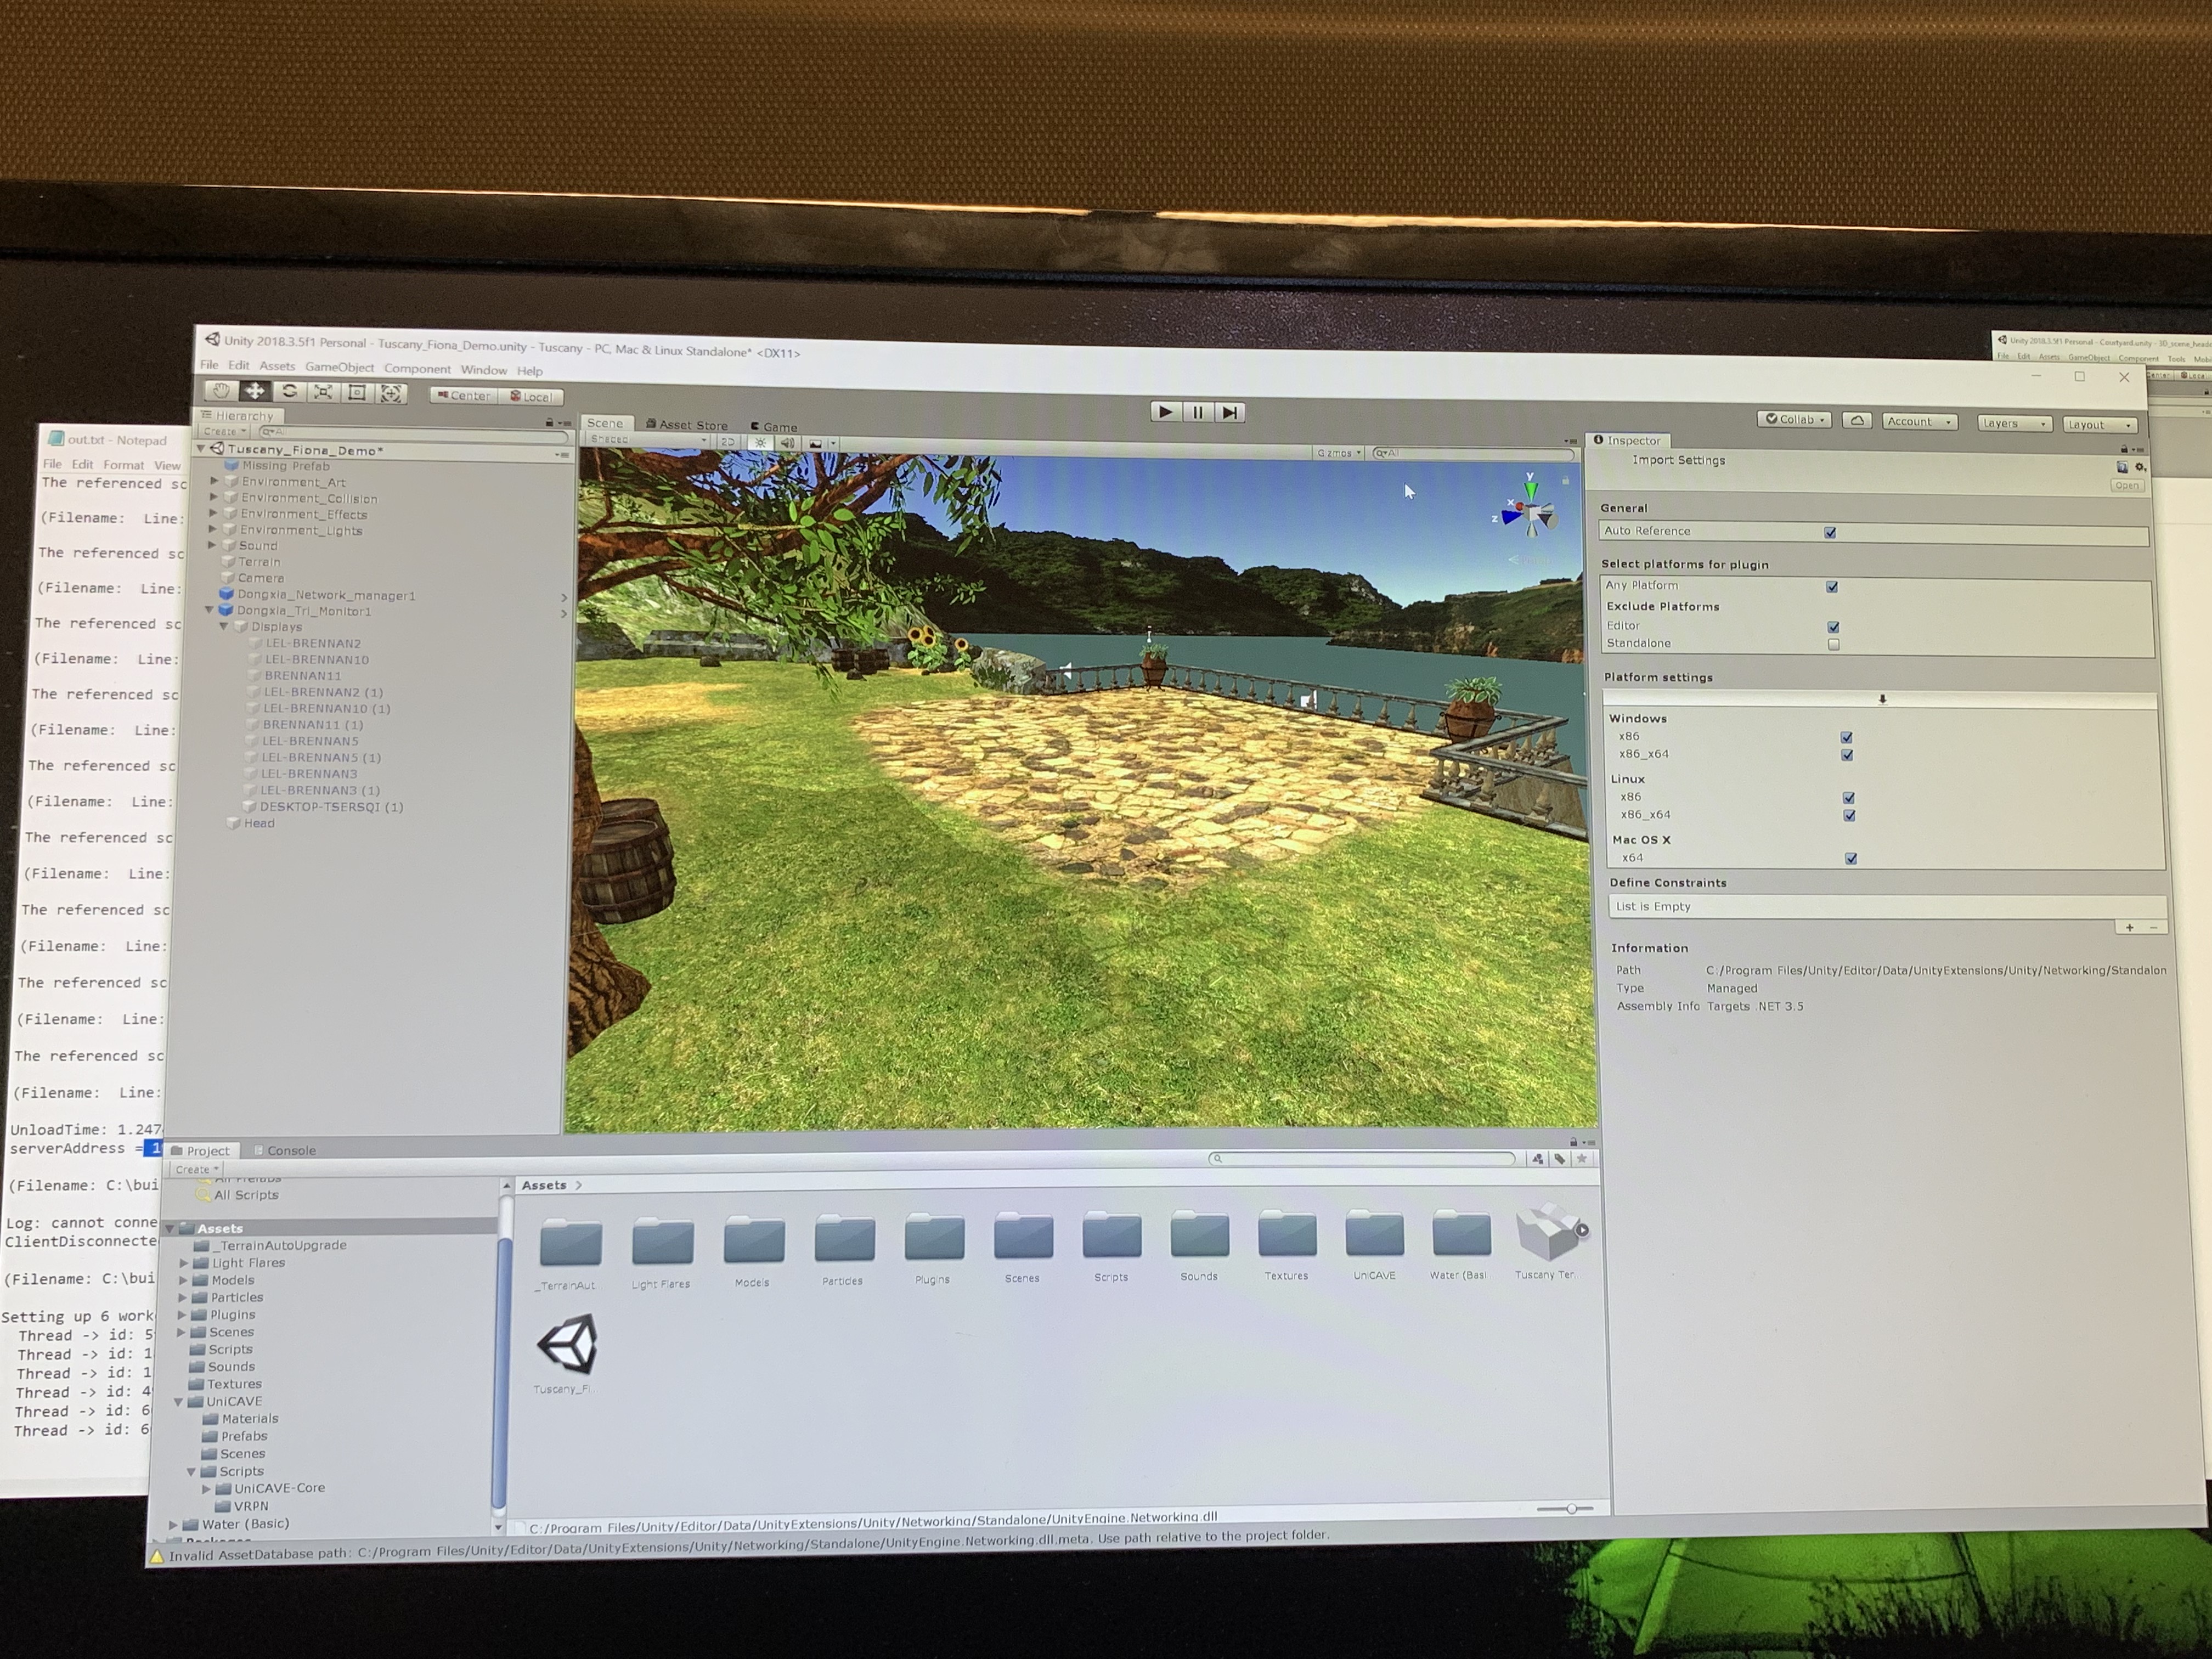
This week we kept trying to let the UniCave prefabs work in the 3D scene project. For the courtyard project, we tried to add our monitor prefab under its playerController as its child in order to getting the position and rotation information. However, it seems that the UniCave prefabs will get confused about which cameras to be selected when there are more than one camera for different purposes. Therefore, we tried to delete some of unnecessary objects in Courtyard scene. Still, we have some unsolved problems of the UniCave prefabs, and we will try other simple 3D scene project like Tuscany next week if we cannot figure it out.
Challenges:
The courtyard scene has so many objects which are related with each other that it is challenging to figure out every object’s function and relation. We try to delete unnecessary objects to make it simple and find the right position to add our monitor prefab to inherit the right position and rotation of camera.
Plan for next week:
Try to realize the player controller mode in the tiled display system for Courtyard scene.
If we can not figure it out, we will jump to Tuscany project and add the play controller by ourselves later.
Per the suggestion of Kevin, I transitioned the way the timed test works to use the Invoke Repeating method. This method solved all my problems with multi-threading in Unity. The test itself will now run through the trials, displaying the C at different positions for X amount of time before recording a failure. There is a period of rest, where there is no C displayed, which I handle by placing a black plane in front of the C display. Using a simple transform it appears and disappears. The test will end when the participant either completes 5 trials at each of the 14 distances, or when the participant fails 4 or more trials on a given distance (as was done in Paisan).
I’ve also started fleshing out the UI more. The main menu scene is currently under construction, and I’m working on displays for the test results once the trial is complete.
Struggles:
Now my that my multi-threading woes are over, I’m making good progress.
Plan for Next Week:
Finish functionality: Main menu, Basic UI
Find calculation for correct logarithmic distance
Program calculation for LogMAR score at end of test
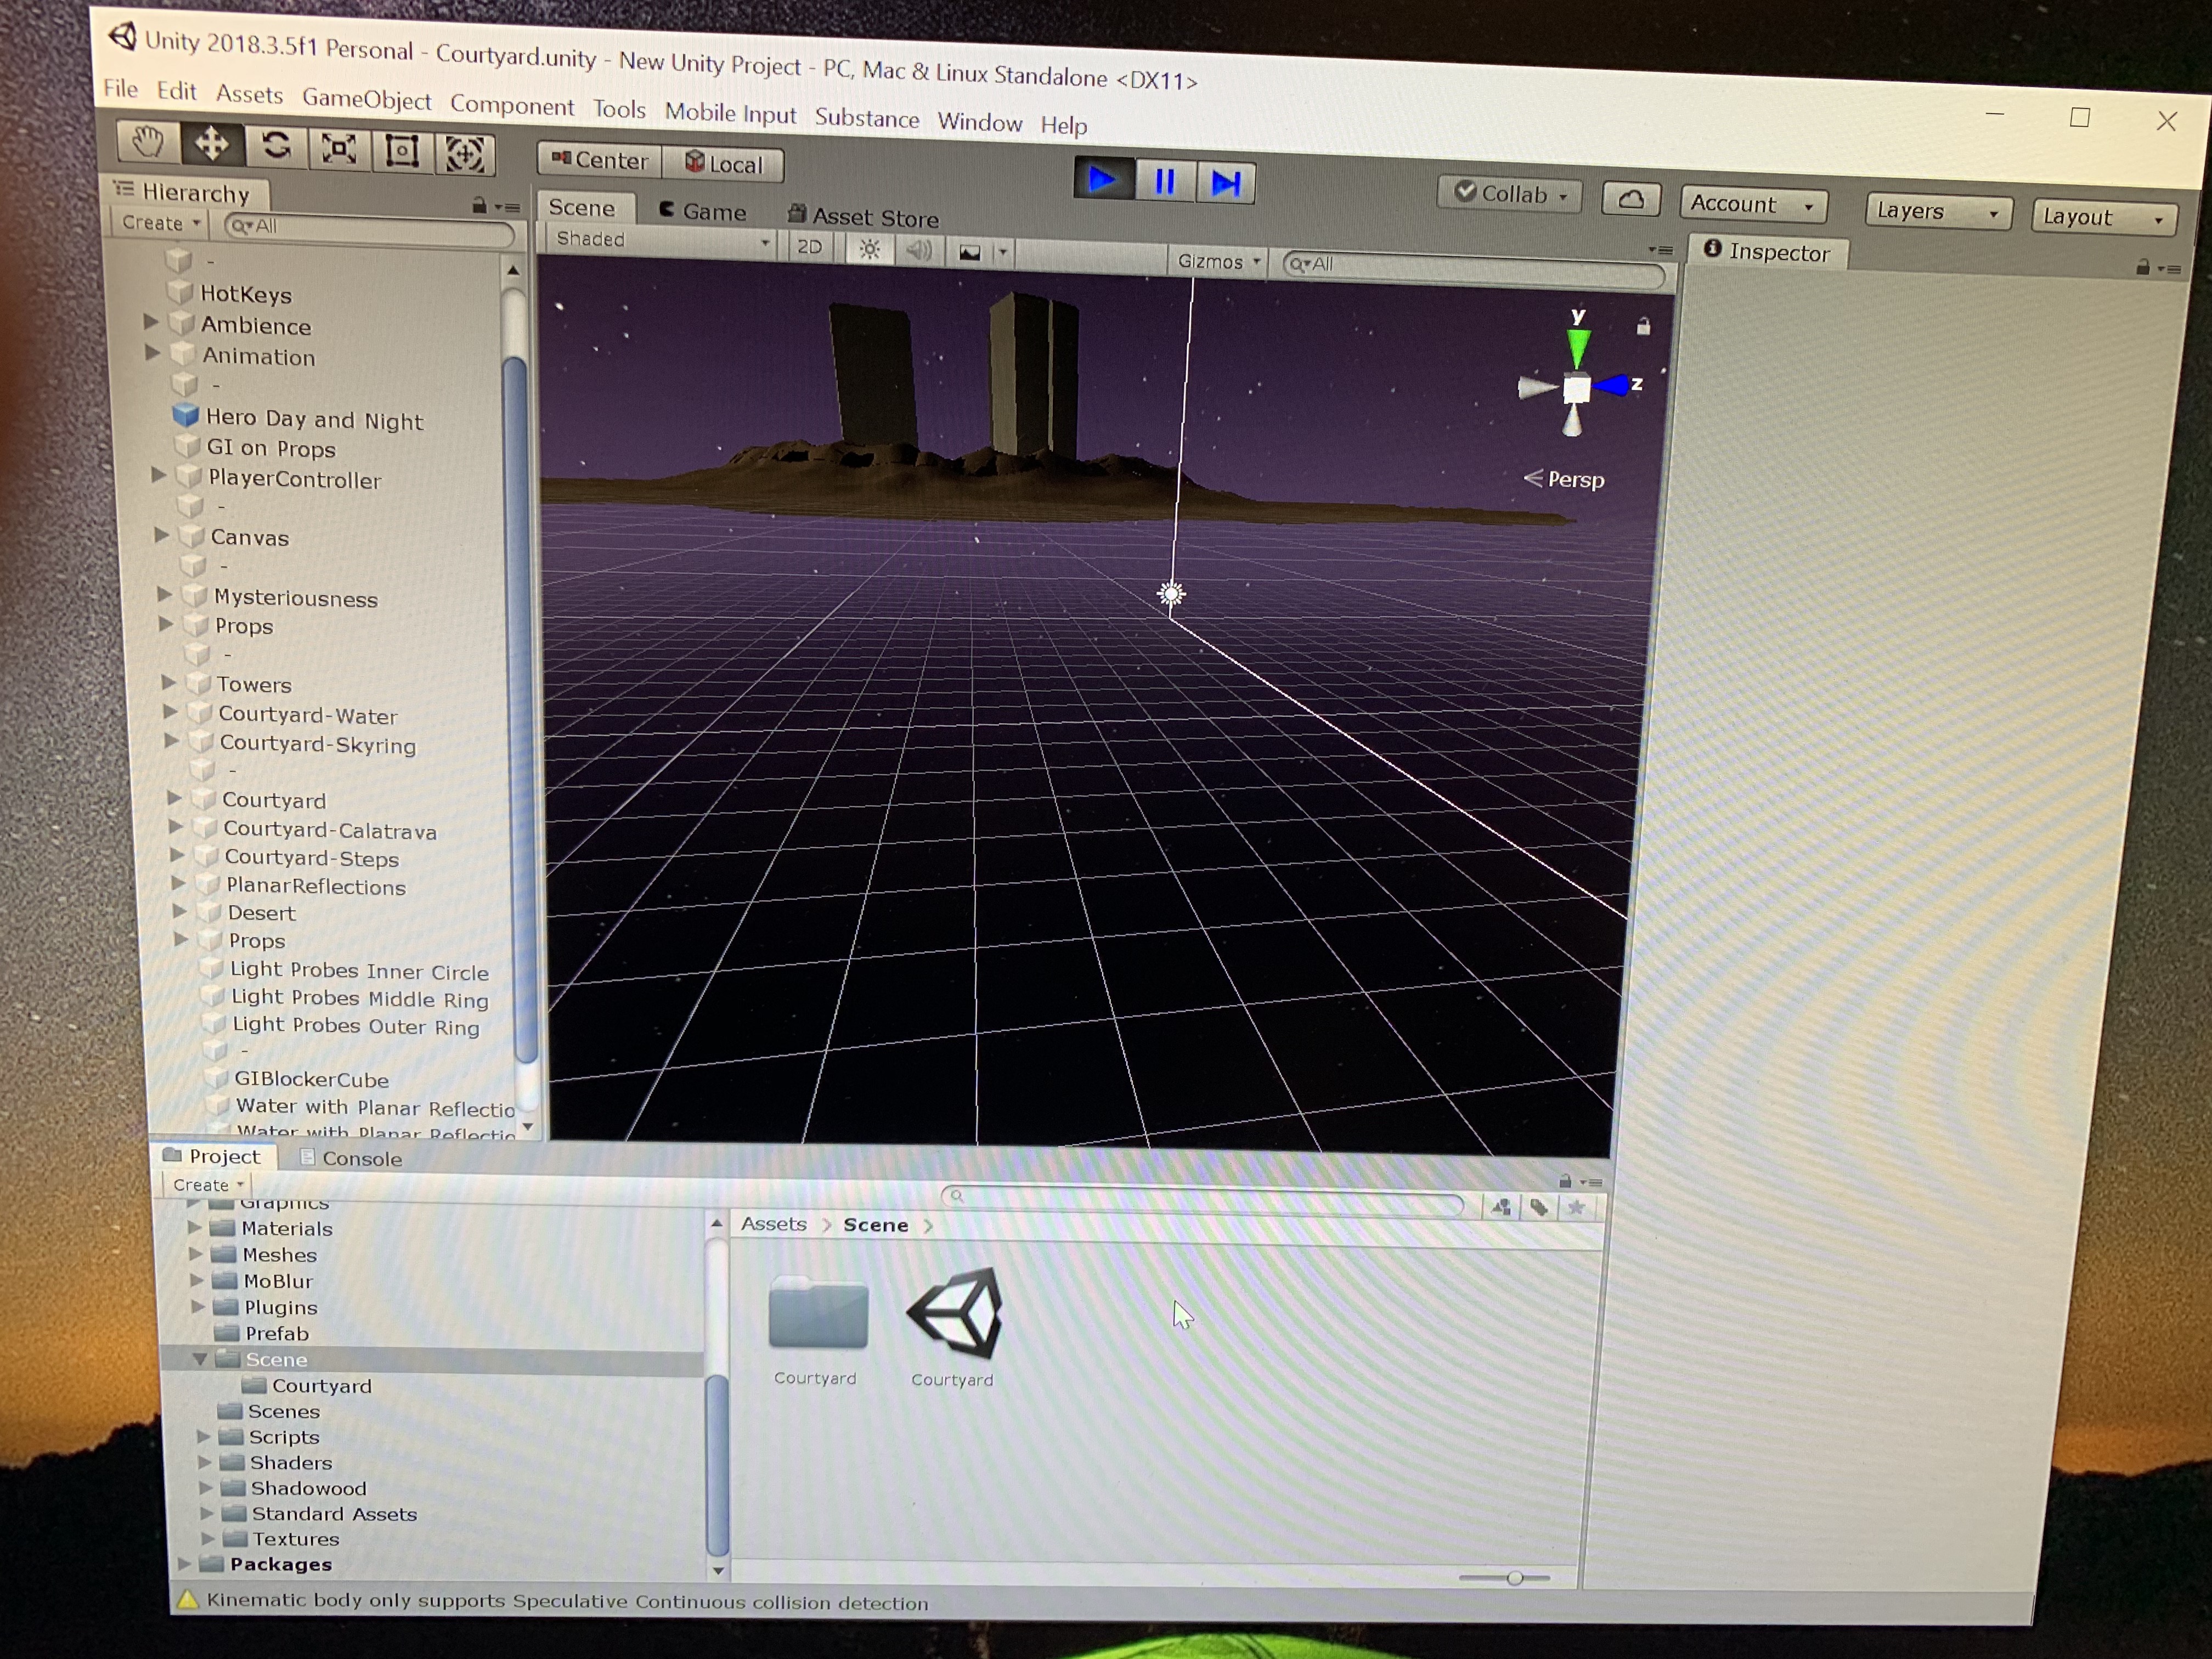
This week we created some prefabs to save our original 3D video project’s objects and tried to build a new 3D scene project. We used the courtyard as our 3D scene, which is a free source provided by unity, and tried to add the prefabs we made before to realize the tiled display function. The picture shows that the presetting works.
Challenges:
The courtyard demo seems to be too large for our head node. We may change this with a smaller 3D scene. Also, there are some camera setting problems which we will try to figure out next week.
Plan for next week:
Try to build and run the 3D scene project in our tiled display setting.
Try to create dynamic anaglyphs for this 3D scene.
This week we wrote TCP Communication python scripts to realize launching. We set all the sub nodes as servers and the head node as client. There were some errors to start executable on the head node because of the firewall setting. But thanks for Kevin and Ross’s help, we successfully solved it. After that, we made some fine tuning of the position of each monitor for calibration. The performance looks good.
Challenges:
Still, the video shown on different monitors will have a few frame difference. When the video finished and looped to the start point, the frame difference became more apparent. But we plan to jump to the next 3D scene project since the performance of the video without looping looks good.
Plan for next week:
Convert 3D video project’s object to a Prefab.
Create a new 3D scene project and finish the presetting part.
Try to add a Kinect system to the environment for head tracking.