Visual Acuity, Week 5

Accomplishments:

After looking into them, co-routines will work for accomplishing the timed component of the Landolt C test. I’ve been able to successfully write the rest of the code pertaining to running the actual test. The last thing I need to to do is figure out how to mathematically represent logMAR units, and produce the correct result.

Struggles:

Fixing the threading issues were a little slow, and I didn’t have as much time as I would’ve liked in the dev lab this week, but I’ll have more next week.

Next Week:

  1. Get the test to output logMAR composite score
  2. Build a basic UI for entering / completing / customizing the test
  3. Start administering it for a few different people to bug test before gathering people for trials

CS 699, week6

Accomplishment:

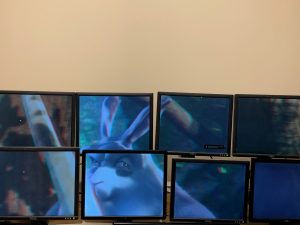
Thanks for the support from Kevin and Ross, we successfully built a Unity project which realize synchronous playback of 3D video. We have successfully connect the head node with all 6 sub nodes.  We also set the position of each screen based on their location and the position of head. The performance looks good.

Challenges:

Sometimes the video shown on different screens will have a few frame difference. Specially when we loop the video. We will try to download the video and test the video again. The problem may also result from different graphics card settings and hardware configurations.

Plan for next week:

  1. Try to realize cluster launching using python script.
  2. Tune the positions of displays.
  3. Try to add a Kinect system to the environment for head tracking.

Visual Acuity, Post 4

Progress

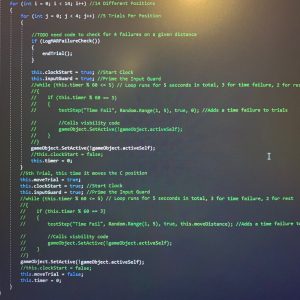
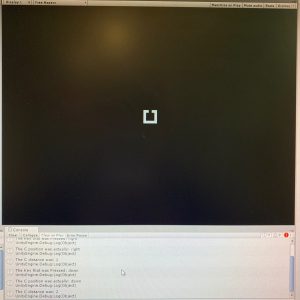
This week I started to build the workings of the Landolt C test. The test needs to run a specific number of trials, a certain number of times, at specific distances, with rest between the trial attempts. The test also should record a failure and move onto the next trial if 3 seconds pass without a guess. All of the code for that functionality has been written, however it requires multi threading, which ended up taking up most of my time this week.

Struggles

In building the timed component of the test, I ran into an issue with multi-threading. Typically in C# (my experience with it pertains mostly to web development) one would use the System.Timer library to create a timer. However, I need to pass around a bunch of information every time that timer goes off. As that library is geared more towards calling object methods (like service classes for an MVC web application), it’s really not meant for passing info around within the object. The event handler method must be declared as static, so that rout ended there.

The next thing I tried, which took up most of my time, was trying to set up my own medieval multi-threading using Time.DeltaTime from unity itself. Needless to say trying to re-engineer multi-threading myself didn’t go well.

I ended up coming to unity’s co-routine functionality towards the end of my time for the week. I’ll need to learn how that works, and see how I can pass information / call other functions from the event handler for the co-routine call.

Next Week

Once I figure that multi-threading issue, the functionality of the Landolt C test will be complete. Then I’ll be moving onto building a functional UI. Part of why the threading is an issue is because I’m trying to make things as modular / customize-able as possible so that the test can be changed to meet any criteria.

  • Enabling choice of perspective
  • Main menu and test result display UI
  • Prompts for test customization

Visual Acuity, Post 3

Progress

This week I finished off the fixed head method of what i’m calling the Landolt V(virtual) test. Both test types are complete, and record data on the actual position of the C object plane (distance, and which direction the gap is pointed). I started to work on adding hand controls to the test, and building out the rest of the architecture so that this program can run in a standalone fashion outside of unity.

I also started to run tests on myself, and found a few interesting things. First, that the issue noticed in week one where the C began to render in an odd fashion doesn’t carry over into the fixed head position test. Furthermore, in that fixed head position, the C object can get much farther away from the viewer before becoming illegible (visually useless due to rendering). I’m curious to see how others interpret these findings, whether the C becomes illegible at shorter distances for others.

I’m also continuing research into validation. There’s a lot of ophthalmology stuff out there, but none of it directly translates to tests administered on screens, or really talks about validation of a Landolt C test.

Struggles

The vive setup in the dev lab was being particularly uncooperative this weekend, but aside from that and minor frustration as I continue to look for papers relevant to the topic of validating a Landolt C test, progress has been smooth.

Next Week

  • Talk with both Alex and Kevin, get some input on test and have others try it. Also discuss research and direction.
  • Make more progress and finishing out the structure of the application

CS 699, week4


Accomplishment:

Thanks for the support from Kevin and Ross, we successfully built an Unity project which realize cluster launching and synchronous playback with one head node and one sub node with two screens.

Challenges:

We are trying to connect more than one sub node. But the video does not show up for the added sub node. I have already confirmed that the additional display should show the video from the head’s position since the Display 3 shows the video when running projects in head node. Therefore, I am not very sure about the reason.

Plan for next week:

  1. Try to figure out the problem and realize the tiled display video part.
  2. Try to add a Kinect system to the environment for head tracking.


Visual Acuity, Post 2

Progress

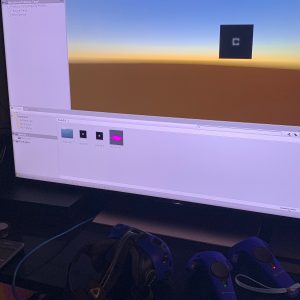
This week starting Wednesday I worked toward getting the free head motion Landolt C test running in a virtual environment. For now I’m using the HTC vive, only because it’s what I’m most familiar with (also for convenience). Everything looks good so far, and it behaves as expected.

Before I spend time polishing that up, I wanted to spend time working on the other mode of the test, which is with the C in a fixed viewing position relative to the headset. Instead of trying to mess with the HMD viewing pipeline, I figured out it was easier to just make the plane object the C is displayed on a child of the HMD object in unity. With the background color of the unity scene being the same as the background of the C plane, it essentially accomplishes the same thing as subverting the viewing pipeline to paste an image directly onto it.

As it stands now, the test is additionally capable of the following

  • Presents two viewing modes of the Landolt C test (fixed, non-fixed)
  • (See previous posts for functionality added)

Struggles

I spent far too long trying to do goofy things to get the C plane to be fixed to the screen. Failed efforts include, but are not limited to: trying to use a HUD prefab, breaking the unity viewing pipeline, trying to directly use the HMD display as a monitor.

I also spent the obligatory hour fighting unity versions. The first time I tried to move to a system supporting an HMD I chose to ignore the warning that unity does not support loading projects from newer versions of unity.

I’m also trying to correct the way the C displays. As discussed in the last post, the C itself actually starts to render onto odd numbers of pixels as it gets quite small; changing the nature of the test entirely, I didn’t see the same problem persist into a virtual environment. Admittedly, my own vision just may not be good enough to see when that starts happening.

Next week

  • Get test controls working from the Vive controller
  • Get back to researching proving accuracy of this test
  • Figure out what distances to administer the C test

CS 699, week2

Accomplishments:

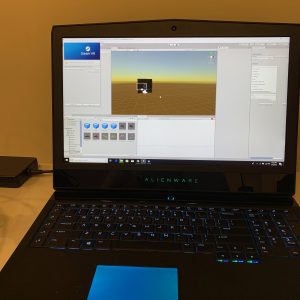
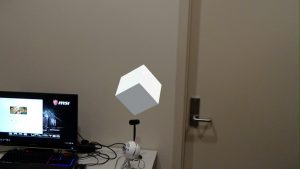
I successfully finished my first MR project. I followed the tutorial to set up the camera, project settings, create a cube scene, and build and deploy the project to HoloLens using Visual Studio. The picture above shows the the cube hologram I made.

Challenges:

It is very hard to set up the connection to HoloLens. I tried two ways. The first one is to use Unity Remoting. But it doesn’t work. I will try to figure it out next week. The second one is to build and deploy the project to HoloLens using Visual Studio. This one also makes me confused. But thanks for Ross’s help,  I successfully finished that and generated the first Unity App in HoloLens.

Plan for next week

  • Read papers and other sources and try to find a detailed direction of the project.
  • Visualize gaze using a world-locked cursor.
  • Control holograms with the select gesture.
  • Spatial mapping


CS 699, week1

Accomplishments:

The main thing I did this week is about background learning. I started with Windows Mixed Reality documentation. I learnt the basic concepts of mixd reality: the relationship between human, environment, and computer, AR, VR, and MR. I also watched the video about concept of hologram, gaze, gestures, spatial mapping, coordinate systems, and spatial anchors. I installed Windows 10 SDK and checked Unity’s version on Thursday.  After that, I navigated Hololens by wearing the device and go through the apps it has, and try to use gaze, gestures and voice commands to operate the holograms.

Challenges:

I found it is challenging to install tools and set up the environment for Hololens since I am not familiar with Windows system. I tried to run Unity tutorial but it seems have some error at the beginning. I have also read from the Hololens Experiment project that I may have difficulty pairing the device but I will try first.

Plan for the next week:

I will try to finish the set up, go through MR basic courses, and try to use unity to realize:

  • Set up Unity for holographic development.
  • Make a hologram.
  • See the created hologram.
  • Visualize gaze using a world-locked cursor.
  • Control holograms with the Select gesture.
  • Spatial mapping

After that, I am going to think about the main objective I want to achieve for the project.


Visual Acuity, Week 1

Progress

This week I started building the unity project for the Landolt C test, as well as continuing to learn about optometry in an effort to better understand the underlying principles of what I’m doing. I started Tuesday by looking more into some of the studies mentioned in Varadharajan (which talks about how to asses and build a new logMAR chart). While it’s not directly pertinent to the Landolt C format, there are small details about assessing visual acuity tests that will prove useful for validation of the test once complete. Also I’m gaining a better sense of how to navigate the subject of optometry as I continue looking for things more related to Landolt C.
The progress on the test itself is going smoothly. Tuesday I used Photoshop to produce images for Landolt C. and E tests, then imported them into unity and got them pasted onto a viewing plane. For now the structure of the test in unity remains fairly simple. A single camera points at a viewing plane with the texture on it.

By the end of my time Friday, I completed the functionality of the test for the on screen viewing environment, essentially reproducing a basic version of the FrACT application. Unlike the FrACT application I’m using a light grey C on an all black background, as this theoretically eliminates the issue of lighting the scene.

As it stands now, the test does the following:

  • Presents a Landolt C to the user
  • Reads a directional input
  • Records the actual rotational position of the C
  • Records the user’s choice for rotational position of the C
  • Rotates, and Repositions the C for the next trial

Struggles

I spent a decent amount of time fighting with the low resolution C texture for the viewing plane. I was getting some strange pixels appearing around the edge of the C even after adjusting the usual suspects for fixing that (max texture size, bilinear -> point, shader type). The issue ended up being that the image I was using as the texture, being based on a 5 x 5 grid was a non power of two image. Changing the power of two texture setting to ‘none’ in unity fixed the pixel noise around the C.

Aside from some short code debugging the only other thing I’ve noticed is that at great distances, the C object starts to render in odd ways on a pixel by pixel basis. Without anti-aliasing, something in the rendering pipeline is just deciding to change the dimensions of the C. This will definitely affect testing results, as the C becomes easier to read in certain positions at great distance than others. For now I have no clue how to solve this, I’m hoping that the distances actually needed to measure visual acuity and the resolution of the HMD’s will make this a non issue.


Next Week

For the next week I first plan to get the test working in the virtual environment on some headset. I’m most comfortable with the HTC system so I’ll probably use that. Once I’ve gotten the code adjusted for input from the Vive controller, I’ll start on the next form of the test.

While the current test uses a plane to display the C object, and the user is able to move their head, we also wanted to try a version where the Landolt C is ‘pasted’ directly onto the HMD display itself. This eliminates head motion.

Final Post with code and image

Here’s how the project turned out:
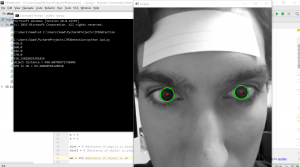
final

And the code for the project:

import cv2
import numpy as np
import argparse

import math
from scipy.spatial import distance


#ap = argparse.ArgumentParser()
#ap.add_argument("-i", "--image", required = True, help = "Path to the image")
#args = vars(ap.parse_args())

#img = cv2.imread(args["image"])
img = cv2.imread("test.jpg", 0)
img = cv2.medianBlur(img,5)
cimg = cv2.cvtColor(img,cv2.COLOR_GRAY2BGR)

cv2.namedWindow("Display", flags= cv2.WINDOW_AUTOSIZE)

circles = cv2.HoughCircles(img,cv2.HOUGH_GRADIENT,1,100,
                           param1=50,param2=25,minRadius=10,maxRadius=30)

circles = np.uint16(np.around(circles))

#coordinates of pupils
point1x = 0.0
point1y = 0.0
point2x = 0.0
point2y = 0.0

#coordinates of object on forehead
leftpointx = 0
leftpointy = 0
rightpointx = 0
rightpointy = 0

#coordinates of pupils in case hough circles doesn't work
leftpointx2 = 0
leftpointy2 = 0
rightpointx2 = 0
rightpointy2 = 0

objectexist = 0

m = 0
k = 0

dist = 0 #distance of pupils in pixels
dist2 = 0 #distance of object in pixels

mm = 100 #distance of object in mm


n = 1


for i in circles[0,:]:
    # draw the outer circle

    cv2.circle(cimg,(i[0],i[1]),i[2],(0,255,0),2)
    # draw the center of the circle
    cv2.circle(cimg,(i[0],i[1]),2,(0,0,255),3)
    if n == 1:
        n = 2
        point1x = float(i[0])
        point1y = float(i[1])
    elif n==2 :
        point2x = float(i[0])
        point2y = float(i[1])

    #print(" " + point1x + ", " + point1y + ", " + point2x + ", " + point2y)

print(point1x)
print(point1y)
print(point2x)
print(point2y)


dist = math.hypot(point2x - point1x, point2y - point1y) #ipd in pixels

#if dist < 10000:
print(dist)


def my_mouse_callback(event, x, y, flags, param):
    global m
    global k
    global leftpointx
    global leftpointy
    global rightpointx
    global rightpointy

    global leftpointx2
    global leftpointy2
    global rightpointx2
    global rightpointy2

    global objectexist

    global dist
    global dist2
    if event==cv2.EVENT_LBUTTONDBLCLK:
        m = m+1

        #print(x)
        if m == 1:
            leftpointx = x
            leftpointy = y
        elif m == 2:
            rightpointx = x
            rightpointy = y
            dist2 = math.hypot(rightpointx - leftpointx, rightpointy - leftpointy)
            print( "object distance = " + str(dist2))

            if dist < 10000:
                distanceInMM = dist * (mm / dist2)  # ipd in mm
                print( "IPD in mm = " + str(distanceInMM))
    if dist > 10000:
        if event==cv2.EVENT_RBUTTONDBLCLK: #used if hough circles doesn't work
            k = k+1
            if dist2 == 0:
                dist2 == 500

            #print(x)
            if k == 1:
                leftpointx2 = x
                leftpointy2 = y
            elif k == 2:
                rightpointx2 = x
                rightpointy2 = y
                dist = math.hypot(rightpointx2 - leftpointx2, rightpointy2 - leftpointy2)
                print("IPD in pixels = " + str(dist))

                distanceInMM = dist * (mm / dist2)  # ipd in mm
                print( "IPD in mm = " + str(distanceInMM))

cv2.setMouseCallback("Display",my_mouse_callback,cimg)


while(1):
    cv2.imshow("Display",cimg)

    if dist2 == 0 and dist < 10000:
        c = cv2.waitKey(0)
        if c == 32: #spacebar
            dist2 = 500
            distanceInMM = dist * (mm / dist2)  # ipd in mm
            print("IPD in mm = " + str(distanceInMM))

    if cv2.waitKey(15)%0x100==27:break    # waiting for clicking escape key
cv2.destroyWindow("Display")


#cv2.imshow('detected circles',cimg)


#cv2.waitKey(0)
#cv2.destroyAllWindows()