
Since I couldn’t find a simple and direct tutorial on the internet that helps compiling PCL, OpenNI and its related dependencies on a Windows machine, here goes one. Before this begins, a few clarifications.
- Why use a Windows OS? Because I have a Kinect-for-Windows. If you are having a Kinect 360 that would work on other Operating Systems, I would suggest trying that in Linux before switching to OSX or Windows.
- I tried installing KinFu too but had to quit as there were a lot of path errors in the CMakeLists. So, if you want KinFu specifically, I am afraid this post would not help you much. You could try installing KinFu with some help from http://pointclouds.org/documentation/tutorials/compiling_pcl_windows.php which is the official documentation and has the kinfu app extensions (See section Downloading PCL Source Code). Best of Luck!
- If you want to try Kinect Fusion(Microsoft’s version of the same), this post is so tally not going to help you. Installing Kinect Fusion essentially means cutting off all ties with PCL and its dependencies. So, again, Best of Luck!
- Stick to one architecture for all installations. Since most computers these days have a 64-bit architecture, we will use the 64-bit versions for all installation packages. *If you are having a computer with a 32-bit architecture, I think it is high time you get a time machine. You have so got to travel in time.*
- You need a good graphics card. I used an Alienware laptop with a NVIDIA GeForce GT 750M graphics card.
Step 1: Basics
Get Microsoft Visual Studio 2010 from www.dreamspark.com (if you are a student, you get it for free) or get it online. It has been one of my favourite IDEs and I hope you will find it useful too. The setup installs only a 32-bit Visual Studio package. You can change it to 64-bit Debug/Release mode by choosing Build->Configuration Manager->Active Solution Platform and changing it to x64 from Win32.
Step 2: Installing PCL
Installing PCL should be fairly straightforward. You can download the setup executable from http://pointclouds.org/downloads/windows.html. Download the Windows
MSVC 2010 (64bit) All in One Installer. During installation, the setup will ask for the 3rd party dependencies it needs to install. Select Boost, Eigen, FLANN, Qhull, VTK. Uncheck OpenNI. We will install OpenNI in the next step from a different source. Redirect your directories in Visual Studio to point to the PCL files locations(PCL and every 3rd party dependence have their own bin, include and lib files).
Step 3: Installing Kinect Drivers
Okay, this is where it gets tricky. You need one (and only one) type of driver for the Kinect. Since we are going to stick to OpenNI, Do not try installing Microsoft Kinect SDK or KinFu.
Install OpenNI-Win64 from http://www.openni.org/wp-content/uploads/2013/11/
Install SensorKinect-Win64 from https://github.com/avin2/SensorKinect/downloads
Install NITE-Win64 from http://www.openni.org/wp-content/uploads/2013/10/
Try installing the latest versions of these Drivers. After installation, you should be able to see Primesense in your Device Manager with the Kinect Hardware as shown below.
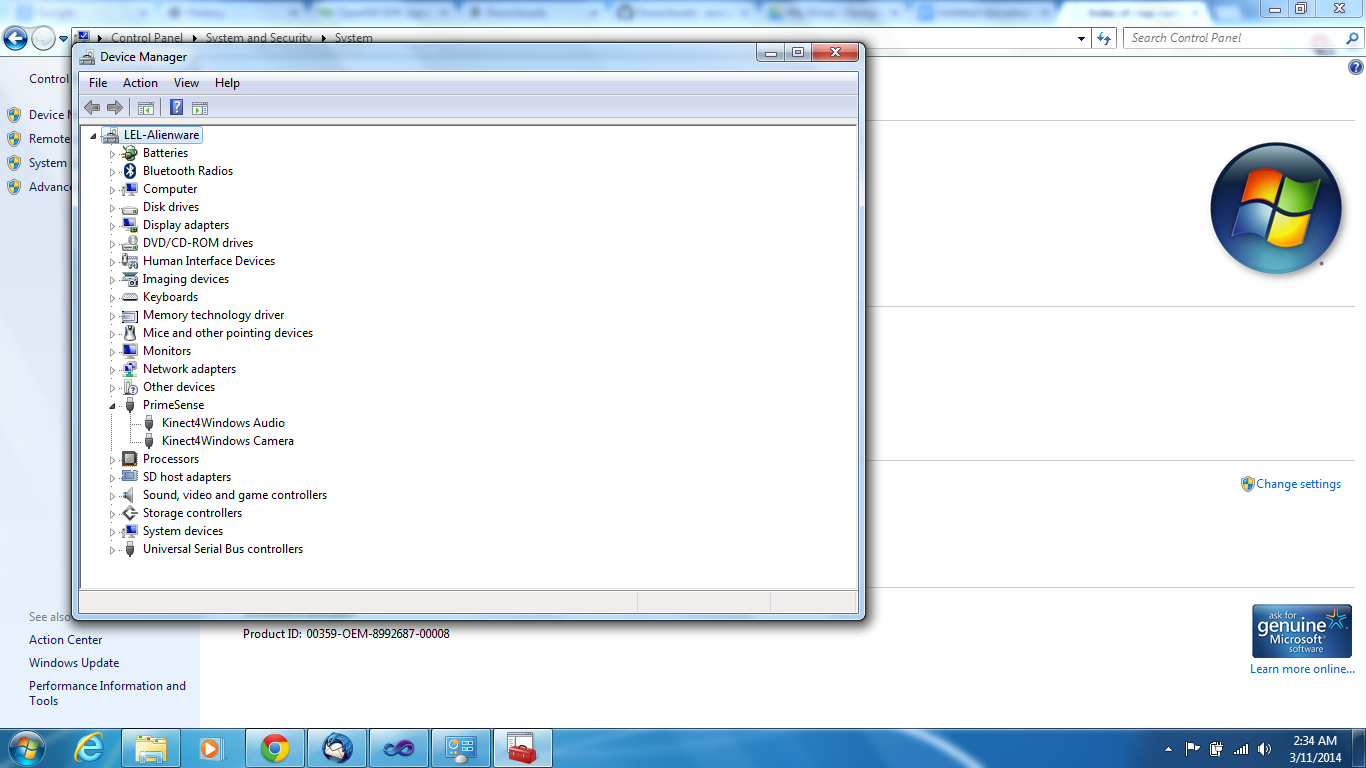
If it does not appear so, it means the Drivers did not sync with your hardware. Try going to an older version of the Drivers. I have OpenNI 1.5.7.10, SensorKinect v5.1.2.1 and NITE 1.5.2 which are not the latest versions but these are the ones that work on my computer.
Step 4: Verification
Connect the Kinect to your laptop. Select Start->OpenNI 64-bit->Samples->NiViewer64. If step3 was successful you must now be able to see your Kinect reading in data (both depth and colour). I guess you can have a sigh of relief at this point.
Step 5: PCL program to obtain a PCD
Compile and run the example program from http://pointclouds.org/documentation/tutorials/openni_grabber.php in Visual Studio. Again, make sure the library files and linkers are directed properly in Visual Studio. When the program runs, you must be able to see a visualisation window in which you can see the input data from the Kinect and you can save the frame as a PCD when you click ‘s’.
There you go.!
I hope the tutorial was helpful. I know it is not as simple as installing it on Linux or OSX. Reminded me of this meme through out.

Image Courtesy: http://imgs.xkcd.com/comics/sandwich.png
However, I hope this post makes it easy now. Have fun. Happy Kinect-ing.!
For further details, email me at nsubramania2@wisc.edu. I will try to help as much as I can.
LEL Project Blog : https://blogs.discovery.wisc.edu/projects/
My Blog : https://blogs.discovery.wisc.edu/projects/author/nsubramaniam/